GP-1610C Color GPS Plotter The purpose of this Operator's Guide is to provide the basic operating procedures for this equipment. For more detailed information see the operator's manual. Waypoint Chart (Requires chart card.) 01 (Marks important point (buoy, etc.); can be set as destination.) Course bar Mark Own ship mark (Marks point of interest, reef, etc.) (Shows current position.) Ship’s track Speed Course Depth (Requires sensor.) CSE 350.0° SPD 16.8kt 2D DEP 110 m TMP 1 6 . 0 °C 13:42 POS 34°26.
SAFETY INSTRUCTIONS WARNING Do not open the equipment. Use the proper fuse. Hazardous voltage which can cause electrical shock, burn or serious injury exists inside the equipment. Only qualified personnel should work inside the equipment. Use of a wrong fuse can result in fire or permanent equipment damage. Do not disassemble or modify the equipment. Fire, electrical shock or serious injury can result.
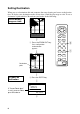
Inserting a Chart Card 1 Turn off the power. 2 Open the chart card drive cover at the bottom of the display unit. Screws Cover 3 Insert chart card label side up, arrow forward. Arrow forward Chart card EJECT button 4 Close the chart card drive cover. To eject a chart card: 1 Open the chart card drive cover. 2 Press the EJECT button. Note: If no chart card is inserted a general world map appears.
Displaying the Plotter Picture Press the POWER key to turn on the equipment. A beep sounds and shortly thereafter the plotter display appears. 1 Press the POWER key. Results of self-test; displayed for about one second. ROM RAM VRAM Battery OK OK OK OK Program No. = 02522521** Base Chart No. = Warning on chart card usage; appears for about one minute.
Adjusting Tone and Brilliance 1 Press the TONE key. Adjust tone or brilliance within 10 seconds, otherwise the display will be erased. LOW TONE : 5 ■■■■■□□□□□ LOW BRILL : 8 HIGH HIGH 3 ■■■■■■■■ Ten levels of tone are provided. Eight levels of brilliance are provided. 2 Press t or s to adjust tone. 2 3 Press ▲ or ▼ to adjust brilliance.
How to Use the Cursor If the cursor is not displayed press the CURS key. 1 Position Cursor intersection Cursor position in lattitude and longitude BRG+ 232.0° RNG+ 0.00nm 2D DEP 110 m TMP - - .-°C 13:55 + 34°43.801'N 135°21.163'E Bearing and range from own ship to cursor 1 Press ▲ ▼ t s. Find the position of a cape. 0 MENU ESC NU/CU ENT DISP SEL 1 EVENT MOB 6 WPT 2 GOTO 7 MARK 3 PLTR 8 ZOOM IN 4 ZOOM OUT 9 Cape CNTR 5 Cursor position is digitally displayed on the screen.
Registering Your Harbor By registering your harbor as a waypoint, you can later use it as a destination waypoint, when returning home. Before departing register your harbor as a waypoint. Confirm that "Own Position" is in reverse video. If it is not, press ▲ to do so. 1 Press the WPT key. SELECT WPT MODE Own Position Cursor WPT List Event to WPT ENT: Sel ESC: Cancel 2 Press the ENT key. Date and time of entry appears. WPT at Own Position LAT: 34°26.345'N LONG: 135°41.
Setting Destination When you set a destination, this unit computes the range, bearing and course to the destination. To display your destination on the screen select a small display range or scale. To set as destination a point which is 20 nm from your harbor do the following: Shrink display range or scale. CSE 180.0° SPD 0.0kt 2D DEP 110 m TMP - - .-°C 14:40 POS 34°26.345’N 135°41.232’E 1 Press the ZOOM OUT key. Press until position for destination appears.
4 3 Press the ENT key. : Cursor ENT: Set ENT twice: complete MENU: SEL Mode 4 Place cursor on destination. 5 Press the ENT key twice. MENU ESC NU/CU ENT DISP SEL 1 EVENT MOB 6 WPT 2 GOTO 7 MARK 3 PLTR 8 ZOOM IN 4 ZOOM OUT 9 CNTR 5 TONE Current position is marked as "00" and the destination with a flag . A dashed line Own ship’s 00 connects current position Destination position and the flag; Course it shows shortest course to destination. WP801 175.0° 15nm Bearing and range CSE 180.0° SPD 0.
Sailing for Destination Steer towards destination. 00 WP801 175.0° 15nm CSE 180.0° SPD 16.8kt 2D DEP 110 m TMP - - .-°C 15:00 POS 34°26.345’N 185°41.232’E Steer towards destination. Steer the boat so its track traces along the course bar, for shortest course to destination. Course bar 00 WP801 175.0° 14.7nm CSE 175.0° SPD 16.8kt 2D DEP 110 m TMP - - .-°C 15:00 POS 34°26.345’N 185°41.
Arriving at Destination When nearing your destination, expand the range scale. Expand the display range or scale. 00 WP801 173.0° 5.2nm CSE 175.0° SPD 16.8kt 2D DEP 110 m TMP - - .-°C 15:15 POS 33°33.979’N 137°07.290’E 1 Press the ZOOM IN key. Press the key to obtain detailed view of arrival area. 1 MENU ESC NU/CU ENT DISP SEL 1 EVENT MOB 6 WPT 2 GOTO 7 MARK 3 PLTR 8 ZOOM IN 4 ZOOM OUT 9 CNTR 5 TONE CURS 0 CLR POWER WP801 173.0° 5.2nm CSE 160.0° SPD 16.8kt 2D DEP 110 m TMP - - .
Entering Marks Marks may be used to denote the location of fish schools, good fishing spots, reefs, etc. Fish caught here WP801 173.0° 5.2nm CSE 173.0° SPD 16.8kt 2D DEP 110 m TMP - - .-°C 16:01 POS 33°33.979’N 137°07.290’E MENU ESC NU/CU ENT DISP SEL 1 EVENT MOB 6 WPT 2 GOTO 7 MARK 3 PLTR 8 ZOOM IN 4 ZOOM OUT 9 1 Press the MARK key. A red circle (default color and shape) appears at own ship’s position the moment the key is pressed.
Changing Mark Shape, Color You may wish to display marks in different shapes and colors to differentiate between reefs and fish schools, for example. The procedure below shows how to change from red circle to green diamond. WP801 170.0° 4.8nm 1 CSE 170.0° SPD 16.8kt 2D DEP 110 m TMP - - .-°C 16:09 POS 33°26.154’N 137°03.731’E 1 Press the MENU key. 2 MENU ESC NU/CU ENT DISP SEL 1 EVENT MOB 6 WPT 2 GOTO 7 MARK 3 PLTR 8 ZOOM IN 4 ZOOM OUT 9 MAIN MENU 1. DISPLAY SETUP 2. TRACK/MARK SETUP 3.
3 Press t to select MARK SHAPE. 4, 6 4 Press s twice to select " ". 7 5 Press ▼ twice to select MARK COLOR. 6 Press s twice to select GREEN. 7 Press the ESC key. 8 MENU ESC NU/CU ENT DISP SEL 1 EVENT MOB 6 WPT 2 GOTO 7 MARK 3 PLTR 8 ZOOM IN 4 ZOOM OUT 9 CNTR 5 TONE 8 Press the MARK key. Red Green WP801 170.0° 3.2nm CSE 177.0° SPD 16.8kt 2D DEP 110 m TMP - - .-°C 16:15 POS 33°21.832’N 137°07.
Returning to Harbor Set your harbor as destination, and the course, range and bearing to it are displayed on the screen. Set waypoint 01, which you entered earlier, as destination. 1 Press the GOTO key. SELECT GOTO MODE WPT List EVENT List ROUTE List Cursor/Route plan ENT: Sel CLR: Release ESC: Cancel 2 Press ▲ three times to select WPT List. 3 Press the ENT key.
Cancel destination; turn off the equipment. 5 After arriving, press the GOTO key. SELECT GOTO MODE WPT List EVENT List ROUTE List Cursor/Route plan ENT: Sel CLR: Release ESC: Cancel 6 Press the CLR key. RELEASE GOTO ENT: YES ESC: NO 8 7 MENU ESC NU/CU ENT DISP SEL 1 EVENT MOB 6 WPT 2 GOTO 7 MARK 3 PLTR 8 ZOOM IN 4 ZOOM OUT 9 CNTR 5 TONE CURS 0 CLR POWER 7 Press the ENT key. Destination is cancelled and course line disappears. 8 Press the ESC key. 9 Press the POWER key.