
Marine GPS System User Manual

4-4
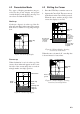
4.4 Selecting Screen Center
by Cursor
1. Press the CURS key to display the cur-
sor.
2. Operate the Cursor Pad to place the cur-
sor where desired.
3. Press the CNTR key.
4.5 Shifting the Display
1. Press the CURS key to turn off the cur-
sor.
2. Operate the Cursor Pad to shift the dis-
play.
4.6 Centering Position
1. Press the CURS key to turn off the cur-
sor.
2. Press the CNTR key.
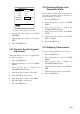
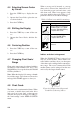
4.7 Changing Chart Scale/
Range
Chart scale (range) may be selected with the
ZOOM IN and ZOOM OUT keys. The
ZOOM IN key blows up the chart; the ZOOM
OUT key shrinks it.
Note: When the display is blown up or shrunk
beyond the range of the chart card in use the
message NO CHART appears to alert you.
4.8 Chart Cards
The chart cards contain nautical charts. When
you insert a suitable chart card in the drive
and your boat is near land, a chart appears
with the land portion arranged according to
the "land settings" in the DISPLAY SETUP
menu.
When a wrong card is inserted or a wrong
chart scale is selected, the land will be hol-
low. Insert the proper card and select a suit
able chart scale. Chart icons appear to help
you select suitable chart scale. Table 4-1 ex-
plains the chart icons and their meanings.
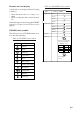
Table 4-1 Chart icons and their meanings
Icon Meaning
Proper card is not inserted
or chart scale is too small.
Press the ZOOM OUT key
to adjust chart scale.
Chart scale is too large.
Press the ZOOM IN key
to adjust chart scale.
Suitable chart scale is
selected.
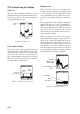
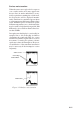
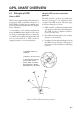
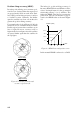
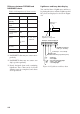
Indices and chart enlargement
When the ZOOM OUT key is pressed you
will see several frames. These frames are
called indices and they show you what parts
of the chart can be enlarged in the current pic-
ture range. The areas circumscribed with
smaller frames can be enlarged, but the area
enclosed by the largest frame cannot.
Figure 4-8 Sample chart (Japan and
South Korea) showing indices