
Installation Guide
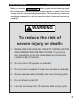
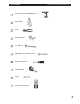
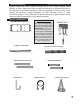
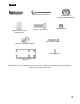
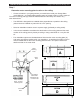
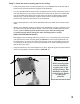

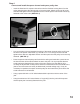

FIG. 3
9
Step 3
Attach the motor hoist to the motor mounting plate.
how the motor hoist should be rotated - which direction the spacer channel bar
attachment tab should be pointing. Ensure your motor hoist is rotated properly before
placing the motor hoist on the motor mounting plate.
(SEE ILLUSTRATIONS ON PAGE 7)
on the motor mounting plate (A) (If there is not enough room between the washers and
the motor mounting plate for the motor hoist mounting tabs it will be necessary to loosen
the nuts by turning them counter clockwise.)
with the ratchet or the adjustable wrench until the motor hoist is securely attached to the
motor mounting plate. (SEE FIG. 3)
Slide the motor hoist
until the tabs are
firmly against the
threaded bolts. Do
not leave any space
between the bolts and
the enclosed end of
the mounting tabs.
!
WARNING