HomePortal 3801HGV Gateway User Guide Release 1.
Notice to Users ©2005–2010 2Wire, Inc. All rights reserved. This manual in whole or in part, may not be reproduced, translated, or reduced to any machine-readable form without prior written approval.
Contents About This Guide . . . . . . . . . . . . . . . . . . . . . . . . . . . . . . . . . . . . . . . . . . . . . . . . . . vi Audience . . . . . . . . . . . . . . . . . . . . . . . . . . . . . . . . . . . . . . . . . . . . . . . . . . . . . . . . . . . . . vi Using this Document . . . . . . . . . . . . . . . . . . . . . . . . . . . . . . . . . . . . . . . . . . . . . . . . . . . . vi Style Conventions . . . . . . . . . . . . . . . . . . . . . . . . . . . . . . . . . . . . . . . . . . . . . . . . . .
HomePortal 3801HGV Gateway User Guide Contents Setting Default System Password . . . . . . . . . . . . . . . . . . . . . . . . . . . . . . . . . . . . . .29 Creating Your System Password . . . . . . . . . . . . . . . . . . . . . . . . . . . . . . . . . . . . . . .30 Configuring Date and Time . . . . . . . . . . . . . . . . . . . . . . . . . . . . . . . . . . . . . . . . . . . . . . .30 Automatically Setting up Date and Time . . . . . . . . . . . . . . . . . . . . . . . . . . . . . . . . .
HomePortal 3801HGV Gateway User Guide Contents Viewing All Event Logs. . . . . . . . . . . . . . . . . . . . . . . . . . . . . . . . . . . . . . . . . . . . . . .85 Filtering Logs . . . . . . . . . . . . . . . . . . . . . . . . . . . . . . . . . . . . . . . . . . . . . . . . . . . . . .87 Clearing Event Logs . . . . . . . . . . . . . . . . . . . . . . . . . . . . . . . . . . . . . . . . . . . . . . . . .87 Viewing System Log . . . . . . . . . . . . . . . . . . . . . . . . . . . . . . . . . . . . . . . . .
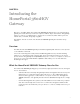
About This Guide The HomePortal 3801HGV Gateway Installation and Configuration Guide is designed to serve as a reference to install and set up the HomePortal 3801HGV gateway.
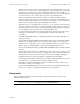
HomePortal 3801HGV Gateway User Guide About This Guide These sections help you find your topics of interest with ease, and guide you through the topics in a simple and logical manner. The See Also section has cross-referenced links to other topics within this document, which may assist you in further understanding your device. Style Conventions The following style conventions are used in this document: Note Notes contain incidental information about the subject.
HomePortal 3801HGV Gateway User Guide About This Guide Support Technical support is available from the 2Wire Website: http://support.2wire.com/index.php.
CHAPTER 1 Introducing the HomePortal 3801HGV Gateway Welcome to the 2Wire family. The HomePortal 3801HGV gateway belongs to the next generation gateway series that delivers profound user experience with its easy-to-use features. This gateway helps you connect to your ISP, and also to achieve a host of functions, which makes your home network safe, convenient, and greatly enjoyable! This chapter offers an overview of the HomePortal 3801HGV gateway, and describes its key features.
HomePortal 3801HGV Gateway User Guide Introducing the HomePortal 3801HGV Gateway • Parental Controls (Internet Access Controls and Content Screening): Parental controls offer easy-to-use tools to limit access to specific Websites, monitor browsing history and usage, and enforce time restrictions on common applications. Parental control settings are straightforward and easily managed by users.
HomePortal 3801HGV Gateway User Guide Introducing the HomePortal 3801HGV Gateway Figure 1: Installation Components Your HomePortal 3801HGV gateway has the following components in the box: • 1 HomePortal 3801HGV Gateway • 1 Power Cord & Adapter See Also Installing the HomePortal 3801HGV Gateway on page 4 Accessing the User Interface on page 11 Configuring Internet Connection on page 14 Regulatory Information on page 117 Components 3
CHAPTER 2 Installing the HomePortal 3801HGV Gateway Installing your HomePortal 3801HGV gateway consists of the following tasks: • Determining HomePortal 3801HGV Gateway Location on page 4 • Connecting the Power Adapter on page 5 • Connecting Your Computer to the Gateway on page 5 • Connecting the Broadband Interface on page 7 • Connecting VoIP Interface on page 8 • Connecting HPNA Interface to IPTV set top Box on page 9 Determining HomePortal 3801HGV Gateway Location If you have subscribed for
HomePortal 3801HGV Gateway User Guide Installing the HomePortal 3801HGV Gateway Connecting the Power Adapter Follow these steps to power on the gateway: 1. Connect one end of the power adapter to the POWER port of your gateway. 2. Connect the other end of the power adapter to an electrical outlet. Once the gateway is powered on, the power LED flashes green for a brief period of time and then turns solid green.
HomePortal 3801HGV Gateway User Guide Installing the HomePortal 3801HGV Gateway Figure 3: LAN Connection Connecting through Wireless The HomePortal 3801HGV gateway has an integrated wireless access point (AP) that enables you to connect your wireless-enabled computers to your gateway. By default, the HomePortal 3801HGV gateway is shipped with WPA-PSK/WPA2-PSK enabled and a preconfigured network name. Most laptops are equipped with an internal 802.11b/g card.
HomePortal 3801HGV Gateway User Guide Installing the HomePortal 3801HGV Gateway Figure 4: Wireless Network Key Location Connecting the Broadband Interface Follow these steps to connect the gateway to Very High Bit-rate DSL (VDSL) wall jack: 1. Connect one end of the phone cord/twisted pair cable to the DSL port (green) on your gateway. 2. Connect the other end of the phone cord/twisted pair cable to the VDSL enabled wall jack outlet.
HomePortal 3801HGV Gateway User Guide Installing the HomePortal 3801HGV Gateway Figure 5: VDSL Broadband Connection Note The HomePortal 3801HGV gateway must be connected to the VDSL wall jack. Do not connect the DSL port of the HomePortal 3801HGV gateway to a telephone wall jack. Connecting VoIP Interface The HomePortal 3801HGV gateway includes one RJ-14 port (Voice 1 & 2) with the capacity to support 2 phone lines using a splitter or multi-jack adapter.
HomePortal 3801HGV Gateway User Guide Installing the HomePortal 3801HGV Gateway 2. To connect 2 phones: a. Connect one end of the line splitter to the HomePortal 3801HGV gateway Voice 1&2 port. b. Connect the phone cables to the first and second jack of the splitter. Figure 7: VoIP Connection Using Splitter Connecting HPNA Interface to IPTV set top Box The HomePortal 3801HGV gateway can be configured to use IPTV services through the cable port.
HomePortal 3801HGV Gateway User Guide Installing the HomePortal 3801HGV Gateway Figure 8: IPTV Connection VDSL over Coax See Also Introducing the HomePortal 3801HGV Gateway on page 1 Accessing the User Interface on page 11 Connecting HPNA Interface to IPTV set top Box 10
CHAPTER 3 Accessing the User Interface To launch the HomePortal 3801HGV gateway user interface, access the Home page of the gateway by entering one of the following URLs into a compatible browser on the computer connected to the gateway: • http://gateway.2Wire.net • http://home • http://192.168.1.254 The Home page appears.
HomePortal 3801HGV Gateway User Guide Accessing the User Interface The Home page has the following five panes: • System Link Tabs • Home • Services • Settings • Site Map • Summary • New TELCO Services Features • Quick Service Links • Home Network Devices • Top Networking Features System Link Tabs Home The Home tab provides the most relevant information about your broadband service at a glance. It also provides links to access more detailed information.
HomePortal 3801HGV Gateway User Guide Accessing the User Interface Home Network Devices The Home Network Devices pane displays all devices that are connected to the gateway. You can click the links to view the device details or view the shared files of the connected devices. Top Networking Features The Top Networking Features pane provides shortcuts to directly access the most commonly used gateway pages. Click a link to access the relevant page directly.
CHAPTER 4 Configuring Internet Connection Objective To configure the Internet connection on the gateway. You must have PPP Authentication credentials to complete this configuration. Also, ensure the Broadband LED on the front panel of the gateway is solid green and the first computer is communicating with the gateway. Note PPP credentials are provided by your ISP. Steps 1. Access the Home page of the gateway. 2. Navigate to Settings > Broadband > Link Configuration. The Link Configuration page appears.
HomePortal 3801HGV Gateway User Guide Configuring Internet Connection 15
HomePortal 3801HGV Gateway User Guide Configuring Internet Connection 3. Select Automatic Ethernet/DSL from the Choose Interface Type drop-down list. This enables the gateway to automatically detect the type of connection used to connect to the Broadband service. 4. Select Automatic from the DSL Line Selection drop-down list. This lets you select RJ-11 or coax interface for connecting the DSL connection to your gateway. 5. Select PPPoE from the Connection Type drop-down list.
CHAPTER 5 Viewing Subscribed Services Status NOTE TO REVIEWER: We need images of the Status tab with all services enabled. We also need information about the following sections: Web Servers, TELCO Digital Voice, TELCO TV. What do these sections display? Will the user be able to see all these sections if he has not subscribed for a particular ser vice? This chapter provides information about the Status tab. You can view the status of your subscribed services in this tab.
HomePortal 3801HGV Gateway User Guide Viewing Subscribed Services Status Refer to the following table for description of the parameters listed on the Status page: Parameter Description File Sharing Displays all devices connected to the HomePortal 3801HGV gateway. You can share files among these devices. Web Servers Displays the Web servers configured to the gateway. TELCO Digital Voice Displays the status of the VoIP lines and associated servers. TELCO TV Displays the IPTV parameters.
CHAPTER 6 Configuring Voice-Based Services This chapter provides information about the tasks that you can perform in the Voice tab.
HomePortal 3801HGV Gateway User Guide Configuring Voice-Based Services You can view the following information on this page: Parameter Description Servers Name Displays the name of the configured SIP server. Associated Line Displays the phone lines associated with the SIP server. Line Status Line Displays the name of the configured line. Number Displays the phone number of the configured line. Status Displays the status of the configured line on the gateway.
HomePortal 3801HGV Gateway User Guide Configuring Voice-Based Services Steps 1. Navigate to Services > Voice > Server. The Server page appears. 2. Select the Enable check box. 3. Type in a name for the server in the Server Name text box. 4. Enter the server name in the SIP Registrar Server Name text box. This can be an IP address or a name provided by the service provider. 5. Enter the server port in the Registrar Server Port text box. The port number will be provided by the service provider.
HomePortal 3801HGV Gateway User Guide Configuring Voice-Based Services Configuring Phone Lines Objective To configure the phone lines. You can configure your telephone number on this page. You can confgure 2 telephone lines at a time in the HomePortal 3801HGV gateway. You can also configure a user name and password for your account to prevent unauthorized access. Steps 1. Navigate to Services > Voice > Line. The Line page appears. 2. Select the Enable check box in the Line 1 section.
HomePortal 3801HGV Gateway User Guide Configuring Voice-Based Services 3. Enter the phone number, user name, and the password in corresponding text boxes. This will be given by the service provider. 4. Select the appropriate bandwidth setting as directed by the service provider. 5. Select the appropriate server to associate with the line in the Line Association drop-down list box. 6. Click Save. 7. Configure the second phone line (if present) in the Line 2 section, and click Save.
HomePortal 3801HGV Gateway User Guide Configuring Voice-Based Services Steps 1. Navigate to Services >Voice > Phone. The Phone page appears. 2. Enter the location of the phone in the corresponding text box in the Phone: Phone 1 section. 3. Select a line that you have configured in the Association drop-down list box. 4. Select the Service Outage check box if . NOTE TO REVIEWER: Need info about the Service Outage check box. 5. Click Save. 6.
HomePortal 3801HGV Gateway User Guide Configuring Voice-Based Services To reset information about each configured line on this page, scroll down and click the Reset button at the end of the information for that particular line. You can view the following information on this page: Parameter Description Line 1 Displays status information about the phone line in use, as well as its current state. Registration Status Displays registration information about the phone line in use.
HomePortal 3801HGV Gateway User Guide Configuring Voice-Based Services All incoming calls Displays complete call statistics of all incoming calls. All outgoing calls Displays complete call statistics of all incoming calls.
CHAPTER 7 Setting Up System Information This chapter provides information about the tasks you can perform in the System Info tab. Following are the links under the System Info tab, and associated tasks: • Status • • Password • • Setting Up System Password on page 29 Date & Time • • Viewing System Information on page 27 Configuring Date and Time on page 30 Event Notification • Enabling Event Notifications on page 32 Viewing System Information View your system information at a glance.
HomePortal 3801HGV Gateway User Guide Setting Up System Information You can view the following information on the Status page: Parameter Description Manufacturer Name of the gateway manufacturer. Model Model number of the gateway. Serial Number Serial number of the gateway. The serial number is also printed on the gateway. Hardware Version Hardware version number of the gateway. Software Version Version number of the software used for the gateway. Key Code Key code of the gateway.
HomePortal 3801HGV Gateway User Guide Setting Up System Information Setting Up System Password Objective To set up the system password. This task allows you to set up a password for your system in order to protect it against unauthorized access. You can either set up the default system password, or create your own password. Steps 1. Navigate to Settings > System Info > Password. The Password page appears. 2. You can perform one of the following tasks: • Set the default system password.
HomePortal 3801HGV Gateway User Guide Setting Up System Information Creating Your System Password To create your own system password: 1. Select the Enable Password Protection box. 2. Click Create or Edit a Custom Password. 3. Enter a password in the Enter New Password text box. The password is case-sensitive, and can contain up to 31 alpha-numeric characters with no spaces. 4. Enter the same password in the Confirm New Password text box. 5. Enter a hint in the Enter a Password Hint text box.
HomePortal 3801HGV Gateway User Guide Setting Up System Information Automatically Setting up Date and Time To automatically set up date and time: 1. Navigate to Settings > System Info > Date & Time. The Date & Time page appears. 2. Select your time zone in the Current Time Settings area. 3. Click Save. Note Do not forget to select the Daylight Savings Time check box in the Time Configuration area if Daylight Savings Time is observed in your state.
HomePortal 3801HGV Gateway User Guide Setting Up System Information Manually Configuring Date and Time To manually configure the date and time: 1. Navigate to Settings > System Info > Date & Time. The Time Configuration section appears. 2. Select the Override automatic time configuration box in the Time Configuration section. 3. Set the time in the corresponding space in the hh:mm:ss format. 4. Set the date in the corresponding space in the yyyy/mm/dd format. 5. Select the Daylight Savings Tim check box.
HomePortal 3801HGV Gateway User Guide Setting Up System Information Enabling Notifications To enable notifications: 1. Navigate to Settings > System Info > Event Notifications. The Event Notifications page appears. 2. Select the Broadband Status Notification and/or Router-Behind-Router Detection check boxes. 3. Click Save. Note To enable router-behind-router detection, make sure that DHCP and NAT are enabled, and the gateways are not in bridge mode. Disabling Notifications To disable notifications: 1.
CHAPTER 8 Configuring Broadband Settings This chapter provides information about the tasks you can perform in the Broadband tab.
HomePortal 3801HGV Gateway User Guide Configuring Broadband Settings Refer to the following table for description of the Summary Status parameters listed on the Status page: Parameter Description Internet Status of the Internet Connection. This displays Connected when the ISP acitvates your Internet connection. DSL Link Status of the DSL connection. This displays Connected when the DSL port of the gateway is connected to the telephone jack.
HomePortal 3801HGV Gateway User Guide Configuring Broadband Settings Refer to the following table for description of the Internet Details parameters listed on the status page: Parameter Description Broadband Link Type Type of broadband connection. Connection Type Identifies the method by which the gateway connects to the Internet Service Provider (ISP). The methods can be: • PPPoE • PPPoA • Direct IP User Name User credentials to connect with your ISP.
HomePortal 3801HGV Gateway User Guide Configuring Broadband Settings The following figure displays the DSL Details section of the Status page. Refer to the following table for description of the DSL Details parameters listed on the status page: Parameter Description Modem Type Displays modem type: either built-in VDSL modem or external broadband modem through Ethernet. Connection Type Method by which the gateway connects to the ISP.
HomePortal 3801HGV Gateway User Guide Parameter Configuring Broadband Settings Description Rate Upload and download speeds in kilobytes per second. Max Rate Maximum speed attained while uploading and downloading the data in kilobytes per second. Noise Margin Current downstream and upstream noise margin in dB. Attenuation Current downstream and upstream DSL attenuation in dB. Output Power Current downstream and upstream DSL transmit and receive power in dB.
HomePortal 3801HGV Gateway User Guide Configuring Broadband Settings Refer to the following table for description of the DSL Link Errors parameters listed on the status page: Parameter Description Link Retrains Number of DSL retrains since the gateway was last restarted, and the time elapsed since the last retrain. DSL Training Errors Number of failed DSL retrains since the gateway was last restarted, and the elapsed time since the last failed retrain.
HomePortal 3801HGV Gateway User Guide Configuring Broadband Settings Parameter Description Uncorrectable Blocks Number of uncorrected DSL superframes that have data errors detected. DSL Unavailable Seconds Number of times the ISP connection was established since the statistics were last reset, and the elapsed time since the last establishment.
HomePortal 3801HGV Gateway User Guide Configuring Broadband Settings Steps 1. Navigate to Settings > Broadband > Link Configuration. Configure the following section of the Link Configuration page to enable the bridge mode and add supplementary networks: 2. Select the Use Broadband IPs on LAN check box. This enables bridge mode on the gateway. 3. Enter the subnet mask address in the Specify usable subnet mask text box.
HomePortal 3801HGV Gateway User Guide Configuring Broadband Settings 9. Enter the Subnet Mask address in the text box. This is the router mask of the secondary subnet. 10. Select the Auto Firewall Open check box to disable the firewall for all devices using addresses from this subnet. 11. Clear the Routing check box to ensure that the gateway does not assign IP addresses to LAN devices through DHCP. 12. Click Save.
HomePortal 3801HGV Gateway User Guide Configuring Broadband Settings Steps 1. Navigate to Settings > Broadband > Routing. The Static Routes page appears. 2. Enter the IP address of the destination network in the Subnet IP text box. 3. Enter the subnet mask of the destination network in the Subnet Mask text box. 4. Enter the gateway address of the destination network in the Gateway IP text box. 5. Click Add To List.
HomePortal 3801HGV Gateway User Guide Configuring Broadband Settings When information is broadcast on a network, information packets are delivered to all segments on the LAN. This degrades network performance. IP multicasting is a method of forwarding information to a group of interested receivers. Internet Group Management Protocol (IGMP) is used to manage IP Multicast sessions.
HomePortal 3801HGV Gateway User Guide Configuring Broadband Settings Refer to the following table to understand the IGMP parameters listed on the multicast page: IGMP Parameter Description IGMP Interface Name Name of the interface for which statistics are being reported. IGMP Enable Query Displays whether the interface has IGMP querying enabled or disabled. IGMP Fast Update Displays whether the interface has IGMP fast update enabled or disabled. IGMP Version Displays the IGMP version.
HomePortal 3801HGV Gateway User Guide Configuring Broadband Settings IGMP Parameter Description IGMP Robustness Time interval that the gateway waits for a report in response to a groupspecific query. IGMP Query Interval Time interval at which the gateway sends membership queries when it is the querier. IGMP Query Response Interval Time interval that the gateway waits for a report in response to a general query. IGMP Group Membership Interval Timeout period for group membership.
HomePortal 3801HGV Gateway User Guide Configuring Broadband Settings Resolving Domain Name Objective To manually add a domain name for resolving the IP address of the networked devices. This task allows you to name network devices (such as printers or Web servers), so that they can be easily accessed by other users on the network. Note Confirm that the domain name is not in use.
HomePortal 3801HGV Gateway User Guide Configuring Broadband Settings Steps 1. Navigate to Settings > Broadband > DNS Resolution. The Domain Name Server Resolution page appears. 2. Enter a name for the network device in the DNS Name text box. 3. Enter the IP address of the network device in the IP Address text box. 4. Click Add To Name Resolution Table. The Name Resolution Table section displays the newly added and existing DNS name, IP address, and Entry type.
HomePortal 3801HGV Gateway User Guide Configuring Broadband Settings Using Diagnostics Features on page 93 Troubleshooting 3801HGV Gateway on page 109 Resolving Domain Name 49
CHAPTER 9 Configuring LAN Devices NOTE TO REVIEWER: [JIRA 1515: ...Unable to determine the steps to set up multiple SSIDs and associated information on the UI of 3801HGV.]. Please provide the necessar y info to document this. How do we configure multiple SSIDs through the UI? This chapter provides information about the tasks you can perform in the LAN tab.
HomePortal 3801HGV Gateway User Guide Configuring LAN Devices Viewing LAN Status To view the LAN status page, navigate to Settings > LAN > Status. The Status page appears. The following figure displays the Private Network section of the Status page. Refer to the following table to understand the Private Network parameters listed on the Status page: Parameter Description Router/Gateway Address IP address allocated to the gateway. Subnet Mask Subnet mask allocated to the gateway.
HomePortal 3801HGV Gateway User Guide Configuring LAN Devices The following figure displays the Interfaces section of the Status page. Refer to the following table to understand the Interface parameters listed on the Status page: Parameter Description Ethernet Displays whether the Ethernet interface is enabled or disabled. Also displays the number of active and inactive Ethernet devices on the network. Wireless Displays whether the wireless interface is enabled or disabled.
HomePortal 3801HGV Gateway User Guide Configuring LAN Devices The following figure displays the Devices section of the Status page. Refer to the following table to hide inactive devices and clear the list of devices appearing on the Status page: Step Result Click Hide Inactive Devices. Devices that are no longer on the local network will be hidden from the Devices list on this page and under Home Network Devices on the Home page. Click Clear List.
HomePortal 3801HGV Gateway User Guide Setting Up Wireless Network Configuring LAN Devices 54
HomePortal 3801HGV Gateway User Guide Configuring LAN Devices 2. Enable the wireless connection by selecting the Enable Wireless Interface check box. 3. Enter a name assigned to your wireless network in the Network Name (SSID) text box. The default is 2WIREXXX, where XXX represents the last three digits of your 2Wire gateway serial number (for example, 2WIRE008). This name appears next to the Wireless icon on the Home page. Note The HomePortal 3801HGV gateway can support up to 4 SSIDs.
HomePortal 3801HGV Gateway User Guide Configuring LAN Devices Steps 1. Navigate to Settings > LAN > Wireless. The Wireless page to configure the Security settings appears. 2. Enable or disable the wireless security by selecting or clearing the Wireless Security check box. Wireless security is enabled as a default setting. 3. Select an authentication setting from the Authentication Type drop-down list box.
HomePortal 3801HGV Gateway User Guide Configuring LAN Devices hexadecimal number uses the characters 0-9, a-f, or A-F. This security key will be used by all clients to access your wireless network. 5. Click Save. This ensures that the configured security setting is saved. Securing the Wireless Network Using MAC Filtering Objective To secure your wireless network using the MAC filtering feature.
HomePortal 3801HGV Gateway User Guide Configuring LAN Devices 3. Enable or disable the MAC filtering by selecting or clearing the Enable MAC Filtering check box. MAC filtering is disabled as a default setting. Disabling MAC address filtering allows all the wireless clients to access the device. 4. Click Save. This ensures that the configured MAC filtering setting is saved. 5.
HomePortal 3801HGV Gateway User Guide Configuring LAN Devices Steps 1. Navigate to Settings > LAN > Wireless. The Wireless page to configure the MAC filtering settings appears. 2. Add the MAC address of the device in the Enter MAC address text box. 3. Click Add To List. This populates the MAC address in the Allowed Devices pane. Blocking MAC Addresses Objective This feature block wireless connection to all devices, or an individual device based on the MAC address of the device. Steps 1.
HomePortal 3801HGV Gateway User Guide Configuring LAN Devices Refreshing the List of Devices Objective This feature enables you to refresh the list of devices while allowing or blocking wireless connection based on the MAC Addresses of the devices. Steps 1. Navigate to Settings > LAN > Wireless. The Wireless page appears. 2. In the MAC Filtering section, click Edit Blocked/Allowed Device List link. The Wireless MAC Filtering page appears. 3.
HomePortal 3801HGV Gateway User Guide Configuring LAN Devices Configuring Advance Wireless Settings Objective To configure advance wireless settings. This allows you to further optimize wireless settings for better performance. Note It is recommended that you leave the default settings as is; however, if you are experiencing connection or performance difficulties, altering these settings may improve performance. Steps 1. Navigate to Settings > LAN > Wireless.
HomePortal 3801HGV Gateway User Guide Configuring LAN Devices 6. Click Save. This ensures that the advance wireless settings are saved. Configuring Wi-Fi Protected Setup Objective To configure Wi-Fi protected setup (WPS). This configuration simplifies the process of connecting any home device to the wireless network. As an access point (AP), the gateway issues and revokes credentials to a network. WPS supports both push button and PIN-based configuration methods.
HomePortal 3801HGV Gateway User Guide Configuring LAN Devices 4. Enter a 4 or 8 digit PIN in Enter the PIN text box. The PIN method requires a 4- or 8-digit PIN. 5. Click Set WPS. This saves the PIN configuration changes done for WPS. Setting Up WPS through the Push Button Method To set up WPS through the PIN method: 1. Navigate to Settings > LAN > Wireless. The Wireless page appears. 2. In the Wi-Fi Protected Setup section, enable the WPS by selecting the Wi-Fi Protected Setup check box. 3.
HomePortal 3801HGV Gateway User Guide Configuring LAN Devices Configuring Local Ethernet Ports Objective To configure local Ethernet ports. This task lets you configure the local Ethernet ports to connect to network devices that support speeds upto 10 Mbits (10BaseT/UTP) and 100 Mbits (100BaseTX), and require a unique setting. By default, the Ethernet ports are pre-configured to auto-detect mode. Steps 1. Navigate to Settings > LAN > Wired Interfaces. The Ethernet Switch page appears. 2.
HomePortal 3801HGV Gateway User Guide Configuring LAN Devices Configuring HomePNA 3.1 Objective To configure Home Phoneline Networking Alliance (HPNA) on the Cable port. This task lets you configure HPNA interface on the Cable port of the gateway. Steps 1. Navigate to Settings > LAN > Wired Interfaces. The HPNA 3.1 (Coax) configuration page appears. 2. Enable or disable HPNA by selecting or clearing the HomePNA Networking check box. 3. Select Coax or DSL from the Select Output Jack drop-down list.
HomePortal 3801HGV Gateway User Guide Configuring LAN Devices Viewing HomePNA Status To view HomePNA status page, navigate to Settings > LAN > Wired Interfaces. Click HomePNA Status listed at the bottom of the wired interfaces page. The following page appears: Refer to the following table to understand the HomePNA Network parameters listed on the status page: Parameter Description Firmware Version Firmware version number. Firmware Signature Firmware signature number.
HomePortal 3801HGV Gateway User Guide Configuring LAN Devices By default, the gateway uses the 192.168.1.0/255.255.0.0 IP address range. You can select from two additional IP address ranges, or configure the network settings manually. When you select either of them, the LAN clients are assigned IP addresses within the specified range. Note Configuring DHCP You should manually configure these settings ONLY if you thoroughly understand IP internetworking.
HomePortal 3801HGV Gateway User Guide Configuring LAN Devices Steps 1. Navigate to Settings > LAN > DHCP. The DHCP Configuration page appears. 2. Enable or disable the DHCP server by selecting or clearing the DHCP Server Enabled check box. 3. Select a relevant radio button from DHCP Network Range, to use the default range of IP addresses or configure the DHCP server manually. If you are using the default range of IP address, continue to step 5.
HomePortal 3801HGV Gateway User Guide Note Configuring LAN Devices 3801HGV supports four subnets simultaneously on the LAN. The 192.168.1.0 / 255.255.255.0 (default) is used as a private subnet by the end user. The 172.16.0.0 / 255.255.0.0 is used as the secondary subnet or public routed subnet by the end user. The remaining options, 10.0.0.0 / 255.255.0.0 and Configure manually are held in reserve to be configured and used by the service provider. 4.
HomePortal 3801HGV Gateway User Guide Configuring LAN Devices Steps 1. Navigate to Settings > LAN > IP Address Allocation. The Public-Private NAT Mappings and Device IP Allocation page appears. 2. Navigate to the relevant device for changing the configuration to override the default DHCP settings. 3. Enable or disable the firewall by selecting the relevant option from the Firewall drop-down list. 4. Select the specific address type from the Address Assignment drop-down list.
HomePortal 3801HGV Gateway User Guide Configuring LAN Devices NOTE TO REVIEWER: Unsure whether this field remains as is. Any configuration change might bring up more options in the drop-down list. Need inputs for the same. 6. Click Save. This saves the allocated IP address to a specific device or devices. 7. Restart the gateway to view the updated configuration on this page.
CHAPTER 10 Configuring Firewall Settings This chapter provides information about the tasks you can perform in the Firewall tab.
HomePortal 3801HGV Gateway User Guide Configuring Firewall Settings Refer to the following table to understand the parameters listed on the Firewall Status page: Parameter Description Firewall Status View whether firewall is enabled or disabled in this section. Current Applications, Pinholes and DMZ Settings View if any applications are hosted in this section. Device Displays the name of the configured devices.
HomePortal 3801HGV Gateway User Guide Configuring Firewall Settings Configuring Firewall Settings 74
HomePortal 3801HGV Gateway User Guide Configuring Firewall Settings 2. Select the computer where you want to host the application(s) in the Select a computer section. When you host an application for a computer on your network, it implies that you are scaling down the firewall security levels for that application to be accessible on the specified computer. 3. Select the Allow individual application(s) radio button.
HomePortal 3801HGV Gateway User Guide Configuring Firewall Settings 3. Enter a name for the application profile in the Application Profile Name text box. 4. Click the TCP or UDP radio button to select the protocol for the application profile. If the application you are adding requires both, you need to create a separate definition for each. 5. Enter the port or port range used by the application in the Port (or Range) text boxes. If only one port is required, enter the port number in the From text box.
HomePortal 3801HGV Gateway User Guide Configuring Firewall Settings sent to 4000. Subsequent ports will be mapped accordingly; 101 will be sent to 4001, 102 will be sent to 4002, and so on. 8. Select the application type from the Application Type drop-down list. 9. Click Add to List. This creates a new application profile. Also, the configured information appears in the Definition List section of the same page.
HomePortal 3801HGV Gateway User Guide Configuring Firewall Settings 14. Modify the information as per your requirement. 15. Click Add to List. The configuration changes appear in the Definition List section of the same page. 16. Repeat step 8 to 15 for each port or range of ports required for the application profile.
HomePortal 3801HGV Gateway User Guide Configuring Firewall Settings Deleting User-defined Applications To delete a user defined application: 1. Click Edit or delete user-defined application in the Edit firewall settings for this computer section. This lets you delete an existing profile. The Edit or Delete a User-Defined Application page appears. 2. Select the application you want to delete from the User defined applications list box. 3. Click Delete.
HomePortal 3801HGV Gateway User Guide Configuring Firewall Settings and can receive unsolicited network traffic from the Internet.The DMZplus mode configuration page appears: 2. Click Save. 3. Confirm that the computer you selected is configured for DHCP. If it is not, configure it for DHCP. 4. Restart the computer. When the computer restarts, it receives a special IP address from the system and all unassigned TCP and UDP ports are forwarded to it. m Use the DMZplus mode with caution.
HomePortal 3801HGV Gateway User Guide Configuring Firewall Settings Steps 1. Navigate to Settings > Firewall > Advanced Configuration. The Advanced Configuration page to configure Attack Detection appears. 2. Clear the Excessive Session Detection check box. When disabled, the firewall does not detect applications on the local network that are creating excessive sessions to the Internet. This activity is due to a virus infected computer and on detection, the gateway displays a HURL warning page. 3.
HomePortal 3801HGV Gateway User Guide Configuring Firewall Settings Controlling Inbound and Outbound Traffic Objective To control inbound and outbound protocol control services, so that the firewall blocks or passes the traffic from/to the network to/from the Internet. Steps 1. Navigate to Settings > Firewall > Advanced Configuration. The Advanced configuration page to configure the outbound and inbound protocols appears: 2. Select or clear any check box in the Outbound Protocol Control section.
HomePortal 3801HGV Gateway User Guide Configuring Firewall Settings Configuring Firewall Security Enhancements Objective To configure firewall security enhancements. This allows you to configure the firewall rules to allow traffic on the UDP and TCP ports. Steps 1. Navigate to Settings > Firewall > Advanced Configuration. The Advanced configuration page to configure the security enchancements appears. 2. Enable or disable stealth mode by selecting or clearing the Stealth Mode check box.
HomePortal 3801HGV Gateway User Guide Configuring Firewall Settings If you enable SIP ALG, client applications can use dynamic TCP/ UDP ports to communicate with the known ports used by the server applications, even though a firewall configuration allows only a limited number of known ports. If you disable ALG, the ports get blocked and you have to explicitly open up a large number of ports in the firewall rendering the network vulnerable to attacks on those ports. Steps 1.
CHAPTER 11 Viewing Logs The Logs tab displays all types of logs which you can use to diagnose a problem, if any. This section gives information about the following tabs: • Event Log • System Log • Upgrade Log • Firewall Log Viewing Event Log Objective: To view event logs.
HomePortal 3801HGV Gateway User Guide Viewing Logs You can see all the event logs on this page. Note Make sure that the option all is selected in the Display Filter list. The following table displays information about the logs that you can view on the Event Logs page. Name Description Type The type of event.
HomePortal 3801HGV Gateway User Guide Viewing Logs Filtering Logs Steps To filter logs: 1. On the Event Logs page, select an option in the Display Filter drop-down list box. 2. Click Submit to view logs pertaining to the option that you selected. You can clear logs on the Event Log page and minimize the clutter from previous events when you try to diagnose a problem. Clearing Event Logs To clear all logs from a list, click the Clear Log button.
HomePortal 3801HGV Gateway User Guide Viewing Logs Filtering and Viewing System Logs Steps: To filter and view system logs: 1. Navigate to Settings>Logs>System Log. The following page appears. 2. Select a log type in the Display Filter drop-down list box. 3. Click Submit to view all logs of the type you selected. Note Viewing System Log You can further filter logs by selecting an option from the drop-down list box beside the Submit button, and click.
HomePortal 3801HGV Gateway User Guide Viewing Logs The following table displays information about the logs that you can view on the System Log page: Name Description Type The type of event for example, ALM, DBG, and so on. Date/Time The date and time when the event occurs, with the latest date on the top. Event Description A brief description of the event.. Inserting Mark Steps To insert a mark in the log and to view it: 1. Click the Insert Mark button on the System Log page. 2.
HomePortal 3801HGV Gateway User Guide Viewing Logs Steps: To view the upgrade information, navigate to Settings>Logs>Upgrade Log. The following page appears. You can view the initial software version and the current software version of the system on this page. Viewing Firewall Log Objective: To view the firewall log.
HomePortal 3801HGV Gateway User Guide Viewing Logs Viewing Log Steps: To view the firewall log: 1. Navigate to Settings>Logs>Firewall Log. The following page appears. The following table displays information about the logs that you can view on the Firewall Log page: Name Description Type The type of event.
HomePortal 3801HGV Gateway User Guide Viewing Logs Clearing Log You can clear logs on the Firewall Log page and minimize the clutter from previous events when you try to diagnose a problem. To clear the firewall log, click the Clear Log button.
CHAPTER 12 Using Diagnostics Features This chapter provides information about the tasks you can perform in the Diagnostic tab.
HomePortal 3801HGV Gateway User Guide Using Diagnostics Features Steps 1. Navigate to Settings > Diagnostics > Link Test. The Link Test page appears. 2. Click Start to start running diagnostic tests on your broadband connection. 3. Click Refresh Page to view the results of your test. Note Running diagnostic tests on your broadband connection may take a few minutes, and broadband will not be available during this time.
HomePortal 3801HGV Gateway User Guide Using Diagnostics Features Viewing Link Tree To view Link Tree, navigate to Settings > Diagnostics > Link Tree. The Link Tree page appears.
HomePortal 3801HGV Gateway User Guide Using Diagnostics Features You can click any link to view its details at the bottom of the page. This is shown in the figure below: Viewing DSL Diagnostic Information The DSL page displays disgnostic information about DSL which you can use in case of any problems. To view the DSL diagnostic information, navigate to Settings > Diagnostics > DSL. The DSL page appears.
HomePortal 3801HGV Gateway User Guide Using Diagnostics Features You can view the following information on this page: Parameter Description General Information Technical information about the DSL. Training History Information about DSL training history. Bitloading Graphic representation of DSL bitloading. Note Explanation of terms used in DSL training history.
HomePortal 3801HGV Gateway User Guide Using Diagnostics Features • Ping: A computer network tool used to test whether a particular host is reachable across an IP network; it is also used to self test the network interface card of the computer, or as a latency test • Traceroute: A computer network tool used to determine the route taken by packets across an IP network • DNSquery: A generic query resolution interface Testing Ping To test ping: 1.
HomePortal 3801HGV Gateway User Guide Using Diagnostics Features 5. Click Stop to stop testing. Note Testing IP Utilities To clear logs, select all logs in the provided space, and press Delete on your keyboard.
HomePortal 3801HGV Gateway User Guide Using Diagnostics Features Testing Traceroute To test traceroute: 1. Navigate to Settings > Diagnostics> IP Utilities, and traceroute in the Test Type dropdown list. The following page appears. 2. Type the host address in the Host Address text box. 3. Select the Enable Name Resolution check box if you want to find the IP address corresponding to the host address. 4. Click Start to start testing. You can view the results in the space provided.
HomePortal 3801HGV Gateway User Guide Using Diagnostics Features 5. Click Stop to stop testing. Note Testing IP Utilities To clear logs, select all logs in the provided space, and press Delete on your keyboard.
HomePortal 3801HGV Gateway User Guide Using Diagnostics Features Testing Dnsquery To test dnsquery: 1. Navigate to Settings > Diagnostics > IP Utilities, and dnsquery in the Test Type drop-down list. The following page appears. 2. Type the host address in the Host Address text box. 3. Select the Enable Name Resolution check box if you want to find the IP address corresponding to the host address. 4. Click Start to start testing. You can view the results in the space provided.
HomePortal 3801HGV Gateway User Guide Using Diagnostics Features 5. Click Stop to stop testing. Note To clear logs, select all logs in the provided space, and press Delete on your keyboard. Viewing NAT Information Network Address Translation (NAT) is the process of modifying network address information in datagram packet headers while in transit across a traffic routing device for remapping a given address space into another.
HomePortal 3801HGV Gateway User Guide Viewing NAT Information Using Diagnostics Features 104
HomePortal 3801HGV Gateway User Guide Using Diagnostics Features You can view the following information on this page: Name Description Pinholes A firewall pinhole is a port that is opened through a firewall to allow a particular application/Web site to gain controlled access to the protected network. This area displays the pinholes that you have used. Current NAT Sessions Displays information about all current NAT sessions.
HomePortal 3801HGV Gateway User Guide Using Diagnostics Features 5. Enter an integer greater than 0 in the Limit Logging to text box. 6. Click Save. Resetting the Gateway Objective To reset the gateway. You may need to reset the HomePortal 3801HGV gateway if one or all the LEDs is/are solid red. This indicates that there is some failure within the system. It is recommended that you discuss your problems with customer service before attempting to reset your device.
HomePortal 3801HGV Gateway User Guide Using Diagnostics Features Resetting System and Links To reset the system and links: 1. Navigate to Settings > Diagnostics > Resets. The Resets page appears. The following figure displays the System and Link Resets section in the Resets page. 2. In the System & Link Resets section: a. Click Clear if you want to clear the device list. Devices will be re-listed as the system rediscovers them.
HomePortal 3801HGV Gateway User Guide Using Diagnostics Features Resetting Configuration To reset the configuration: 1. Navigate to Settings > Diagnostics > Resets. The Resets page appears. The following figure displays the Configuration Resets section in the Resets page. 2. In the Configuration Resets section: a. Click Reset for Wireless Configuration Reset if you want to reset the wireless AP settings to factory default. b.
CHAPTER 13 Troubleshooting 3801HGV Gateway This chapter provides information about troubleshooting the HomePortal 3801HVG gateway hardware and firmware issues. It lists the issues, possible cause(s), and solution(s) in a tabular format. The issues mentioned in this chapter are based on likely user scenarios.
HomePortal 3801HGV Gateway User Guide Troubleshooting 3801HGV Gateway Issue Possible Cause(s) What to Do No WIRELESS light LAN clients are not connected to the gateway through the wireless interface Ensure that at least one LAN client is connected to the wireless connection of the gateway. Wireless Interface is disabled Select the Enable Wireless Interface check box from Settings > LAN > Wireless.
HomePortal 3801HGV Gateway User Guide Troubleshooting 3801HGV Gateway System Information Issues The following table provides information to troubleshoot system information issues: Issue Possible Cause(s) What to Do Unable to set time and date manually Override Automatic Time Configuration check box is not selected Select the Override Automatic Time Configuration check box to apply the manually configured time and date settings.
HomePortal 3801HGV Gateway User Guide Troubleshooting 3801HGV Gateway LAN Issues The following table provides information to troubleshoot LAN issues: Issue Possible Cause(s) What to Do Unable to connect to the gateway through the local Ethernet port Loose Ethernet cable connection • Check the Ethernet cable connection on the computer and gateway, and make sure that it is securely seated in both ports • Check the ETHERNET indicator on the gateway; it should blink green Incorrect Ethernet mode selecte
HomePortal 3801HGV Gateway User Guide Troubleshooting 3801HGV Gateway Firewall Issues The following table provides information to troubleshoot firewall issues: Issue Possible Cause(s) What to Do HTTP service not available HTTP traffic is disabled Navigate to Settings > Firewall > Advanced Configuration. Select the HTTP checkbox from the Outbound Protocol Control section to enable the HTTP traffic to pass through the firewall.
APPENDIX A Glossary Term Description Access Point A device that transports data between a wireless network and a wired network. With the helpof the system, a wireless base station is an example of an access point that acts between a wireless node and with other wired PCs and peripherals. Default Gateway A device that is placed between network segments (or “subnets”) to ensure that traffic is properly routed between different subnets.
HomePortal 3801HGV Gateway User Guide Glossary Term Description NAT (Network Address Translation) Enables a LAN to use one set of IP addresses for internal traffic and a second set of IP addresses for external traffic. This feature is used by the system so an end user can have an internal computer network in their home, with all its computers using internal IP addresses, using only one routable IP address, which accesses the outside (Internet).
HomePortal 3801HGV Gateway User Guide Glossary Term Description SYN Flood A method that the user of a hostile client program can use to conduct a denial-ofservice (DOS) attack on a computer server. The hostile client repeatedly sends SYN (synchronization) packets to every port on the server, using fake IP addresses. TCP/IP (Transmission Control Protocol/Internet Protocol) A method of packet-switched data transmission used on the Internet.
APPENDIX B Regulatory Information Electrical AC Adapter The AC adapter is designed to ensure your personal safety and to be compatible with this equipment. Please follow these guidelines: • Do not use the adapter in a high moisture environment. Never touch the adapter when your hands or feet are wet • Allow adequate ventilation around the adapter. Avoid locations with restricted airflow • Connect the adapter to a proper power source.
HomePortal 3801HGV Gateway User Guide Regulatory Information Equipment Repairs Do not, under any circumstances, attempt any service, adjustments, or repairs on this equipment. Instead, contact your local 2Wire distributor or service provider for assistance. Failure to comply may void the product warranty. Location – Environmental Considerations Do not plug the AC/DC power adapter into an outdoor outlet or operate the residential gateway outdoors.
HomePortal 3801HGV Gateway User Guide Regulatory Information • Connect the equipment into an outlet on a circuit different from that to which the receiver is connected • Consult the dealer or an experienced radio/TV technician for help m Changes or modifications not expressly approved by the party responsible for compliance could void your authority to operate this equipment.
HomePortal 3801HGV Gateway User Guide Regulatory Information exposed to the transmitter in order to meet the FCC RF exposure guidelines. Making changes to the antenna or the device is not permitted. Doing so may result in the installed system exceeding RF exposure requirements. This device must not be co-located or operated in conjunction with any other antenna or radio transmitter. Installers and end users must follow the installation instructions provided in this guide.