
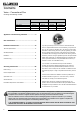
Conventional Flue Instructions

9
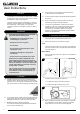
User Instructions
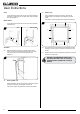
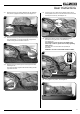
7.11 Place the rear log into position between the rear brackets
and pushed up against the back panel, see Diagram 16.
Log 1
16
7.12 Place the second log into the left hand groove on the burner
tray, see Diagram 17. The log should butt up against the
raised molding and the left hand side liner.
Log 2
17
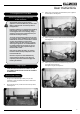
7.13 Place the third log into the groove on the right hand side,
see Diagram 18.
The log should butt up against the raised molding and the
right hand side liner.
Log 3
18
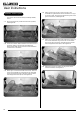
7.14 Once the logs are in there are two embers which can be
loosely placed at the front of the fuel bed and cover the tabs
securing the burner tray, see Diagram 19.
Embers
19
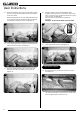
7.15 Sparingly spread an amount of the Embaglow bres
provided, covering the ports in the burner tray,
see Diagram 20
It is essential to cover the port in the middle of the
burner tray in order to get the most visually appealing
flame picture.
Take care not to use more than half a packet per
application.
WARNING - DO NOT PLACE NEAR THE PILOT AREA.
It is essential to
cover the
central port
Embaglow
20
7.16 Fix log guard into position, see Diagram 21.
21