98067/98756/98046 MiniCam™ Pro User’s Manual www.jascoproducts.
Table of Contents Cautions......................................................................................................................... 2 System Requirements............................................................................................. 3 Maintenance Care and Storage........................................................................ 3 Contents.........................................................................................................................
System Requirements 1. Operating System - Microsoft® Windows® 2000, XP and Vista 2. CD drive 3. USB port Maintenance Care and Storage 1. Do not use or store the camera in high humidity and extreme high/low temperature. 2. Do not touch the lens with your fingers. 3. Do not drop the camera or get the camera wet. 4. Do not try to repair the camera. 5. To clean the camera, use a dry cloth. Do not use organic solvents, such as alcohol etc. to clean the camera. 6.
Getting to Know Your MiniCam™ Pro Note: You must install the camera driver BEFORE connecting the camera to your computer. Snap Shot Button Microphone Focus Ring Lens Camera Stand Installation Please note that you must install the camera drivers BEFORE you connect the camera to the USB port of your computer. 1. You must install all relevant updates, service packs, and patches for your operating system. These are available on Microsoft’s® website under “Resources”. Use the “Windows Update” link. (www.
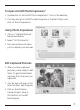
4. The installation menu will come up. Select MiniCam™ Pro Driver. 5. Select Next on the Welcome screen. 6. Under Setup Type select Complete, and then Next to continue. 7. Select Install to begin copying the driver files to your computer. 8. On the final screen, select Finish. 9. It may be necessary to have your Windows installation disk available to install any additional windows drivers onto your computer. You will receive a prompt if this is necessary. 10.
PhotoImpression™ - Welcome to PhotoImpression ArcSoft PhotoImpression™ is an easy-to-use imageediting program specifically designed for general consumers. The program enables you to edit, retouch, enhance or add special effects to digital images with pointand-click simplicity. It also offers a great variety of project templates for creating greeting cards and calendars, plus the functionalities of the popular Arcsoft PhotoPrinter® and Funhouse™ programs.
To Open ArcSoft PhotoImpression™ 1. Double click on the ArcSoft PhotoImpression™ icon on the desktop. 2. You may also go to ArcSoft under Programs in the Start Menu, and click on Photo Impression. Using Photo Impression 1. Click on “Camera/Scanner”. See picture below. 2. Select “GE MiniCamPro”. 3. The new window will allow you to capture your pictures. Edit Captured Pictures 1. After you have captured pictures, you’re ready to edit them. To get started select a picture from the ones you captured. 2.
4. The associated menus are located on the bottom of the screen. Scroll through those to find what you need. See Diagram. Have fun! If you need more help, click on “Help” in the upper left-hand corner of the screen. Visit www.arcsoft.com for a tutorial, full manual, technical assistance, patches, free card and calendar templates and other fun stuff. Video Impression™ ArcSoft Video Impression™ is a powerful, easy-to-use video editing and presentation program designed for consumers.
Working with Video Impression™ • Getting Started • Working with Albums • Working with the Storyboard • Editing Images • Editing Video • Editing Audio • Printing a Still Image from a Video • Saving a Movie ArcSoft Video Impression™ - Getting Started 1. Open ArcSoft Video Impression™ A) Double click on the Video Impression icon on your desktop. B) You may also go to ArcSoft under Programs in the Start Menu, and click on Video Impression 2. Click on “Create a New Video.” 3.
If you need more help, click on “Help” in the upper left-hand corner of the screen. Note: If you are trying to send a video clip by email, your email provider may have a size limitation. Visit www.arcsoft.com for a tutorial, full manual, technical assistance, patches, templates and other fun stuff. MSN® Messenger Installing/Opening MSN® Messenger A. Windows® 98/ME/2000 • Log on to http://messenger.msn.
Using MSN® Messenger with your camera 1. Make sure the MiniCam™ Pro driver has been installed. 2. Plug the camera into any USB port on your computer. 3. Open MSN® Messenger using the instructions above. 4. To start a video conference a. In Windows® 98/ME/2000 click on NetMeeting. b. In Windows® XP/Vista click on Actions Start a Video Conversation. Note 1: In order to chat and share video with a friend, you will need to add your friend to your contact list. Your friend will also need to use MSN® Messenger.
• Go to the Start Menu (Settings in some operating systems) Control Panel Add/Remove Programs • Select “MiniCamPro” • Select “Remove”, then “OK” to uninstall the driver. • Select “Yes, I want to restart my computer”, then “Finish”. • Your computer will now reboot. 3. “Can’t detect camera”, “Can’t find VFW driver”, or “Can’t find camera driver” errors • Close all open applications. • Unplug the MiniCam™ Pro from your computer.
TWO YEAR LIMITED WARRANTY Jasco Products Company warrants this product to be free from manufacturing defects for a period of two years from the original date of consumer purchase. This warranty is limited to the repair or replacement of this product only and does not extend to consequential or incidental damage to other products that may be used with this unit. This warranty is in lieu of all other warranties express or implied.
• Increase the separation between the equipment and receiver. • Connect the equipment into an outlet on a circuit different from that to which the receiver is connected. • Consult the dealer or an experienced radio/TV technician for help. CAUTION: Any changes of modifications not expressly approved by the grantee of this device could void the user’s authority to operate the equipment. This device complies with Part 15 of the FCC Rules.