600 Watts Models: JE510 JE520 Sub-Compact Microwave Oven Owner’s Manual Important Safety Information 2 Precautions to Avoid Possible Exposure to Excessive Microwave Energy .....................2 Special Notes About Microwaving .....................6 Operating Instructions 11 Features of Your Microwave...............................11 The Controls on Your Microwave ......................12 Time Cooking..........................................................15 Other Features..........................
Important Safety Information Read all safety information before using For Your Safety PRECAUTIONS TO AVOID POSSIBLE EXPOSURE TO EXCESSIVE MICROWAVE ENERGY For your safety the information in this manual must be followed to minimize the risk of fire or explosion or to prevent property damage, personal injury or loss of life. Do Not Attempt to operate this oven with the door open since open-door operation can result in harmful exposure to microwave energy.
Welcome Welcome to the GE family. We’re proud of our quality products and we believe in dependable service. You’ll see it in this easy-to-use manual and you’ll hear it in the friendly voices of our customer service department. Best of all, you’ll experience these values each time you use your microwave. That’s important, because your new microwave will be part of your family for a long time. Start Here! Staple your receipt to the inside back cover of this manual.
Important Safety Information Read all safety information before using Warning To reduce the risk of fire, electric shock, injury to persons, or exposure to excessive microwave energy when using your appliance, follow basic precautions, including the following sections. Safety Precautions This microwave oven is not approved or tested for marine use. • Read and follow the specific “Precautions to Avoid Possible Exposure to Excessive Microwave Energy.” • This appliance must be grounded.
• To reduce the risk of fire in the oven cavity: — Do not overcook food. Carefully attend appliance if paper, plastic or other combustible materials are placed inside the oven while cooking. — Remove wire twist ties and metal handles from paper or plastic containers before placing them in the oven. — Do not use the oven for storage purposes. Do not leave paper products, cooking utensils or food in the oven when not in use.
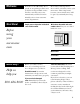
Important Safety Information Special Notes About Microwaving Arcing If you see arcing, press the CLEAR/OFF pad and correct the problem. Foods Arcing is the microwave term for sparks in the oven. Arcing is caused by: • Metal or foil touching the side of the oven. • Recycled paper towels containing small metal pieces being used in the microwave. • Foil not molded to food (upturned edges act like antennas).
SAFETY FACT SUPERHEATED WATER Microwaved water and other liquids do not always bubble when they reach the boiling point. They can actually get superheated and not bubble at all. Superheated liquid will bubble up out of the cup when it is moved or when something like a spoon or tea bag is put into it. To prevent this from happening and causing injury, do not heat any liquid for more than 2 minutes per cup.
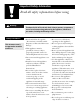
Important Safety Information Special Notes About Microwaving Microwave-Safe Cookware If you use a meat thermometer while cooking, make sure it is safe for use in microwave ovens. How to Test for a Microwave-Safe Dish Make sure all cookware used in your microwave oven is suitable for microwaving. Most glass casseroles, cooking dishes, measuring cups, custard cups, pottery or china dinnerware which does not have metallic trim or glaze with a metallic sheen can be used.
• Plastic cookware—Plastic cookware designed for microwave cooking is very useful, but should be used carefully. Even microwave-safe plastic may not be as tolerant of overcooking conditions as are glass or ceramic materials and may soften or char if subjected to short periods of overcooking. In longer exposures to overcooking, the food and cookware could ignite. Follow these guidelines: 1 Use microwave-safe plastics only and use them in strict compliance with the cookware manufacturer’s recommendations.
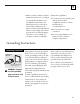
Important Safety Information Grounding Instructions Use of Adapter Plugs (Adapter plugs not permitted in Canada) Align large prongs/slots Ensure proper ground and firm connection before use TEMPORARY METHOD Usage situations where appliance’s power cord will be disconnected infrequently. You should have the circuit checked by a qualified electrician to make sure the receptacle is properly grounded.
Operating Instructions Features of Your Microwave Features 1 2 3 4 6 Wattage: 600 Watts Optional Accessory (Available at extra cost from your GE supplier): 4-A019-3 Hanging Kit allows this oven to be mounted under a cabinet. 1 Door Latches. 5 4 Control Panel Display (panel layout will vary by model). 2 Window with Metal Shield. Screen allows cooking to be viewed while keeping microwaves confined in the oven. 5 Door Open Bar. Press to open door. Door must be securely latched for oven to operate.
Quick Start (Features and appearance vary by model) The controls on your microwave oven OFF 1 2 3 15 14 4 13 5 6 12 7 11 10 1 9 8 Timer Allows you to cook by time for up to 15 minutes.
GUIDES IN BOOK • Cooking • Defrosting • Heating and Reheating POWER LEVEL / TIME COOK DEFROST 2 Time Features Allows you to cook by time. Press POWER LEVEL/TIME COOK (press one to ten times to choose power level) DEFROST Enter Amount of cooking time. Amount of defrosting time.
Operating Instructions Changing Power Levels POWER LEVEL / TIME COOK 1 2 3 4 5 6 7 8 9 0 START How to Change the Power Level The power level may be changed before setting the cooking time. 1 Press POWER LEVEL/TIME COOK one to ten times to choose a power level other than Hi. 2 Enter cooking time. 3 Press START. Variable power levels add flexibility to your microwave cooking. The power levels on your microwave oven can be compared to the surface units on a range.
Time Features (vary by model) Timer Cooking (on some models) OFF 1 2 3 15 14 4 13 5 Allows you to microwave for up to 15 minutes. You may open the door during Timer cooking to check the food. Close the door and cooking resumes automatically. Popcorn Tip For best results when cooking microwave popcorn, turn under the ends of the popcorn bag. This allows the bag to rotate properly in the oven. 6 12 7 11 10 9 8 Turn the dial for up to 15 minutes of cooking time.
Operating Instructions Cooking Guide for Timer Cooking and Time Cook Fresh Vegetables For frozen vegetables, follow the instructions on the package. Place a 10 oz. package in a 1-qt. casserole and add 2–4 tablespoons of water. Turn the dish after half of time. NOTE: Use Power Level Hi unless otherwise noted. Vegetable Amount Time Comments Green Beans 1 lb. cut in half 15 to 20 min. In 1-1/2-qt. casserole, place 1/2 cup water. Whole Beets 1 bunch 25 to 30 min. In 2-qt.
Time Features Defrost Allows you to defrost for the length of time you select. See the Defrosting Guide for suggested times. DEFROST 1 2 3 4 5 6 8 9 7 0 START 1 Press DEFROST. 2 Enter defrosting time. 3 Press START. A dull thumping noise may be heard during defrosting. This sound is normal when the oven is not operating at Hi power. Defrosting Tips • Foods frozen in paper or plastic can be defrosted in the package.
Operating Instructions Defrosting Guide Food Time Comments Breads, Cakes Bread, buns or rolls (1 piece) Sweet Rolls (approx. 12 oz.) 1-1/2 min. 5 to 7 min. Rearrange after half the time. Fish and Seafood Fillets, frozen (1 lb.) Shellfish, small pieces (1 lb.) 10 to 13 min. 7 to 9 min. Fruit Plastic pouch—1 to 2 (10-oz. package) 5 to 8 min. Meat Bacon (1 lb.) 5 to 7 min. Franks (1 lb.) 5 to 7 min. Ground meat (1 lb.) Roast: beef, lamb, veal, pork 7 to 9 min. 13 to 17 min. per lb. 7 to 11 min.
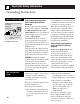
Heating or Reheating Guide 1 Directions below are for heating or reheating already-cooked foods stored in refrigerator or at room temperature. Use microwave-safe cookware. 2 Cover most foods for fastest, most even heating. Exceptions are some sandwiches, griddle foods and baked items. 3 Bubbling around edges of dish is normal, since the center is the last to heat. Foods heated to 160°F. to 165°F. will provide safe, palatable results. Adjust temperatures to suit your personal taste.
Operating Instructions Other Features Your Model May Have Cooking Complete Reminder Clock Press to enter the time of day or to check the time of day while microwaving. CLOCK 1 2 3 4 5 6 7 8 9 0 20 To remind you that you have food in the oven, the oven will beep once a minute until you either open the oven door or press CLEAR/OFF. 1 Press CLOCK. 2 Enter time of day. 3 Press CLOCK.
Helpful Information Microwave Terms Microwave Terms Term Definition Arcing Arcing is the microwave term for sparks in the oven. Arcing is caused by: • metal or foil touching the side of the oven. • foil that is not molded to food (upturned edges act like antennas). • metal such as twist ties, poultry pins, gold-rimmed dishes. • recycled paper towels containing small metal pieces. Covering Covers hold in moisture, allow for more even heating and reduce cooking time.
Helpful Information Care and Cleaning Helpful Hints How to Clean the Inside Opening the oven door a few minutes after cooking helps air out the inside. An occasional thorough wiping with a solution of baking soda and water keeps the inside fresh. Walls, Floor, Inside Window, Metal and Plastic Parts on the Door. Some spatters can be removed with a paper towel, others may require a damp cloth. Remove greasy spatters with a sudsy cloth, then rinse with a damp cloth.
How to Clean the Outside Do not use cleaners containing ammonia or alcohol on the microwave oven. Ammonia or alcohol can damage the appearance of the microwave. Case. Clean the outside of the microwave with a sudsy cloth. Rinse and then dry. Wipe the window clean with a damp cloth. Control Panel and Door. Wipe with a damp cloth. Dry thoroughly. Do not use cleaning sprays, large amounts of soap and water, abrasives or sharp objects on the panel—they can damage it.
If Something Goes Wrong Before You Call for Service Problem Oven Will Not Come On Foods Are Either Overcooked or Undercooked Control Panel Lighted, Yet Oven Will Not Start 24 Possible Causes What to Do A fuse in your home may be blown or the circuit breaker tripped. • Replace fuse or reset circuit breaker. Power surge. • Unplug the microwave oven, then plug it back in. Plug not fully inserted into wall outlet. • Make sure the 3-prong plug on the oven is fully inserted into wall outlet.
All These Things are Normal with Your Microwave Oven • Steam or vapor escaping from around the door. • Light reflection around door or outer case. • Dimming oven light and change in blower sound may occur while operating at power levels other than high. • Dull thumping sound while oven is operating. • Some TV-radio interference might be noticed while using your microwave oven. It’s similar to the interference caused by other small appliances and does not indicate a problem with your microwave.
GE Service Numbers We’ll be there! GE Answer Center® 800.626.2000 In-Home Repair Service 800-GE-CARES (800-432-2737) For Customers With Special Needs 800.626.2000 26 Whatever your question about any GE major appliance, GE Answer Center® information service is available to help. Your call—and your question—will be answered promptly and courteously. And you can call any time. GE Answer Center® service is open 24 hours a day, 7 days a week.
Para los clientes de habla española 800.626.2000 Service Contracts 800-626-2224 Parts and Accessories 800-626-2002 Further Service Para obtener instrucciones en español, llame a GE Answer Center®, servicio de información para el consumidor, teléfono 800.626.2000. You can have the secure feeling that GE Consumer Service will still be there after your warranty expires. Purchase a GE contract while your warranty is still in effect and you’ll receive a substantial discount.
MICROWAVE OVEN WARRANTY Staple sales slip or cancelled check here. Proof of original purchase date is needed to obtain service under warranty. What is Covered LIMITED ONE-YEAR WARRANTY For one year from date of original purchase, we will provide, free of charge, parts and service labor to repair or replace any part of the microwave oven that fails because of a manufacturing defect.