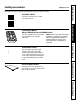
Gas Downdraft Cooktop www.GEAppliances.com Safety Instructions . . . . .2–5 Operating Instructions Controls . . . . . . . . . . . . . . 8, 9 Cookware . . . . . . . . . . . . . . 9 Electric Ignition . . . . . . . . . 8 Features . . . . . . . . . . . . . . . . 6 Grill Module . . . . . . . . .10–13 Other Accessories . . . . .7, 14 Surface Burner Modules . . . . . . . . . . . 6, 8–10 Ventilation System . . . . . 6, 9 Installation Instructions Ductwork . . . . . . . . . . .22–25 Electrical Connection . . . .
Safety Instructions IMPORTANT SAFETY INFORMATION. READ ALL INSTRUCTIONS BEFORE USING. WARNING! For your safety, the information in this manual must be followed to minimize the risk of fire or explosion, electric shock, or to prevent property damage, personal injury, or loss of life. Operating Instructions WARNING: If the information in this manual is not followed exactly, a fire or explosion may result causing property damage, personal injury or death.
IMPORTANT SAFETY NOTICE The California Safe Drinking Water and Toxic Enforcement Act requires the Governor of California to publish a list of substances known to the state to cause cancer, birth defects or other reproductive harm, and requires businesses to warn customers of potential exposure to such substances. SAFETY PRECAUTIONS Have the installer show you the location of the cooktop gas shutoff valve and how to shut it off if necessary. ■ IMPORTANT: This product is for use with natural gas only.
SAFETY PRECAUTIONS ■ Always keep dish towels, dishcloths, pot holders and other linens a safe distance from your cooktop. ■ Do not store flammable materials near a cooktop. ■ Do not store or use combustible materials, gasoline or other flammable vapors and liquids in the vicinity of this or any other appliance. Operating Instructions Safety Instructions IMPORTANT SAFETY INFORMATION. READ ALL INSTRUCTIONS BEFORE USING.
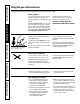
WARNING! SURFACE BURNERS 5 Consumer Support READ AND FOLLOW THIS SAFETY INFORMATION CAREFULLY. SAVE THESE INSTRUCTIONS Troubleshooting Tips ■ Foods for frying should be as dry as possible. Frost on frozen foods or moisture on fresh foods can cause hot fat to bubble up and over the sides of the pan. ■ Use the least possible amount of fat for effective shallow or deep-fat frying. Filling the pan too full of fat can cause spillovers when food is added.
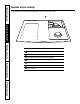
Throughout this manual, features and appearance may vary from your model. 3 Care and Cleaning Operating Instructions Safety Instructions Features of your cooktop.
GEAppliances.com Throughout this manual, features and appearance may vary from your model. Grill Model JXGG79 Consists of two black grill grates and a grill burner. The grill assembly can be removed and a sealed burner module installed. NOTE: Optional surface burner module (JXGB79) can replace the grill burner. Burners supplied with cooktop and optional module air shutters have been adjusted for compatibility on both sides.
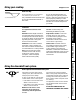
Throughout this manual, features and appearance may vary from your model. Electric Ignition Your surface burners are lit by electric ignition, eliminating the need for standing pilots with constantly burning flames. In case of a power outage, you can light the surface burners on your cooktop with a match. Hold a lit match to the burner, then turn the control knob to the high position. Use extreme caution when lighting the burners this way.
GEAppliances.com Wok This Way We recommend that you use a flat-bottomed wok, available at your local retail store. Use a flat-bottomed wok. Only a flat-bottomed wok should be used. Do not use a flat-bottomed wok with a wok holder. Do not use a flat-bottomed wok on a support ring. Placing the ring over the burner or grate may cause the burner to work improperly, resulting in carbon monoxide levels above allowable current standards. This could be dangerous to your health.
Throughout this manual, features and appearance may vary from your model. Sealed Burner Module To Install the Sealed Burner Module: Operating Instructions Safety Instructions Surface burner and grill modules. 1. Make sure that all control knobs are set to OFF. 4. Slide the burner module forward until the tubes and ignitors start to engage. 2. Clean the cooktop basin to remove any grease accumulation. See the Care and Cleaning the Cooktop section. 5.
GEAppliances.com Using the Grill • Allowing excessive amounts of grease or drippings to constantly flame voids the warranty on the grill grates. Excessive flare-ups indicate that either the grill interior needs to be cleaned, excessive amounts of fat are in the meat or that the meat was not properly trimmed. • Grease drippings will occasionally ignite to produce harmless puffs of flame for a second or two. This is a normal part of the cooking process. • Never leave the grill unattended during operation.
Grilling Tips • With your grill, any food you’ve considered “at its best” when prepared outdoors can now be prepared indoors with less fuss and great flavor. • The following suggestions are good rules to follow and will increase your enjoyment of the equipment. Be sure to follow directions in this guide for using the grill. • Suggested cooking times and control settings are approximate due to variations in meats. Experience will quickly indicate cooking times as well as which settings work best.
GEAppliances.com Preheat the grill on high for 5 to 10 minutes for best flavor. Type Cooking Time Procedure HI HI HI 6 to 10 minutes 10 to 16 minutes 21 to 24 minutes Turn after 3 to 5 minutes.† Turn after 5 to 8 minutes. Turn after 6 to 12 minutes. HI HI HI Medium Medium Medium Medium Medium 14 to 24 minutes 18 to 30 minutes 24 to 34 minutes 20 to 25 minutes 20 to 30 minutes 10 to 15 minutes 15 to 20 minutes 50 to 65 minutes Turn after 7 to 12 minutes.† Turn after 9 to 15 minutes.
Grill Cover The textured steel grill cover makes an attractive cover for the grill section of the cooktop when it is not in use. To use the grill cover: Remove the cover before heating the grill. Since a heated grill cover would not appear hot, this could cause accidental burns should it be touched. Heating the grill cover could also damage the finish. Do not place the grill cover over a heated grill. Let the grill cool before putting the cover in place. Use the cover over the grill grates only.
GEAppliances.com Before Cleaning Before cleaning any part of your cooktop, be sure all controls are off and DISCONNECT ELECTRICAL POWER TO THE COOKTOP at the fuse box or circuit breaker panel, or pull the cooktop power plug, located beneath the cooktop and inside the cabinets. Do not operate the cooktop without all parts in place. After grilling there may be soot on the knobs and control panel seal. This soot can be removed by scrubbing with a plastic scrubber and mild dishwashing detergent.
Grill Burner The grill burner should be cleaned after each use. It can be cleaned with a nonabrasive pad or in the dishwasher. Rinse and dry thoroughly before using again. For heavy soil, the burner should be cleaned first with a soapy steel wool pad, rinsed and dried. Then it can be cleaned in a self-cleaning oven for two hours. NOTE: Check to be sure all burner ports are open. To open clogged ports, insert a twist tie directly into each port.
Igniters It is important to keep igniter port openings on burners clear and free of obstructions to avoid ignition failure and possible gas buildup. If the port openings are blocked, use a twist tie to remove food particles. DO NOT immerse a hot griddle in cold water. Once the griddle has cooled, wash with soap or detergent in hot water in the sink. Be sure to remove all food residue before cooking on the griddle again. Remove stubborn spots with a plastic scouring pad.
Installation Instructions Gas Downdraft Cooktop If you have questions, call 800.GE.CARES (800.432.2737) or visit our Website at: GEAppliances.com IMPORTANT SAFETY INSTRUCTIONS In the Commonwealth of Massachusetts: • This product must be installed by a licensed plumber or gas fitter. • When using ball-type gas shut-off valves, they shall be the T-handle type. • A flexible gas connector, when used, must not exceed 3 feet. The cooktop has been design-certified by CSA International.
Installation Instructions PARTS LIST PREPARING FOR INSTALLATION • Gas cooktop base unit • Literature pack • 1 Surface burner assembly • 2 Surface burner grates • 1 Vent filter • 1 Vent grille • 1 Grease jar JGP979 Tie down bolt on each end Pressure Regulator Wiring Box Cover *Blower can be swiveled 90° Grease Container 2015⁄16″ 1⁄16″ 53.18 .16 cm 287⁄8″ 1⁄16″ 73.34 .16 cm TOOLS AND PARTS NEEDED 79⁄16″ 19.
Installation Instructions MINIMUM SPACING REQUIREMENT 1 INSTALLING CABINETS OVER YOUR COOKTOP When installing a double bay downdraft cooktop in combination with another downdraft cooktop maintain the minimum spacing between units as shown below. Installing them too close will affect cooking performance. 30″ min (76.2 cm) 18″ 45.7 cm 13″ (33 cm) 30″ (76.2 cm) 43⁄8″ 11.1 cm 25″ (63.5 cm) 8″ min to wall (20.3 cm) 18″ (45.7 cm) 8″ min to wall (20.3 cm) 36″ (91.
GAS AND ELECTRICAL LOCATION The position of the electrical supply receptacle and the gas supply pipe entering the cabinet should be positioned as shown in the shaded areas marked below. The cooktop is equipped with a 4 ft (1.2 m) power cord, which should reach any desired location on the cabinet walls. The cooktop must be disconnected from the power supply before any servicing is carried out.
PREPARE FOR DUCTWORK NOTE: Ductwork MUST be vented outside. DO NOT vent into a wall, ceiling, crawlspace, attic or any concealed space. Determine the best route for ductwork; it can be routed in a variety of ways depending on the kitchen layout. Typical duct arrangement countertop series.
Installation Instructions 8 PLAN THE DUCT RUN 3. Use quality metal duct of at least 26-gauge galvanized or 24-gauge aluminum. Inferior quality pipe and fittings can cause up to twice the restriction shown and is a poor value. See the Prepare for Duct Work section of this guide for optional under-slab ducting. Local codes may require a heavier gauge material or restrict PVC. 4. Distance between adjacent fittings (elbows, transitions, etc.) should be at least 18″. The farther the better.
Installation Instructions Example 1 Example 2 5″ to 6″ Transition 5″ to 6″ Transition 2 ft. of 6″ Round 6″ Elbow 2 ft. of 6″ Round 6″ Elbow 4 ft. of 6″ Round 4 ft. of 6″ Round 6″ Elbow 6″ Elbow 6 ft. of 6″ Round 6″ Elbow 6 ft. of 6″ Round 4 ft.
Installation Instructions DUCT LENGTH CHART Duct Fitting Equivalent Length Duct Fitting Number of Fittings 5 ft. 8″ Diameter 90° Elbow (1.52 m) 2.5 ft. 6″ Diameter 45° Elbow (0.76 m) 1 ft. 5″ to 6″ Transition (12.7 cm to 15.24 cm) (0.30 m) 6″ to 31⁄4″ x 10″ 90° Elbow (15.24 cm to 8.26 cm x 25.4 cm) (1.52 m) 31⁄4″ x 10″ to 6″ 90° Elbow (8.26 cm x 25.4 cm to 15.24 cm) (2.75 m) 6″ to 31⁄4″ x 10″ Transition (15.24 cm to 8.26 cm x 25.4 cm) (0.30 m) 31⁄4″ x 10″ to 6″ Transition (8.26 cm x 25.
Installation Instructions 11 ELECTRICAL CONNECTION 12 CHECK IGNITION After installing the cooktop, check the ignition of each burner. 1. Push in one knob and turn to the LITE position (180° from OFF). The igniter will spark and the burner will light. 2. After the burner is lit, turn the knob to HI and the igniter will stop sparking. 3. Turn the knob to the OFF position. Repeat this for each burner. NOTE: If flames are yellow or too low, refer to the Troubleshooting Tips section in this manual.
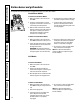
Before you call for service… GEAppliances.com Troubleshooting Tips Save time and money! Review the chart on this page first and you may not need to call for service. Problem Possible Causes What To Do Burners do not light Plug on cooktop is not completely inserted in the electrical outlet. • Make sure electrical plug is plugged into a live, properly grounded outlet. Gas supply not connected or turned on. • See the Installation Instructions section.
Safety Instructions Operating Instructions Care and Cleaning Troubleshooting Tips Before you call for service… Troubleshooting Tips Problem Possible Causes What To Do Sparking sound persists Be sure the knob is in the after burner is turned off OFF position. • Remove knob by pulling it straight off the stem and check the bottom of the knob for any build-up of soil. Occasional sparking sound Changing blower speed. • This is a typical electrical switching noise. This is normal.
GE Service Protection Plus™ GE, a name recognized worldwide for quality and dependability, offers you Service Protection Plus ™—comprehensive protection on all your appliances— No Matter What Brand! Benefits Include: • Backed by GE • All brands covered • Unlimited service calls • All parts and labor costs included • No out-of-pocket expenses • No hidden deductibles • One 800 number to call We’ll Cover Any Appliance. Anywhere. Anytime.
Consumer Product Ownership Registration Dear Customer: Thank you for purchasing our product and thank you for placing your confidence in us. We are proud to have you as a customer! Follow these three steps to protect your new appliance investment: 1 2 3 Complete and mail your Consumer Product Ownership Registration today. Have the peace of mind of knowing we can contact you in the unlikely event of a safety modification. After mailing the registration below, store this document in a safe place.
All warranty service provided by our Factory Service Centers, or an authorized Customer Care® technician. To schedule service, on-line, 24 hours a day, visit us at GEAppliances.com, or call 800.GE.CARES (800.432.2737). Staple your receipt here. Proof of the original purchase date is needed to obtain service under the warranty. GE Will Replace: One Year From the date of the original purchase Any part of the cooktop which fails due to a defect in materials or workmanship.
Consumer Support. GE Appliances Website www.GEAppliances.com Have a question or need assistance with your appliance? Try the GE Appliances Website 24 hours a day, any day of the year! For greater convenience and faster service, you can now download Owner’s Manuals, order parts, catalogs, or even schedule service on-line. You can also “Ask Our Team of Experts™” your questions, and so much more... Schedule Service www.GEAppliances.com Expert GE repair service is only one step away from your door.
Estufa de cubierta a gas con tiro descendente www.GEAppliances.com Instrucciones importantes de seguridad . . . . . . . . . . . . .2–5 Instrucciones de operación Cacerolas para cocinar . . . . . . . 9 Características . . . . . . . . . . . . . . 6 Controles . . . . . . . . . . . . . . . 8, 9 Ignición eléctrica . . . . . . . . . . . 8 Módulo de asador . . . . . . .10–13 Módulo de quemadores sellados . . . . . . . . . . . . . . 6, 8–10 Otros accesorios . . . . . . . . .7, 14 Sistema de ventilación . . . . .
¡ADVERTENCIA! Por su seguridad, se debe seguir la información de este manual para reducir el riesgo de incendio o explosión, choque eléctrico o para evitar daños a la propiedad, lesiones personales o la pérdida de la vida. ADVERTENCIA: Si no se sigue con precisión la información en este manual, un incendio o explosión puede resultar causando daños a la propiedad, heridas personales o muerte. Operación Seguridad INSTRUCCIONES IMPORTANTES DE SEGURIDAD Lea estas instrucciones antes de usar este aparato.
GEAppliances.com La Ley sobre los productos tóxicos y de agua potable de California (California Safe Drinking Water and Toxic Enforcement Act) requiere que el gobernador de California publique una lista de sustancias que el estado sabe que causan cáncer, defectos de nacimiento u otros daños de reproducción, y requiere que los negocios les avisen a los clientes contra la exposición potencial a tales sustancias.
Seguridad INSTRUCCIONES IMPORTANTES DE SEGURIDAD Lea estas instrucciones antes de usar este aparato. PRECAUCIONES DE SEGURIDAD ■ Siempre mantenga las toallas y los paños para platos, los agarradores de ollas y otros elementos de tela a una distancia segura de la estufa. ADVERTENCIA: PARA REDUCIR EL ■ No guarde materiales inflamables cerca de la estufa. A. Utilice esta unidad únicamente en la forma que lo determina el fabricante. Si tiene alguna pregunta póngase en contacto con el fabricante.
GEAppliances.com QUEMADORES DE LA SUPERFICIE Use el tamaño correcto de recipiente. Evite usar los recipientes que no son estables o se vuelcan fácilmente. Seleccione los recipientes con fondo plano bastante grandes para contener el alimento y evitar las salpicaduras y derrames y bastante grandes para cubrir las parrillas de los quemadores. Esto ahorrará el tiempo de cocción e impedirá la acumulación peligrosa de alimentos; las salpicaduras dejadas o los derrames dejados sobre la estufa se pueden arder.
Características de su estufa de cubierta. Su modelo puede tener otras características y apariencia que las ilustradas en este manual.
Accesorios. GEAppliances.com Seguridad Su modelo puede tener otras características y apariencia que las ilustradas en este manual. Asador Modelo JXGG79 Consta de dos parrillas negras para asar y un quemador de asador. Operación Módulo de quemadores sellados Modelos JXGB79B (negra) y JXGB79W (blanca) El asador se puede retirar para instalar un módulo de quemador sellado. Plancha Modelo JXGL89 Puede utilizarse únicamente con el módulo del asador.
Cómo usar los quemadores de la superficie. Su modelo puede tener otras características y apariencia que las ilustradas en este manual. Cómo encender un quemador Presione la perilla de control y hágala girar hasta LITE (encender). Escuchará un pequeño chasquido—que es el sonido de la chispa eléctrica que enciende el quemador. Presione la perilla de control y hágala girar hasta LITE (encender). Después de encender el quemador, haga girar la perilla para ajustar el tamaño de la llama.
Como usar su estufa de cubierta. GEAppliances.com Use sólo ollas tipo “wok” con fondo plano. Recomendamos que use sólo ollas tip “wok” con fondo plano. Se encuentran disponibles en la tienda de su localidad. Use sólo ollas tipo “wok” con fondo plano. No use ollas tipo “wok” con fondo plano con un soporte. No utilice ollas tipo “wok” con arillos de soporte.
Seguridad Módulos de quemadores y de asador. Su modelo puede tener otras características y apariencia que las ilustradas en este manual. Módulo de quemadores sellados Para instalar el módulo de quemadores: 1. Asegúrese de que las perillas de control estén en la posición de OFF (apagado). 2. Limpie el contenedor inferior de la estufa para retirar cualquier acumulación de grasa. Consulte la sección Cuidado y limpieza. Operación 3.
Para asar. GEAppliances.com • El ventilador funcionará automáticamente cuando el quemador del asador esté en uso. • Antes de utilizar el asador por primera vez, lave las parrillas del asador con agua caliente jabonosa. Enjuague y seque. • Al chorrearse la grasa, en ocasiones ésta se incendiará y despedirá aire o fuego por un segundo o dos. Esto es una parte normal del proceso de cocción. • Para una limpieza más fácil, rocíe las parrillas y el contenedor de los quemadores con una capa no pegajosa.
Seguridad Para asar. Consejos para asar • Con su asador, cualquier comida que haya considerado “de lo mejor” cuando se prepara al aire libre, ahora puede prepararse dentro de la casa con menos ajetreo y con un magnífico sabor. Operación • Las siguientes sugerencias son buenas reglas a seguir e incrementarán el placer de disfrutar de su equipo. Asegúrese de seguir las instrucciones de este manual en lo que se refiere al uso del asador.
Guía para asar. GEAppliances.com Seguridad Precaliente el asador en alto de 5 a 10 minutos para obtener un mejor sabor. Tipo Ajuste de control Procedimiento HI (alto) HI (alto) HI (alto) 6 a 10 minutos 10 a 16 minutos 21 a 24 minutos Voltee después 3 a 5 minutos.† Voltee después 5 a 8 minutos. Voltee después 6 a 12 minutos.
Seguridad Otros accesorios. Cubierta del asador La cubierta del asador de acero texturizado es atractiva para la sección del asador de la estufa cuando no está en uso. Para utilizar la cubierta del asador: Operación Quite la cubierta antes de calentar el asador. Puesto que la cubierta del asador no parece estar caliente, esto podría causar quemaduras accidentales en caso de que usted o alguien la toque. Calentar la cubierta del asador puede dañar el acabado.
Cuidado y limpieza. GEAppliances.com Antes de limpiar cualquier parte de la estufa, asegúrese de que todos los controles estén apagados y DESCONECTE LA ENERGIA ELECTRICA DE LA ESTUFA en la caja de fusibles o en el panel principal del interruptor del circuito de suministro de corriente, o desconecte el enchufe de corriente localizada debajo de la estufa y dentro de los gabinetes. No opere la estufa sin que estén colocadas todas las partes.
Cuidado y limpieza. Quemador del asador El quemador del asador deberá limpiarse siempre después de usarse. Puede limpiarse con una fibra de lana de acero o en la lavavajillas. Enjuague y seque perfectamente bien antes de volver a utilizarlo. Para manchas muy pegadas, primero deberá limpiarse el quemador con una fibra de acero remojada en agua jabonosa, enjuagada y secada. Luego, puede ponerse en un horno de autolimpieza durante dos horas. NOTA: Revise que todos los puertos de los quemadores estén abiertos.
GEAppliances.com Seguridad Ignitores Es importante mantener las aberturas del puerto de ignitores en los quemadores libres de obstrucciones para evitar fallas en la ignición y posible acumulación de gas. Si las aberturas del puerto están bloqueadas, use un alambre para retirar las partículas de alimentos. Accesorio de la plancha para asar Una vez que se haya enfriado la plancha, lave con jabón o detergente en agua caliente en el fregadero.
Instrucciones de instalación Estufa de cubierta a gas con tiro descendente ¿Preguntas? llame a 800.GE.CARES (800.432.2737) o visite nuestro sitio Web: GEAppliances.com INSTRUCCIONES IMPORTANTES DE SEGURIDAD En el Estado de Massachusetts: • Este producto lo debe instalar un plomero con licencia o un instalador de gas. • Al usar válvulas de cierre de gas de tipo esfera, no deben ser del tipo de manija en T. • Un conector de gas flexible, cuando se utilice, no debe superar los 3 pies.
Instrucciones de instalación LISTA DE PARTES PREPARANDOSE PARA LA INSTALACION • Unidad de base de la estufa de cubierta a gas • Paquete de literatura • 1 ensamblaje de quemador de superficie • 2 parrillas de los quemadores • 1 filtro de aire • 1 rejilla de aire • 1 recipiente para grasa JGP979 Apriete los pernos que están en cada extremo Regulador de presión Cubierta de la caja del cableado * La unidad de tiro descendente puede girarse 90 grados. Recipiente contenedor de grasa 287⁄8″ 1⁄16″ 73,34 .
Instrucciones de instalación ESPACIO MINIMO REQUERIDO 1 COMO INSTALAR LOS GABINETES EN LA PARTE SUPERIOR DE LA ESTUFA (cont.) Cuando instale una estufa de doble unidad de tiro en combinación con otra estufa de tiro, conserve entre las unidades el espacio mínimo que se muestra. Instalarlas demasiado cerca afectará su funcionamiento. Si los gabinetes se instalan en la parte superior de la estufa, deje una distancia mínima de 30″ (76,2 cm) entre la superficie para cocinar y la parte de abajo del gabinete.
Instrucciones de instalación 2 PREPARACION DE LA 4 PROPORCIONE EL SUMINISTRO SUPERFICIE Dimensiones del corte en la superficie ADECUADO DE GAS Parte trasera de la superficie Esta estufa está diseñada para funcionar solamiente con gas natural a 5″ (12,7 cm) de la presión de la columna de agua. Es para uso con gas natural únicamente y no es convertible a gas P.L. Se deberá conectar un regulador de presión en serie al múltiple de la estufa y deberá permanecer en serie con la línea de abastecimiento.
Instrucciones de instalación 6 PREPARACION PARA EL DUCTO 7 CONEXION DE GAS NOTA: El ducto DEBE desfogarse en el exterior. NO se desfogue en una pared, techo, espacios pequeños, ático o cualquier espacio cerrado. Determine la mejor ruta para el ducto, que puede colocarse en una gran variedad de formas, dependiendo de la distribución de la cocina. Arreglo típico del ducto de la serie de estufas en cubiertas.
Instrucciones de instalación 8 PLANEE LA TRAYECTORIA DEL aluminio. Si usa tubos de calidad inferior puede causar una restricción hasta del doble de lo que se muestra y eso representa un valor muy bajo. Consulte la sección Preparación para el ducto de esta guía para ver que otro tipo de tubería puede elegir. Los códigos locales pueden exigirle el uso de un material de mayor calibre o restringir el uso de PVC. 4.
Instrucciones de instalación Ejemplo 1 Ejemplo 2 Transición 5″ a 6″ Transición 5″ a 6″ 2′ de tubería recta de 6″ 2′ de tubería recta de 6″ Codo de 6″ Codo de 6″ 4′ de tubería recta de 6″ 4′ de tubería recta de 6″ Codo de 6″ 6′ de tubería recta de 6″ Codo de 6″ Codo de 6″ 4′ de tubería recta de 6″ 6′ de tubería recta de 6″ Tapa de pared de 31⁄4″ x 10″ Tapa de pared de 6″ Transición 6″ a 31⁄4″ x 10″ Longitud equivalente de las conexiones Número de las conexiones Total de longitud equivalente d
Instrucciones de instalación TABLA DE LONGITUD DEL DUCTO Conexiones de los ductos Codo de 90° de 8″ de diámetro Longitud equivalente de las conexiones del ducto Número de conexiones 5′ (1,52 m) Codo de 45° de 6″ de diámetro 2,5′ (0,76 m) Flujo de aire Transición de 5″ a 6″ (12,7 cm a 15,24 cm) 1′ (0,30 m) No se recomienda esta dirección para el flujo de aire.
Instrucciones de instalación 11 CONEXION ELECTRICA 12 REVISE EL ENCENDIDO Después de instalar la estufa, verifique la ignición de cada quemador. 1. Oprima una perilla y hágala girar hasta la posición de LITE (encender) (180° de OFF [apagado]). El piloto producirá chispas y se encenderá el quemador 2. Después de encender el quemador, haga girar la perilla hasta la posición de HI (alto) y el piloto dejará de producir chispas. 3. Haga girar la perilla hacia la posición de OFF (apagado).
Antes de llamar para solicitar servicio… GEAppliances.com Seguridad Solucionar problemas ¡Ahorre dinero y tiempo! Revise la siguiente tabla primero y quizás no tenga que llamar para solicitar servicio. Problema Causas posibles Qué hacer Los quemadores no encienden El enchufe de la estufa no está • Cerciórese de que el enchufe esté conectado en un completamente conectado en tomacorriente activo, correctamente conectado a tierra. el tomacorriente. • Consulte la sección Instrucciones de instalación.
Apoyo al consumidor Solucionar problemas Cuidado y limpieza Operación Seguridad Antes de llamar para solicitar servicio… Solucionar problemas Problema Causas posibles Qué hacer El sonido de chispa persiste después de haber apagado el quemador Cerciórese de que la perilla esté en la posición OFF. • Retire la perilla halándola en línea recta fuera del vástago y revise la parte de abajo de la perilla en busca de cualquier acumulación de suciedad.
Notas.
Apoyo al consumidor Solucionar problemas Cuidado y limpieza Operación Seguridad Notas.
Garantía de GE para su estufa de cubierta a gas. Peque aquí su recibo. Se requiere facilitar prueba de la fecha de compra original para obtener un servicio bajo la garantía. GE reemplazará: Un año A partir de la fecha de la compra original Cualquier parte de la estufa de cubierta a gas que falle debido a defectos en los materiales o en la fabricación.
Apoyo al Consumidor. Página Web de GE Appliances www.GEAppliances.com ¿Tiene alguna pregunta sobre su electrodoméstico? ¡Pruebe la página Web de GE Appliances 24 horas al día, cualquier día del año! Para mayor conveniencia y servicio más rápido, ya puede descargar los Manuales de los Propietarios, pedir piezas o incluso hacer una cita en línea para que vengan a realizar una reparación. También puede “Ask Our Team of Experts™” (Preguntar a nuestro equipo de expertos) sobre cualquier cuestión y mucho más...