Self-Cleaning Gas Ranges GEAppliances.com For a Spanish version of this manual, visit our Website at GEAppliances.com. Para consultar una version en español de este manual de instrucciones, visite nuestro sitio de internet GEAppliances.com. In Canada contact us at: www.GEAppliances.ca Safety Information . . . . . . . . . . . . 2 Warranty . . . . . . . . . . . . . . . . . . . . . . . . 8 Owner’s Manual Assistance / Accessories . . . . . . 9 Using The Cooktop Surface Burners . . . . . . . . . . . . . .
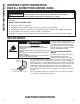
SAFETY INFORMATION IMPORTANT SAFETY INFORMATION. READ ALL INSTRUCTIONS BEFORE USING. WARNING If the information in this manual is not followed exactly, a fire or explosion may result, causing property damage, personal injury or death. - Do not store or use gasoline or other flammable vapors and liquids in the vicinity of this or any other appliance. - WHAT TO DO IF YOU SMELL GAS Ŷ Do not try to light any appliance. Ŷ Do not touch any electrical switch; do not use any phone in your building.
The California Safe Drinking Water and Toxic Enforcement Act requires the Governor of California to publish a list of substances known to the state to cause cancer, birth defects or other reproductive harm, and requires businesses to warn customers of potential exposure to such substances. WARNING This product contains one or more chemical known to the State of California to cause cancer, birth defects or other reproductive harm.
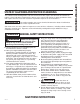
SAFETY INFORMATION IMPORTANT SAFETY INFORMATION. READ ALL INSTRUCTIONS BEFORE USING. WARNING GENERAL SAFETY INSTRUCTIONS (CONT.) Ŷ 1HYHU EORFN WKH YHQWV DLU RSHQLQJV RI WKH range. They provide the air inlets and outlets that are necessary for the range to operate properly with correct combustion. Air openings are located at the rear of the cooktop, at the top and bottom of the oven door, and at the bottom of the range under the warming drawer, lower oven drawer or kick panel.
Ŷ 'R QRW XVH ZDWHU RQ JUHDVH ILUHV 1HYHU SLFN XS a flaming pan. Turn the controls off. Smother a flaming pan on a surface burner by covering the pan completely with a well-fitting lid, cookie sheet or flat tray. If necessary, use a multi-purpose dry chemical or foam-type fire extinguisher. Ŷ ,I WKHUH LV D ILUH LQ WKH RYHQ GXULQJ EDNLQJ WXUQ the oven off and keep the door closed until the fire goes out. If necessary, use a multi-purpose dry chemical or foam type fire extinguisher.
SAFETY INFORMATION IMPORTANT SAFETY INFORMATION. READ ALL INSTRUCTIONS BEFORE USING. WARNING OVEN SAFETY INSTRUCTIONS WARNING NEVER cover any slots, holes, or passages in the oven bottom or cover an entire rack with materials such as aluminum foil or oven liners. Doing so blocks air flow through the oven and may cause carbon monoxide poisoning. Never place foil or oven liners on the oven bottom. They can trap heat causing risk of smoke or fire.
Ŷ The purpose of the warming drawer is to hold hot FRRNHG IRRGV DW VHUYLQJ WHPSHUDWXUH %DFWHULD ZLOO JURZ YHU\ UDSLGO\ LQ IRRG WKDW LV EHWZHHQ DQG ) 'R QRW SXW FROG IRRG LQ ZDUPLQJ drawer. Do not keep food in the warming drawer IRU PRUH WKDQ KRXUV )DLOXUH WR IROORZ WKHVH instructions may result in foodborne illness. Ŷ Do not leave paper products, plastics, canned food or combustible materials in the drawer. They may ignite.
WARRANTY Thank You! ... for your purchase of a GE Brand appliance. Register Your Appliance: Register your new appliance on-line at your convenience! ZZZ JHDSSOLDQFHV FRP VHUYLFHBDQGBVXSSRUW UHJLVWHU Timely product registration will allow for enhanced communication and prompt service under the terms of your warranty, VKRXOG WKH QHHG DULVH
7U\ WKH *( $SSOLDQFHV :HEVLWH www.geappliances.com/service_and_support/ KRXUV D GD\ DQ\ GD\ RI WKH \HDU )RU JUHDWHU FRQYHQLHQFH DQG IDVWHU VHUYLFH \RX FDQ QRZ GRZQORDG 2ZQHU¶V 0DQXDOV RUGHU SDUWV RU HYHQ schedule service on-line. Schedule Service: Expert GE repair service is only one must be exercised, since improper servicing may cause step away from your door. Get on-line and schedule your unsafe operation.
USING THE COOKTOP: Surface Burners Surface Burners How to Light a Surface Burner WARNING Burners should be operated only when covered by cookware. Burner flames not covered by cookware present a risk of fire or clothing ignition. Never let flames extend beyond the sides of the cookware. Failure to comply may result in serious injury. 0DNH VXUH DOO EXUQHUV DUH LQ WKHLU FRUUHFW ORFDWLRQV DQG fully assembled before attempting to operate any burner. Select a burner and find its control knob.
How to Light the Bridge Burner (on some models) WARNING Burner flames not covered by cookware present a risk of fire or clothing ignition. The bridge burner should be used only with the griddle in place. Failure to do so may result in serious injury. Ŷ 7KH IURQW DQG UHDU URXQG burners of the bridge burner Bridge can be operated individually Burner for cooking. Operation of the bridge burner to heat your Preseasoned Chef’s Griddle requires use of both front and rear burner knobs.
USING THE COOKTOP: Griddle Griddle (on some models) Using the Griddle (on some models) WARNING Ŷ Ŷ Ŷ Ŷ Fire Hazard The PREHEAT setting (on some models) is provided to quickly heat your griddle. Turn heat down before placing food on the griddle. Cooking at the PREHEAT setting may result in fire. Use care when cooking greasy foods. Spilled grease may result in fire. Never place any items on the griddle when it is not in use. Heat from surrounding burners can heat the griddle and may result in fire.
Using the Griddle (on some models) (Cont.) Placement of the Preseasoned Lodge Chef’s Griddle over Left Grate The Chef’s griddle can only be used resting on top of the left grate. Position the griddle over the left grate REVHUYLQJ WKH ³)URQW´ DQG ³%DFN´ LQGLFDWRUV VWDPSHG LQ the griddle. The bottom of the griddle should interlock securely with the fingers of the left grate. Do not turn on the bridge burner until you are certain the griddle has been positioned correctly.
USING THE OVEN: Oven Controls Oven Controls Non Convection 2 5 7 11 4 6 8 12 9 3 Convection 2 5 1 11 13 7 4 8 12 6 7 9 3 10 Convection and Remote Enable 2 1 14 5 10 11 13 12 4 8 7 6 9 14 3 49-85211-4
1. Convection Cooking Modes: Convection cooking modes use increased air circulation to improve performance. The type of benefit depends RQ WKH PRGH
USING THE OVEN: Special Features Special Features There are several different special features on your oven. To change the settings of these special features, press the Bake and Broil pads at the same time and hold for three seconds. "SF" will appear in the display. Select the feature you want to change. When the change has been made, press the Start key to save the change and return to the time of day.
USING THE OVEN: Cookware / Cooking Modes Cookware Cookware Guidelines The material, finish, and size of cookware affect baking performance. Dark, coated and dull pans absorb heat more readily than light, shiny pans. Pans that absorb heat more readily can result in a browner, crisper, and thicker crust. If using dark and coated cookware check food earlier than minimum cook time.
WARNING Consuming undercooked food can result in foodborne illness. Use probe according to the following instructions to ensure all portions of the food reach minimum safe cooking temperatures. Recommendations for minimum safe food temperatures can be found at www.foodsafety.gov or www.IsItDoneYet.gov. Internal food temperature is frequently used as an indicator of doneness, especially for roasts and poultry.
USING THE OVEN: Cooking Guide Cooking Guide RECOMMENDED MODE(S) RECOMMENDED RACK POSITION(S) ADDITIONAL SUGGESTIONS %DNH RU 8VH VKLQ\ FRRNZDUH /D\HU FDNHV RQ 0XOWLSOH Racks %DNH &RQYHFWLRQ 0XOWL %DNH DQG Ensure adequate airflow VHH LOOXVWUDWLRQ EHORZ 8VH H[WHQVLRQ UDFN LQ SRVLWLRQV &KLIIRQ FDNHV DQJHO IRRG %DNH 8VH VKLQ\ FRRNZDUH Cookies, biscuits, scones on a Single Rack %DNH RU 8VH VKLQ\ FRRNZDUH Cookies, biscuits, scones on 0XOWLSOH 5DFNV &RQYHFWLRQ 0XOWL %DNH
ITEM Breads, pies, pastries SETTING ADDITIONAL INFORMATION /2 Cover with a lid or aluminum foil.
CARE AND CLEANING: Cleaning The Oven Cleaning The Oven %H VXUH HOHFWULFDO SRZHU LV RII DQG DOO VXUIDFHV DUH FRRO EHIRUH FOHDQLQJ DQ\ SDUW RI WKH UDQJH Control Panel and Knobs Wipe the control panel after each use of the oven with a damp cloth. For cleaning, use mild soap and water or D VROXWLRQ RI YLQHJDU DQG ZDWHU 5LQVH ZLWK FOHDQ water. Polish dry with a soft cloth.
Oven Interior (Cont.) Self Clean Mode Read Self-Cleaning Oven Safety Instructions at the EHJLQQLQJ RI WKLV PDQXDO EHIRUH XVLQJ 6HOI &OHDQ 0RGH Self clean uses very high temperatures to clean the oven interior. The oven door will lock when using this IHDWXUH %HIRUH RSHUDWLQJ WKH VHOI FOHDQ F\FOH SUH ZDVK inner door and inside window before self-cleaning. Wipe inner black door before self clean.
CARE AND CLEANING: Cleaning The Cooktop 24 Cleaning The Cooktop Removal of Surface Burners for Cleaning Turn all controls OFF. Allow cooktop to cool before removing grates and burner parts. When removing the burner caps and heads, remember their size and location. Replace them in the same location after cleaning. CAUTION Do not attempt to remove bridge burner, oval burner or tri-ring burner caps from burner heads.
Cleaning The Burners Burner Caps Wash burner caps in hot, soapy water and rinse with FOHDQ ZDWHU
CARE AND CLEANING: Cleaning The Cooktop Cleaning The Cooktop (Cont.) Burner Grates Grates should be washed in hot, soapy water and rinsed with clean water. To soften burned-on food, SODFH JUDWHV LQ D SODVWLF EDJ FRQWDLQLQJ ó FXS RI household ammonia for several hours. Afterward, scrub grates with a plastic scouring pad soaked in hot, soapy water. Rinse well and dry. When replacing the grates, be sure to locate them correctly on the cooktop.
To clean the inside of the door Do not allow excess water to run into any holes or slots in the door. Wipe dishwashing detergent over any baked-on spatters RQ WKH JODVV 8VH D VLQJOH VLGHG VDIHW\ UD]RU EODGH WR clean it off. Then wipe over the glass with a soapy cloth to remove any residue and dry off. The area outside the gasket can be cleaned with a soap-filled plastic scouring pad. The gasket is designed with a gap at the bottom to allow for proper air circulation.
CARE AND CLEANING: Maintenance Maintenance Oven Light Replacement WARNING SHOCK OR BURN HAZARD: %HIRUH UHSODFLQJ RYHQ OLJKW EXOE GLVFRQQHFW WKH HOHFWULFDO power to the oven at the main fuse or circuit breaker panel. Failure to do so may result in electric shock or burn. CAUTION BURN HAZARD: The glass cover and bulb should be removed when cool. Touching hot glass with bare hands or a damp cloth can cause burns. NOTE: The glass cover should be removed only when cold.
Save time and money! Review the charts on the following pages first and you may not need to call for service. Problem Possible Cause What To Do My new oven doesn't cook like my old one. Is something wrong with the temperature settings? Your new oven has a different cooking system from your old oven and therefore may cook differently than your old oven. For the first few uses, follow your recipe times and temperatures carefully.
TROUBLESHOOTING TIPS 30 Troubleshooting tips ... Before you call for service Problem Possible Cause What To Do Oven light does not work Light bulb is loose or defective. Tighten or replace bulb. Pad operating light is broken. Call for service. Oven will not self-clean The temperature is too high to set a self-clean operation. Allow the oven to cool and reset the controls. Oven controls improperly set. See the Cleaning the Oven section.
Problem Possible Cause What To Do Top burners do not light or do not burn evenly. (The front right burner is designed to have slightly smaller flames between the 6 and 9 o’clock positions. This is normal.) Plug on range is not completely inserted in the electrical outlet. 0DNH VXUH HOHFWULFDO SOXJ LV SOXJJHG LQWR D OLYH SURSHUO\ JURXQGHG outlet. Burner slits on the side of the burner may be clogged. Remove the burners and clean them. Check the electrode area for burned-on food or grease.
TROUBLESHOOTING TIPS Troubleshooting tips ... Before you call for service Problem Possible Cause What To Do Drawer does not slide smoothly or drags The drawer is out of alignment. Fully extend the drawer and push it all the way in. See the Care and cleaning of the range section. Drawer is over-loaded or load is unbalanced. Reduce weight. Redistribute drawer contents. A fuse in your home may be blown or the circuit breaker tripped. Replace the fuse or reset the circuit breaker.
a Gas con Función de Auto Limpieza Cocinas GEAppliances.com Información de Seguridad . . . . 2 Garantía . . . . . . . . . . . . . . . . . . . . . . . . . 8 Manual del Propietario Asistencia / Accesorios . . . . . . . . 9 Uso de la Placa de Cocción Quemadores . . . . . . . . . . . . . . . . . . . . . .10 Plancha . . . . . . . . . . . . . . . . . . . . . . . . . . .12 Uso del Horno Controles del Horno . . . . . . . . . . . . . . .14 Funciones Especiales . . . . . . . . . . . . . .
INFORMACIÓN DE SEGURIDAD INFORMACIÓN IMPORTANTE DE SEGURIDAD LEA TODAS LAS INSTRUCCIONES ANTES DE USAR ADVERTENCIA Si la información de este manual no se sigue exactamente, se podrá producir un incendio o explosión, ocasionando daños sobre la propiedad, lesiones o la muerte. - No guarde ni use gasolina u otros vapores inflamables y líquidos cerca de este ni de otros electrodomésticos.
/D /H\ VREUH $JXD 3RWDEOH ,QRFXD \ 7UDWDPLHQWR GH 5HVLGXRV 7y[LFRV GH &DOLIRUQLD &DOLIRUQLD 6DIH 'ULQNLQJ :DWHU DQG 7R[LF (QIRUFHPHQW $FW VROLFLWD DO *REHUQDGRU GH &DOLIRUQLD TXH SXEOLTXH XQD OLVWD GH VXVWDQFLDV TXH HO HVWDGR UHFRQRFH TXH SURGXFHQ FiQFHU GHIHFWRV GH QDFLPLHQWR X RWURV GDxRV UHSURGXFWLYRV \ VROLFLWD D ORV HPSUHVDULRV TXH DGYLHUWDQ D VXV FOLHQWHV VREUH OD SRVLEOH H[SRVLFLyQ D WDOHV VXVWDQFLDV ADVERTENCIA Este producto contiene uno o más químicos que el Estado de California entiende T
INFORMACIÓN DE SEGURIDAD INFORMACIÓN IMPORTANTE DE SEGURIDAD LEA TODAS LAS INSTRUCCIONES ANTES DE USAR ADVERTENCIA INSTRUCCIONES GENERALES DE SEGURIDAD (CONT.
EN CASO DE INCENDIO, SIGA LOS SIGUIENTES PASOS PARA EVITAR LESIONES O LA PROPAGACIÓN DEL FUEGO Ŷ 1 R XVH DJXD VREUH HO IXHJR GH OD JUDVD 1XQFD tome una olla que se esté incendiando. Apague los FRQWUROHV ([WLQJD OD ROOD TXH VH HVWp LQFHQGLDQGR VREUH XQ TXHPDGRU VXSHUILFLDO FXEULHQGR OD ROOD FRPSOHWDPHQWH FRQ VX WDSD FRUUHVSRQGLHQWH XQD KRMD PHWiOLFD GH JDOOHWDV R XQD EDQGHMD SODQD 6L HV QHFHVDULR XVH XQ TXtPLFR VHFR PXOWLXVR R XQ H[WLQWRU de chorro de espuma.
INFORMACIÓN DE SEGURIDAD INFORMACIÓN IMPORTANTE DE SEGURIDAD LEA TODAS LAS INSTRUCCIONES ANTES DE USAR ADVERTENCIA INSTRUCCIONES DE SEGURIDAD ADVERTENCIA NUNCA cubra ninguna ranura, agujeros o pasajes en el fondo del horno ni cubra un estante entero con materiales tales como papel de aluminio o cobertores de horno. Hacer esto bloquea el flujo de aire a través del horno y puede ocasionar envenenamiento con monóxido de carbono. Nunca coloque papel de aluminio o cobertores de horno en el fondo del horno.
INSTRUCCIONES DE SEGURIDAD DEL CAJÓN CALENTADOR/ CAJÓN DEL HORNO INFERIOR (Algunos modelos) Ŷ ( O SURSyVLWR GHO FDMyQ FDOHQWDGRU HV PDQWHQHU ODV comidas cocinadas a temperatura para servir. Las bacterias crecen de forma muy rápida en las comidas con temperaturas entre 40° F y 140°F. No coloque comida fría en el cajón calentador. No guarde comida HQ HO FDMyQ FDOHQWDGRU SRU PiV GH KRUDV 6L QR VH VLJXHQ HVWDV LQVWUXFFLRQHV VH SRGUiQ SURGXFLU enfermedades generadas en la comida.
GARANTÍA ¡Gracias! ...
£&RQVXOWH HO 6LWLR :HE GH (OHFWURGRPpVWLFRV GH *( www.geappliances.com/service_and_support/ GXUDQWH ODV KRUDV FXDOTXLHU GtD GHO DxR 3DUD PD\RU FRQYHQLHQFLD \ XQ VHUYLFLR PiV UiSLGR DKRUD SXHGH GHVFDUJDU HO 0DQXDO GHO 3URSLHWDULR RUGHQDU piezas o incluso programar el servicio técnico a través de Internet.
USO DE LA PLACA DE COCCIÓN: Quemadores Quemadores Cómo Encender un Quemador Superficial de Gas ADVERTENCIA Los quemadores sólo deben ser usados cuando estén cubiertos por los utensilios. Las llamas de los quemadores que no estén cubiertas por el utensilio presentan un riesgo de incendio o incendio de telas. Nunca permita que las llamas se extiendan más allá de los costados del utensilio. Si esto no se cumple, se podrán producir lesiones graves.
Cómo Iluminar el Quemador del Puente (en algunos modelos) ADVERTENCIA Las llamas de los quemadores que no estén cubiertas por el utensilio presentan un riesgo de incendio o incendio de telas. El quemador del puente se deberá usar sólo cuando se coloque la plancha. Si esto no se cumple, se pueden sufrir lesiones graves. Ŷ /RV TXHPDGRUHV UHGRQGRV Bridge frontal y trasero del quemador Burner del puente pueden ser usados de forma individual para cocinar.
USO DE LA PLACA DE COCCIÓN: Plancha Plancha (en algunos modelos) Uso de la plancha (en algunos modelos) ADVERTENCIA Riesgo de Incendio Ŷ La configuración PREHEAT (Precalentar) (en algunos modelos) se brinda para precalentar la plancha de forma rápida. Apague el control antes de colocar comida en la plancha. La cocción en la configuración PREHEAT (Precalentar) puede ocasionar un incendio. Ŷ Tenga cuidado al cocinar comidas con grasa. La grasa esparcida puede provocar un incendio.
Uso de la plancha (en algunos modelos) (Cont.) Cómo Colocar la Plancha Precurada con Tapa del Chef sobre la rejilla izquierda. La plancha del Chef sólo se puede usar apoyándola sobre la UHMLOOD L]TXLHUGD 3RVLFLRQH OD SODQFKD VREUH OD UHMLOOD L]TXLHUGD REVHUYDQGR ODV LQGLFDFLRQHV GH ³)5217$/´ \ ³75$6(52´ colocadas en la plancha. La parte inferior de la plancha se debería ajustar de forma segura con los dedos de la rejilla izquierda.
USO DEL HORNO: Controles del Horno Controles del Horno Non Convection (Sin Convección) 2 5 7 11 4 6 8 12 9 3 Convection (Convección) 2 5 1 11 13 7 4 8 12 6 7 9 3 10 Convección y Acceso Remoto 2 1 14 5 10 11 13 12 4 8 7 6 9 14 3 49-85211-4
1. Convection Cooking Modes (Modos de Cocción por Convección): Los modos de cocción por convección 10. Probe (Sonda): 0RQLWRUHD OD WHPSHUDWXUD LQWHUQD GH la comida y apaga el horno cuando la comida alcanza la WHPSHUDWXUD SURJUDPDGD ,QVHUWH OD VRQGD SURJUDPH HO PRGR GH FRFFLyQ \ SURJUDPH OD WHPSHUDWXUD GH OD VRQGD 3DUD PiV LQIRUPDFLyQ FRQVXOWH OD VHFFLyQ GH 0RGRV GH Cocción.
USO DEL HORNO: Funciones especiales Funciones especiales ([LVWHQ YDULDV IXQFLRQHV HVSHFLDOHV HQ VX KRUQR 3DUD PRGLILFDU ODV FRQILJXUDFLRQHV GH HVWDV IXQFLRQHV HVSHFLDOHV PDQWHQJD SUHVLRQDGDV las teclas Bake (Hornear) y Broil (Asar) DO PLVPR WLHPSR GXUDQWH WUHV VHJXQGRV 6) DSDUHFHUi HQ OD SDQWDOOD 6HOHFFLRQH OD IXQFLyQ TXH GHVHH PRGLILFDU 8QD YH] UHDOL]DGR HO FDPELR SUHVLRQH OD WHFOD Start (Iniciar) para guardar dicho cambio y regrese a la hora del día.
(O KRUQR FXHQWD FRQ VHLV SRVLFLRQHV GH HVWDQWHV (Q OD *XtD GH &RFFLyQ VH EULQGDQ UHFRPHQGDFLRQHV GH SRVLFLRQHV GH ORV HVWDQWHV SDUD GLIHUHQWHV WLSRV GH FRPLGDV 6H DMXVWD un estante en una dirección para afectar los resultados de FRFFLyQ 3RU HMHPSOR VL VH SUHILHUHQ SDUWHV VXSHULRUHV PiV RVFXUDV HQ WDUWDV SDQHFLOORV R JDOOHWDV SUXHEH PRYLHQGR la comida a un estante que se encuentre una posición más DUULED 6L HQFXHQWUD TXH ODV FRPLGDV HVWiQ GHPDVLDGR GRUDGDV HQ OD SDUWH VXSHULRU SUXHEH PRYLHQGR
USO DEL HORNO: Utensilios / Modos de Cocción Utensilios Pautas de Uso de Utensilios (O PDWHULDO HO DFDEDGR \ HO WDPDxR GH ORV XWHQVLOLRV DIHFWDQ HO horneado. /DV ROODV RVFXUDV UHYHVWLGDV \ RSDFDV DEVRUEHQ HO FDORU PiV rápidamente que las ollas claras y brillantes.
ADVERTENCIA El consumo de comida semicruda puede hacer que se contraigan enfermedades producidas por la comida. Use la sonda de acuerdo con las siguientes instrucciones, a fin de asegurar que todas las partes de la comida alcancen temperaturas de cocción mínimamente seguras. Puede encontrar recomendaciones de temperaturas de cocción mínimamente seguras en www.foodsafety.gov o en www.IsItDoneYet.gov.
USO DEL HORNO: Guía de Cocción Guía de Cocción MODO(S) RECOMENDADO(S) POSICIÓN(ES) DE ESTANTES RECOMENDADA SUGERENCIAS ADICIONALES 7RUWDV FRQ FDSDV WRUWDV UHFWDQJXODUHV URVFDV SDQHFLOORV SDQ UiSLGR HQ XQ 6ROR (VWDQWH Hornear R 8VH XWHQVLOLRV EULOODQWHV 7RUWDV FRQ FDSDV HQ 0~OWLSOHV Estantes Hornear Horneado Múltiple por Convección 2y4 $VHJ~UHVH GH TXH KD\D XQ IOXMR GH DLUH DGHFXDGR 9HD OD LOXVWUDFLyQ 8VH HO HVWDQWH H[WHQVLEOH HQ ODV SRVLFLRQHV TIPO DE COMIDA Productos Horneado
ARTÍCULO Panes, tartas, masas CONFIGURACIÓN INFORMACIÓN ADICIONAL %$-2 Cubra con una tapa o papel de aluminio. Tapa de ventilación para permitir que la humedad salga. 0(',2 Cazuelas $/72 Chiles/ Estofado Carnes $/72 Panqueques %$-2 Cubra con una tapa o papel de aluminio.
CUIDADO Y LIMPIEZA: Limpieza del Horno Limpieza del Horno $VHJ~UHVH GH TXH OD FRUULHQWH HOpFWULFD HVWp DSDJDGD \ TXH WRGDV ODV VXSHUILFLHV HVWpQ IUtDV DQWHV GH OLPSLDU FXDOTXLHU SDUWH GH OD FRFLQD Panel de Control y Perillas Limpie el panel de control luego de cada uso del horno con XQD WHOD K~PHGD 3DUD OLPSLDU XVH MDEyQ VXDYH \ DJXD R XQD solución que sea mitad de vinagre y mitad de agua. Enjuague con agua limpia. Pula en seco con una tela suave.
Interior del Horno (Cont.) Modo de Limpieza Automática /HD ODV ,QVWUXFFLRQHV GH 6HJXULGDG GHO +RUQR FRQ /LPSLH]D $XWRPiWLFD HQ HO FRPLHQ]R GH HVWH PDQXDO DQWHV GH XVDU HO PRGR 6HOI &OHDQ /LPSLH]D $XWRPiWLFD (VWH PRGR XVD temperaturas muy altas para limpiar el interior del horno. &XDQGR XVH HVWD IXQFLyQ OD SXHUWD GHO KRUQR VH WUDEDUi $QWHV GH XWLOL]DU HO FLFOR GH OLPSLH]D DXWRPiWLFD UHDOLFH XQD limpieza previa de la parte interna de la puerta y de la ventana interna.
CUIDADO Y LIMPIEZA: Limpieza de la Placa de Cocción 24 Limpieza de la Placa de Cocción Retiro de los Quemadores para su Limpieza APAGUE todos los controles. Espere a que la placa de cocción se enfríe antes de retirar las rejillas y las partes del quemador. Al UHWLUDU ODV WDSDV \ FDEH]DV GH ORV TXHPDGRUHV UHFXHUGH VX WDPDxR \ XELFDFLyQ 9XHOYD D FRORFDUORV HQ VXV PLVPDV XELFDFLRQHV luego de la limpieza.
Limpieza de los Quemadores Tapas de los Quemadores Lave las tapas de los quemadores en agua caliente con jabón y enjuague con agua limpia. Puede fregar con una base de fregado plástica para eliminar partículas de comida quemadas. Las tapas redondas también se pueden limpiar en un lavavajillas. Cabezas de los Quemadores /LPSLH ODV FDEH]DV GH ORV TXHPDGRUHV GH IRUPD UXWLQDULD HVSHFLDOPHQWH OXHJR GH GHUUDPHV LPSRUWDQWHV TXH SRGUtDQ bloquear las aberturas.
CUIDADO Y LIMPIEZA: Limpieza de la Placa de Cocción Limpieza de la Placa de Cocción (Cont.) Parrillas de Quemadores Las rejillas se deberán lavar con agua caliente y jabón y deberán ser enjuagadas con agua limpia. Para ablandar la FRPLGD TXHPDGD FRORTXH ODV UHMLOODV HQ XQD EROVD SOiVWLFD TXH FRQWHQJD ó GH WD]D GH DPRQtDFR KRJDUHxR GXUDQWH YDULDV KRUDV /XHJR IULHJXH ODV UHMLOODV FRQ XQ HVWURSDMR GH SOiVWLFR con agua caliente y jabón. Enjuague a fondo y seque.
Para limpiar el interior de la puerta 1R SHUPLWD TXH HO H[FHGHQWH GH DJXD HQWUH D QLQJ~Q DJXMHUR R ranuras de la puerta. Aplique detergente para lavar platos sobre cualquier VDOSLFDGXUD TXH KD\D VREUH HO YLGULR GHELGR DO KRUQHDGR 8VH el filo de una navaja del lado seguro para despejarlo. Luego limpie el vidrio con una tela con jabón para eliminar cualquier residuo y seque. El área fuera de la junta se puede limpiar con una almohadilla para fregar de plástico con jabón.
CUIDADO Y LIMPIEZA: Mantenimiento Mantenimiento Reemplazo de la Lámpara del Horno ADVERTENCIA PELIGRO DE DESCARGA O QUEMADURAS: Antes de reemplazar la lámpara de luz GHO KRUQR GHVFRQHFWH OD FRQH[LyQ HOpFWULFD GHO KRUQR GHO IXVLEOH SULQFLSDO R GHO SDQHO GHO GLV\XQWRU 6L HVWR QR VH FXPSOH VH SRGUi SURGXFLU XQD GHVFDUJD HOpFWULFD R XQ LQFHQGLR PRECAUCIÓN RIESGO DE INCENDIO: La tapa de vidrio y la lámpara de luz se deberán retirar cuando HVWpQ IUtDV 7RFDU HO YLGULR FDOLHQWH VLQ SURWHFFLyQ HQ ODV PDQR
¡Ahorre tiempo y dinero! Primero revise los cuadros que aparecen en las siguientes páginas y es posible que no necesite solicitar reparaciones. Problema Causa Posible Qué Hacer Mi horno nuevo no cocina como el anterior. ¿Hay algún problema con las configuraciones de temperatura? Su horno nuevo cuenta con un sistema de cocción diferente con relación al anterior y, por lo tanto, es posible que cocine de forma diferente.
CONSEJOS PARA LA SOLUCIÓN DE PROBLEMAS Consejos para la Solución de Problemas... Antes de solicitar el servicio técnico Problema Causa Posible Qué Hacer La luz del horno no funciona La lámpara está floja o presenta defectos. Ajuste o reemplace la lámpara. La luz de funcionamiento del interruptor está rota. Llame al servicio técnico. El modo de limpieza automática del horno no funciona La temperatura del horno es demasiado caliente como para configurar la limpieza automática.
Problema Causa Posible Qué Hacer Los quemadores no se encienden o no queman de forma pareja. (El quemador frontal derecho está diseñado para que sus llamas sean un poco más pequeñas entre las posiciones de las 6 y las 9 en punto. Esto es normal). El enchufe en la cocina no está completamente insertado en el tomacorriente eléctrico. $VHJ~UHVH GH TXH HO FDEOH GH HOHFWULFLGDG HVWp HQFKXIDGR HQ XQ tomacorriente correctamente conectado a tierra. Las hendiduras al costado del quemador se podrán atascar.
CONSEJOS PARA LA SOLUCIÓN DE PROBLEMAS 32 Consejos para la Solución de Problemas... Antes de solicitar el servicio técnico Problema Causa Posible Qué Hacer El cajón no se desliza de forma pareja o se arrastra El cajón está desalineado. ([WLHQGD WRWDOPHQWH HO FDMyQ \ HPSXMH HO PLVPR WRWDOPHQWH KDFLD adentro. Consulte la sección Cuidado y limpieza de la cocina. El cajón está sobrecargado o la carga está desbalanceada. Reduzca el peso. Redistribuya los contenidos del cajón.