
Installation Instructions

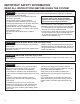

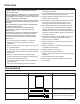
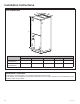
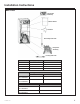
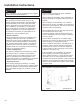
Table Of Contents

31-5000486 Rev. 2 3
Thank you for purchase this product from GE Appliances, a Haier
company. This installation manual will help you to get the best
performance.
For future reference, record the model and serial number located on
the label on the side of your air conditioner, and the date of purchase.
Staple your proof of purchase to this manual to aid in obtaining
warranty service if needed.
_______________________________________
Model number
_______________________________________
Serial number
_______________________________________
Date of purchase
To register your new air handler, go to
http://www.haierductless.com/product-registration and input the
model/serial number information on this page. To receive a 10-year
compressor and parts warranty, registration is required within 60
days of installation.
Table of Contents
Record Keeping
SAFETY INFORMATION .........................................................................4
OVERVIEW ...................................................................................6
ACCESSORIES. . . . . . . . . . . . . . . . . . . . . . . . . . . . . . . . . . . . . . . . . . . . . . . . . . . . . . . . . . . . . . . . . . . . . . . . . . . . . . . .6
REQUIRED TOOLS FOR INSTALLATION ...........................................................7
UNIT DIMENSIONS ............................................................................8
MAIN PARTS .................................................................................9
INSTALLATION INSTRUCTIONS ................................................................ 10
CONVENTIONAL LINE SET INSTALLATION ....................................................... 11
REFRIGERANT LINE INSTALLATION .............................................................11
INSTALL CONDENSATE DRAIN .................................................................12
ELECTRICAL REQUIREMENTS .................................................................13
DUCT SYSTEM ...............................................................................13
HEATER KIT .................................................................................14
ELECTRICAL CONNECTIONS ..................................................................14
THERMAL EXPANSION VALVE ................................................................. 15
THERMOSTAT CONNECTION .................................................................. 16
AIR FLOW ADJUSTMENT INSTRUCTIONS FOR CONNECT SERIES ................................... 18
FINAL CHECK ................................................................................19
TROUBLESHOOTING .........................................................................19
LIMITED WARRANTY ......................................................................... 21