
Use and Care Guide
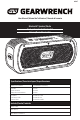


1. Power - Power On/Off
2. Mode - Toggle Modes
3. Prev - Previous Track
4. Play/Pause
5. Next - Next Track
6. Minus (-) - Volume Down/Previous Preset Station
7. Plus (+) - Volume Up/Next Preset Station
8. Call - Accept/End Calls
1 2
3
4
5
6
7
8
Charging and Powering On
Charging
The charging port is accessible under the removable
rubber cover on the back of the GEARWRENCH radio. The
charging port is labeled “DC IN”.
When the GEARWRENCH radio is charging, the red LED
indicator light next to the charging port will be lit. When
the GEARWRENCH radio is fully charged, the red LED
indicator light will turn off.
We recommend fully charging the GEARWRENCH radio for
3 hours before first use.
Powering on and off
To power on, press and hold the power button until the
LCD screen lights up and you hear the GEARWRENCH radio
announce that it has powered on.
To power off, press and hold the power button until you hear
the GEARWRENCH radio announce that it is powering off.
Checking Battery Level
During normal use, your GEARWRENCH radio will have two
battery indicators on the LCD screen, one near the top of
the screen, and one near the bottom of the screen.
During recharging, these symbols will alternately light up.
When the battery level is below 3.5V, the bottom symbol
on the LCD screen will begin flashing. The speakers will
also audibly announce “battery low.”
When the battery level is below 3.3V for more than one
minute, the radio will automatically shut down.
Switching Modes
Short press the mode button to toggle between modes. By
default, this GEARWRENCH radio will start in Bluetooth mode
when it is turned on. The toggle order for modes is
Bluetooth -> SD card mode -> FM radio mode -> AUX mode.
This GEARWRENCH radio has voice prompts that will
announce each mode as they are toggled through.
AUX Mode
When your GEARWRENCH radio is in AUX mode, “AUX” will
be displayed in the bottom left corner of the LCD screen.
Using a 3.5mm AUX cable, insert one end of the cable into
the AUX port on the radio, and the other into your phone
or tablet’s AUX port. Use the +/- buttons to control the
playback volume.
If you are using a compatible device, you can use the
Play/Pause button on your GEARWRENCH radio to control
the playback of music from your device.
microSD Card Playback
When the GEARWRENCH radio is set to play MP3 files from
a microSD card, “MP3” will be displayed in the top left
corner of the LCD screen.
You can use the controls on the GEARWRENCH radio to
control your microSD card playback. Press the Play/
Pause button to stop and start playback of the current
track. Use the Prev/Next buttons to switch between
tracks. Use the +/- buttons to control the playback
volume.
Note: This radio will play music recorded in MP3, APE, MAV,
and FLAC formats only. Maximum supported capacity for
microSD cards is 128GB.
1 2
3
4
5
6
7
8
Bluetooth Pairing and Playback
When Bluetooth mode is active, the Bluetooth symbol will
be displayed in the top right corner of the LCD screen. By
default, this GEARWRENCH radio starts in Bluetooth mode
each time that it is powered on. The radio will audibly
announce that it is ready to pair.
On your Bluetooth-enabled device, search in your
Bluetooth settings menu for a device called
“GEARWRENCH” and connect with that device.
The GEARWRENCH radio will audibly announce when it has
successfully paired.
Answering Phone Calls
The built-in microphone in your GEARWRENCH radio allows
it to function as a speakerphone. When the GEARWRENCH
radio is paired with a smartphone, the speaker will play a
ringing tone when there is an incoming call. Press the call
button once to accept the incoming call.
Press the call button twice to reject the incoming call.
During the call, you can adjust the volume of the call with
the +/- buttons. Short press the Play/Pause key to toggle
muting the microphone.
To end a call, press the call button once during the call. To
redial the most recently dialed number, double press the
call button.
Note: In handshake mode, phone calls will only be
answerable on the host radio.
Bluetooth Handshake Mode
(pairing a 2nd GEARWRENCH radio)
If you have purchased a 2nd GEARWRENCH radio (of the
same model), you can play music via Bluetooth from one
device to both radios at the same time.
The radio that you connect to your smartphone or tablet
is the “host radio”. To activate handshake mode, turn on
your host radio, and pair with it as you would a regular
Bluetooth speaker.
After you’ve successfully paired your device to the host
radio, turn on your second GEARWRENCH radio, which is
called the guest radio. Make sure that the guest radio is
in Bluetooth mode, and is ready to pair.
Now, press and hold the Play/Pause button for at least
3 seconds until you hear a sound from the guest radio,
which indicates that the handshake pairing is completed.
To disable the handshake pairing, press and hold the Play/
Pause button for 3 seconds on the host radio.
If handshake pairing is not manually disabled, the next
time that both radios are turned on and are in range of
each other, handshake pairing will automatically
reconnect the two radios.
Note: In handshake mode, phone calls will only be
answerable on the host radio.
FM Radio Mode
Once you have switched into FM radio mode, “FM” will be
displayed in the bottom right corner of the LCD screen.
Short press the Play/Pause button to begin auto-seeking
for stations. Each time a station is found, the radio will stop
on that station. To store a station in memory as a preset,
long press the Play/Pause button. To continue to search
for the next station, short press the Play/Pause button.
This GEARWRENCH radio stores up to 6 stations as presets,
numbered P01 through P06. The favorites are filled in
order, so your first saved station will be P01, your second
saved station will be P02, etc.
You can switch between your stored favorite stations with
the Prev and Next buttons. This radio does not support
manual station tuning.
Once you have filled up all 6 presets, and want to store
a new set of stations, put the radio into auto-seek mode
with Play/Pause. When the radio stops on a desired
station, long press Play/Pause, and you will see “DELE”
displayed on the LCD display. Now, all the preset stations
will be cleared. The next station you save will be in P01.
Use the +/- buttons to control the playback volume.