
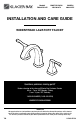
Installation Guide

Installation (continued)
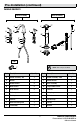
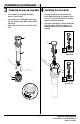
P
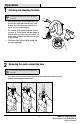
1
2
3
L
M
N
O
Loop toward
rear of sink
Loop toward
front of sink
□ Insert the drain assembly (M) and rubber
washer (L) into the sink.
□ Secure the drain assembly (M) in place under
the sink using the large rubber washer (N) and
lock nut (O).
□ Opening for ball rod must face towards rear of
sink.
□ Insert the plunger (P) into the sink with the
plastic loop of the plunger (P) facing the rear of
the sink. This ensures the plunger is in locked
mode and cannot be removed.
□ If you place the plunger (P) with the plastic loop
facing the front of the sink, the plunger is in
unlocked mode and can be removed for easy
cleaning.
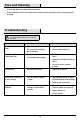
3
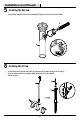
Preparing the pop-up assembly
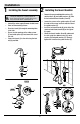
4
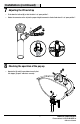
Installing the drain body
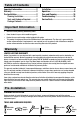
HOMEDEPOT.COM/GLACIERBAY
Please contact 1-855-HD-GLACIER for
further assistance.
5