& Companion Companion II Companion II Golden Tehcnologies • 401 Bridge Street • Old Forge, PA 18518 • Tel: 800.624.6374• Fax: 800.628.5165 • www.goldentech.
Thank you for purchasing your Companion Scooter. We are honored you have chosen Golden Technologies for your mobility needs. Please note, unless otherwise specified, the term Companion is to refer to each of the models listed below: Companion I – 3 wheel scooters GC222 – 300 lb. load capacity GC223 – 300 lb. load capacity Companion II – 3 wheel scooters GC323 – 300 lb. load capacity GC322 – 350 lb. load capacity GC325 – 350 lb. load capacity Companion II – 4 wheel scooters GC421 - 350 lb.
Companion Owner's Manual: GC222, GC223, GC322, GC323, GC325, GC421 CONTENTS I. INTRODUCTION....................................................................................... 2 II. SAFETY.................................................................................................... 3 III. EMI/RFI................................................................................................... 7 IV. YOUR GOLDEN COMPANION ..................................................................
Companion Owner's Manual: GC222, GC223, GC322, GC323, GC325, GC421 INTRODUCTION Congratulations on the purchase of your new Golden Companion scooter. The Companion, the Companion II, and the four-wheel Companion II all combine cutting edge technology with attractive designs that are also highly functional in today’s world. We at Golden Technologies, Inc.
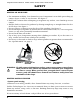
Companion Owner's Manual: GC222, GC223, GC322, GC323, GC325, GC421 SAFETY Your Golden Companion is a battery-operated personal mobility vehicle. Please exercise caution and consideration when you are operating it. Driving your Companioncarefully and thoughtfully will help ensure your personal safety and the safety of other people. NOTE: Before learning to operate your Companion, have your authorized Golden Technologies, Inc.
Companion Owner's Manual: GC222, GC223, GC322, GC323, GC325, GC421 SAFETY DRIVING ON AN INCLINE • For maximum stability, lean forward in your Companion’s seat while proceeding up ramps, slopes, curbs, or any low rise. See figure 1. • Drive with caution when attempting to negotiate any incline, even handicap access ramps. • Always climb or descend a gradient by driving straight up or straight down the face of the slope. See figure 1. • Do not traverse or drive across the face of the gradient. See figure 2.
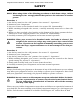
Companion Owner's Manual: GC222, GC223, GC322, GC323, GC325, GC421 SAFETY NOTE: When using either of the following procedures to back down a slope, Golden Technologies, Inc. strongly advises that you have the assistance of another person. Procedure 1 1. Set the key switch to the “Off” position. See section V. “Operation.” 2. Dismount your Companion. 3. Put your scooter in the freewheel mode. See section VII. “Disassembly.” 4.
Companion Owner's Manual: GC222, GC223, GC322, GC323, GC325, GC421 SAFETY all things, especially motor operated vehicles, observing a few rules and safety considerations will help ensure safe scooter operation. So please follow the rules below. NOTE: Please remember that while on your Golden Companion, you are a motorized pedestrian. You must observe and obey all pedestrian rules and regulations for the locale in which you are riding.
Companion Owner's Manual: GC222, GC223, GC322, GC323, GC325, GC421 EMI/RFI The rapid development of electronics, especially in the area of communications, has saturated our environment with electromagnetic (radio) waves that are emitted by television transmitters, cellular phones, citizen’s band radios (CBs), amateur radios (ham radios), wireless computer links, microwave transmitters, paging transmitters, etc.
Companion Owner's Manual: GC222, GC223, GC322, GC323, GC325, GC421 YOUR GOLDEN COMPANION Control Panel HANDGRIP THUMB LEVERS Tiller Tiller AdjustMENT LEVER Arm Rest Width Adjustment Knobs Removable carpet TRUNK LID (HINGED) access to charger Seat RotatION Lever Brake Handle FIGURE 3. YOUR GOLDEN COMPANION FOR YOUR RECORDS Please fill in your Companion’s information below. This information will be useful in the event- that you ever need to contact Golden Technologies, Inc.
Companion Owner's Manual: GC222, GC223, GC322, GC323, GC325, GC421 YOUR GOLDEN COMPANION Specifications GC222 Length 41" Width 24" Tires Front 7 3/4" Rear 8 3/4" Weight capacity 300 lbs Maximum speed 4 1/2 mph Ground clearance 3 1/2 " Operating range (miles) up to 32* Turning radius 37" Batteries (2) Type U-l Weight 100 lbs with batteries 148 lbs Freewheel mode Yes Maximum safe incline 6 degrees Electronic speed control Yes Brakes Charger Rear-wheel drive Sealed Warranty GC223 41" 24" GC322
Companion Owner's Manual: GC222, GC223, GC322, GC323, GC325, GC421 OPERATION DC VOLTAGE METER POWER-ON/DIAGNOSTICS LED LIGHTS ON INDICATOR HORN BUTTON LIGHT SWITCH BUTTON THUMB LEVER (REVERSE) THUMB LEVER (FORWARD) SPEED ADJUSTMENT DIAL KEY SWITCH TILLER ADJUSTMENT LEVER FIGURE 4. CONTROL PANEL HAND CONTROLS Speed Adjustment Dial The speed adjustment dial allows you to preselect the maximum top speed of your Golden Companion.
Companion Owner's Manual: GC222, GC223, GC322, GC323, GC325, GC421 OPERATION When the power to your Companion is turned on, the Power On/Diagnostics LED (Light Emitting Diode) will light up. This LED is used for diagnosing operational problems that may arise. See section X. “Diagnostics.” Horn Button Press this button to sound the horn. Light Switch Button This button operates your Companion’s lighting system. • Press the button once to turn on your scooter’s lights.
Companion Owner's Manual: GC222, GC223, GC322, GC323, GC325, GC421 OPERATION • Green indicates a full charge on the batteries. • Yellow indicates caution and approximately a one-half charge of the batteries. • Red indicates that the batteries have less than one-half of a charge remaining. See section XI. “Care and Maintenance” for instruction concerning charging the batteries. NOTE: Your scooter will automatically turn itself off if the battery output falls to or below 17.5 VDC.
Companion Owner's Manual: GC222, GC223, GC322, GC323, GC325, GC421 OPERATION Armrest Width Adjustment To adjust the armrest width: 1. Loosen the adjustment knobs at the rear of the seat. See figure 6. HEIGHT ADJUSTING SCREWS 2. Slide the armrests in or out to the desired width. 3. Tighten the adjustment knobs. Seat Height Adjustment To adjust the seat height: 1. Remove the seat by lifting it straight up. 2. Set the seat aside. 3.
Companion Owner's Manual: GC222, GC223, GC322, GC323, GC325, GC421 RIDING YOUR COMPANION MOUNTING NOTE: For your first driving sessions, make certain that your Golden Companion starts out on a level surface and that you will continue driving on a level surface. OFF ON To Get on Your Companion 1. Stand alongside your Companion and insert the key into the key switch. See figure 4 on page 10 and figure 9 on this page. • Do not turn the key switch to the “On” position. FIGURE 10 FIGURE 9 2.
Companion Owner's Manual: GC222, GC223, GC322, GC323, GC325, GC421 RIDING YOUR COMPANION Steering Steering your Golden Companion is easy and logical. 1. With both hands on the handgrips of the tiller (see figure 3), turn the tiller to the right to travel to the right. 2. With both hands on the handgrips of the tiller (see figure 3), turn the tiller to the left to travel to the left. 3. Make certain to maintain sufficient clearance when turning your scooter so that the rear wheels will clear any obstacle.
Companion Owner's Manual: GC222, GC223, GC322, GC323, GC325, GC421 RIDING YOUR COMPANION Ramps When proceeding up any ramp, curb, or incline: • Lean forward in your seat to move your center of gravity forward for maximum stability and safety. See figure 11. If the ramp has a switchback, good cornering ability is required. • Maneuver your Companion so that the front wheels take wide swings around the corners of the ramp.
Companion Owner's Manual: GC222, GC223, GC322, GC323, GC325, GC421 DISASSEMBLY 1. REMOVING THE SEAT NOTE: Pinchless seat hinges are standard on all Golden Companion scooters. 1. Loosen the adjustment knobs. See figure 13. 2. Slide the arms off the scooter. 3. Remove the seat by lifting it straight up and out of the seat post. 4. The seat can be folded for compact storing. ADJUSTMENT KNOBS 2. DISCONNECTING THE TAILLIGHT CONNECTOR 1. Open the trunk lid. See figure 13. 2. Disconnect the taillight connector.
Companion Owner's Manual: GC222, GC223, GC322, GC323, GC325, GC421 DISASSEMBLY SEAT POST REMOVE THIS BOLT, NUT, AND WASHERS PEDESTAL 4. REMOVING THE SEAT POST NOTE: This step may not be necessary. We provide instructions in case you do find it necessary to remove the seat post for storage or for replacement. 1. Remove the nut, bolt, and washer. See Figure 16. 2. Pull the seat post up and out of the seat post pedestal. FIGURE 16.
Companion Owner's Manual: GC222, GC223, GC322, GC323, GC325, GC421 DISASSEMBLY NOTE: The motor and the brake connectors (see figure 17) should be disconnected only if you are going to remove the rear electronics enclosure. If is not necessary to remove the charger connector while removing the rear electronics enclosure. 7. PUTTING YOUR COMPANION IN FREEWHEEL MODE Your Golden Companion is equipped with a brake handle (see figure 19) that can set your scooter in or out of freewheel mode.
Companion Owner's Manual: GC222, GC223, GC322, GC323, GC325, GC421 DISSASSEMBLY 8. Locate the Red "T" Handle and Latch on frame assembly. (Fig. 20) Fig. 20 Fig. 21 9. Grasp the handle and pull it toward the front of the scooter to release the latch. (Fig. 21) Fig. 23 Fig. 22 10. The latch will swing open. Now simply lift the "T" handle and the unit comes apart. (Fig. 22 and Fig.
Companion Owner's Manual: GC222, GC223, GC322, GC323, GC325, GC421 ASSEMBLY 1. To reconnect the frame, lift the "T" handle and guide the front frame hooks into the rear frame sockets. It helps to stabilize the rear frame by holding the seat post. (Fig.24 and Fig. 25) Fig. 24 Fig. 25 2. Now swing the latch into the locked position. You will hear and feel a positive snap when the latch engages. (Fig. 26 and Fig. 27) Fig. 26 Companion Fig.
Companion Owner's Manual: GC222, GC223, GC322, GC323, GC325, GC421 3. You will notice that you cannot place the batteries into the unit, unless the latch is fully engaged. (Fig. 28) Fig. 28 Fig. 29 4. When the left battery is properly placed, and secured with hook and loop strap, it acts as a secondary securing mechanism for the latch. (Fig. 29) Fig. 30 5. The figure above shows the batteries properly placed and secured with hook and loop straps and the latch properly engaged. (Fig.
Companion Owner's Manual: GC222, GC223, GC322, GC323, GC325, GC421 ASSEMBLY BATTERY BATTERY CABLE CONNECTORS CHARGER CONNECTORS MOTOR/BRAKE CONNECTORS MAIN HARNESS CONNECTORS TAIL LIGHT CONNECTORS FIGURE 31. ELECTRICAL CONNECTIONS 6. ELECTRICAL CONNECTIONS NOTE: The electrical connectors on your Companion have been designed so that only the correct connector will fit in its appropriate mating/plug receptacle.
Companion Owner's Manual: GC222, GC223, GC322, GC323, GC325, GC421 ASSEMBLY 8. INSTALL THE SEAT POST If the seat post was not removed, proceed to step 9. If the seat post was removed: 1. Insert the seat post into the seat post pedestal. See figure 33. 2. Align holes in the seat post with the holes in the seat post pedestal to set the desired height for the seat. 3. Install the bolt through the aligned holes, starting at the rear of the pedestal. 4. Install the washer. 5. Install and tighten the nut. 9.
Companion Owner's Manual: GC222, GC223, GC322, GC323, GC325, GC421 ASSEMBLY WARNING: Do not sit in or attempt to move your Companion unless the frame are rear carriage are securely engaged. Accidental separation of the frame from the rear carriage may occur and cause injury of damage. 11. INSTALL THE SEAT 1. Make certain that the seat post is mounted in the seat post pedestal and adjusted to the desired height. See assembly step 6. 2. Lift seat and position the seat swivel post into the seat post.
Companion Owner's Manual: GC222, GC223, GC322, GC323, GC325, GC421 TRANSPORTING YOUR COMPANION COMPANION FIGURE 40 COMPANION II FIGURE 41 FOUR-WHEEL COMPANION II FIGURE 42 NOTE: All Golden Companion scooters (see figures 40, 41, and 42) can be equipped with docking devices for loading onto a vehicle by means of a mechanical lift or hoist. Contact your Golden Technologies, Inc. dealer for more information concerning docking devices and scooter lift devices.
Companion Owner's Manual: GC222, GC223, GC322, GC323, GC325, GC421 DIAGNOSTICS The diagnostics feature of your Golden Companion’s “Rhino” microprocessorbased motor control board functions as follows: • Any fault condition on the “Rhino” controller or on an associated system will cause the Power-on/diagnostics LED (see figure 43) to flash. • The flashing of the LED occurs as one flash or as a series of flashes separated by a two-second pause.
Companion Owner's Manual: GC222, GC223, GC322, GC323, GC325, GC421 DIAGNOSTICS 4 Flashes • Indicates that the motor control board is overloaded and overheated. • An overload can occur if you have been driving your Companion for an extended period of time up an incline that is steeper than the recommended grade (see “Specifications” on page 9). • An overload can occur if your Companion is carrying a payload that is higher then the recommended weight capacity.
Companion Owner's Manual: GC222, GC223, GC322, GC323, GC325, GC421 DIAGNOSTICS 6 Flashes • Indicates that the thumb levers (see section V. “Operation) were not in the neutral position when the key switch was turned to the “On” position. • May indicate that the PADDLE potentiometer is out of adjustment. Remedy: • Turn the key switch to the “Off position. • Make certain that the thumb control levers are in the neutral position. • Turn the key switch to the “On” position.
Companion Owner's Manual: GC222, GC223, GC322, GC323, GC325, GC421 CARE AND MAINTENANCE MAIN CIRCUIT BREAKER MAIN CIRCUIT BREAKER RESET The 50-amp main circuit breaker reset button is located on the rear electrical enclosure. See figure 45. WARNING: Do not attempt electrical repairs. Consult Golden Technologies, Inc. or your authorized Golden Technologies, Inc. dealer. If, for no apparent reason, your Companion stops operating, the main circuit breaker may have tripped. FIGURE 45.
Companion Owner's Manual: GC222, GC223, GC322, GC323, GC325, GC421 CARE AND MAINTENANCE • • Contact your authorized Golden Technologies, Inc. dealer. Do not keep resetting the main circuit breaker without correcting the underlying electrical problem. WHEELS AND TIRES Golden Companion scooters are equipped with split-rim wheels with pneumatic and foam-filled tires. WARNING: Golden Technologies, Inc. does not recommend that you disassemble the tire from the splitrim wheels.
Companion Owner's Manual: GC222, GC223, GC322, GC323, GC325, GC421 CARE AND MAINTENANCE IF YOUR COMPANION DOES NOT OPERATE • Make certain that the brake handle is set to the engaged position. See section VIII, figure 32, page 23, “Assembly.” • Check the main circuit breaker. If necessary, reset the circuit breaker. • Make certain that the speed adjustment dial is at the desired setting. • Make certain that the key switch is set to the “On” position.
Companion Owner's Manual: GC222, GC223, GC322, GC323, GC325, GC421 CARE AND MAINTENANCE CHARGER AND BATTERIES To Charge the Batteries: 1. Make certain that the key switch is in the “Off” position. See figure 9 on page 14. 2. Lift the trunk lid. See figure 3 on page 8. 3. Uncoil the charger AC cord. 4. Plug the charger AC cord into a working electrical outlet. 5. Two amber LEDs (Light Emitting Diode) will illuminate. See figure 47. 6.
Companion Owner's Manual: GC222, GC223, GC322, GC323, GC325, GC421 CARE AND MAINTENANCE • If you have not used, your Golden Companion for more than three days, make certain that you charge the batteries on the night before you are going to use your scooter. This will ensure that you start operating your scooter with a full charge on the batteries. • If you use your scooter during the day, charge the batteries as soon as you are finished using it. The charger is fully automatic.
Companion Owner's Manual: GC222, GC223, GC322, GC323, GC325, GC421 CARE AND MAINTENANCE CLEANING YOUR COMPANION Tires • Clean the tires with ordinary kitchen-type cleaners and a damp cloth. • Do not use solvents on the tires. Solvents can cause the tire material to break down or become too soft. • Check tire pressure every 3 weeks. Body The body (rear shroud, tiller shroud, deck shroud) of your Golden Companion is formed ABS plastic and coated with a durable automotive-type finish.
Companion Owner's Manual: GC222, GC223, GC322, GC323, GC325, GC421 WARRANTY LIFE-TIME LIMITED WARRANTY Life-Time Warranty • Structural frame components including main frame, rear frame, fork, seat post, and frame welds Two-year Warranty • Drive train (transaxle assembly) • Battery charger 100% replacement of parts cost 100% replacement of parts cost One-year Warranty • All other parts This warranty excludes the following: 1. Battery manufacturer provides a six-month limited warranty 2.
Companion Owner's Manual: GC222, GC223, GC322, GC323, GC325, GC421 Golden Companion Warranty Registration Please type or print. Serial # Date Purchased Owner Name Address City State Zip E-mail Failure to return warranty registration card could result in significant delays in obtaining service. Optional Information (Used for Marketing Information) Height Weight Age Sex e-mail How did you hear of Golden? If you’re satisfied with your scooter, let us help other family members and friends.
Companion Owner's Manual: GC222, GC223, GC322, GC323, GC325, GC421 FOLD HERE FIRST PLACE STAMP HERE 401 BRIDGE ST OLD FORGE PA 18518 FOLD HERE SECOND 40 Companion
401 Bridge Street Old Forge, PA 18518 Tel: (800) 624-6374 Fax: (800) 628-5165 www.goldentech.