MODEL T28798 METAL DUST COLLECTOR OWNER'S MANUAL (For models manufactured since 01/20) COPYRIGHT © JANUARY, 2019 BY GRIZZLY INDUSTRIAL, INC., REVISED JUNE, 2021 (BL) WARNING: NO PORTION OF THIS MANUAL MAY BE REPRODUCED IN ANY SHAPE OR FORM WITHOUT THE WRITTEN APPROVAL OF GRIZZLY INDUSTRIAL, INC. #RS20011 PRINTED IN TAIWAN V2.06.
This manual provides critical safety instructions on the proper setup, operation, maintenance, and service of this machine/tool. Save this document, refer to it often, and use it to instruct other operators. Failure to read, understand and follow the instructions in this manual may result in fire or serious personal injury—including amputation, electrocution, or death. The owner of this machine/tool is solely responsible for its safe use.
Table of Contents INTRODUCTION................................................................................................................................ 2 Contact Info................................................................................................................................. 2 Manual Accuracy......................................................................................................................... 2 Identification......................................................
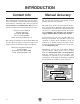
INTRODUCTION Contact Info Manual Accuracy We stand behind our machines! If you have questions or need help, contact us with the information below. Before contacting, make sure you get the serial number and manufacture date from the machine ID label. This will help us help you faster. We are proud to provide a high-quality owner’s manual with your new machine! Grizzly Technical Support 1815 W. Battlefield Springfield, MO 65807 Phone: (570) 546-9663 Email: techsupport@grizzly.
Identification Become familiar with the names and locations of the controls and features shown below to better understand the instructions in this manual. ON/OFF Paddle Switch w/Disabling Pin Motor Access Door Stainless Mesh Filter Collection Drawer Filter Door Active Carbon Filter Pleated Micro Filter Dust Tray To reduce your risk of serious injury, read this entire manual BEFORE using machine. Model T28798 (Mfd.
Customer Service #: (570) 546-9663 · To Order Call: (800) 523-4777 · Fax #: (800) 438-5901 MODEL T28798 METAL DUST COLLECTOR Product Dimensions: Weight ........................................................................................................................................................................... 183 lbs. Width (side-to-side) x Depth (front-to-back) x Height .................................................................................20 x 28-1/2 x 43 in.
Filter Information Number of Filters .............................................................................................................................................................3 Total Filter Surface Area ..................................................................................................................................6.11 sq. ft. First-Stage Filter Type ............................................................................................................
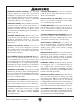
SECTION 1: SAFETY For Your Own Safety, Read Instruction Manual Before Operating This Machine The purpose of safety symbols is to attract your attention to possible hazardous conditions. This manual uses a series of symbols and signal words intended to convey the level of importance of the safety messages. The progression of symbols is described below. Remember that safety messages by themselves do not eliminate danger and are not a substitute for proper accident prevention measures.
WEARING PROPER APPAREL. Do not wear clothing, apparel or jewelry that can become entangled in moving parts. Always tie back or cover long hair. Wear non-slip footwear to reduce risk of slipping and losing control or accidentally contacting cutting tool or moving parts. HAZARDOUS DUST. Dust created by machinery operations may cause cancer, birth defects, or long-term respiratory damage. Be aware of dust hazards associated with each workpiece material.
Additional Safety for Metal Dust Collectors Long-term respiratory damage, metal toxicity, cancer, or birth defects can occur from improperly using, setting up, or servicing machine, and using this machine without wearing a respirator. Explosions or fire can result if machine is used to capture incorrect materials or if dust/waste material is exposed to an ignition source. To reduce these risks, operator and bystanders MUST completely heed the warnings below. USE FOR INTENDED PURPOSE.
SECTION 2: POWER SUPPLY Availability Before installing the machine, consider the availability and proximity of the required power supply circuit. If an existing circuit does not meet the requirements for this machine, a new circuit must be installed. To minimize the risk of electrocution, fire, or equipment damage, installation work and electrical wiring must be done by an electrician or qualified service personnel in accordance with all applicable codes and standards.
Grounding Requirements This machine MUST be grounded. In the event of certain malfunctions or breakdowns, grounding reduces the risk of electric shock by providing a path of least resistance for electric current. This machine is equipped with a power cord that has an equipment-grounding wire and a grounding plug. Only insert plug into a matching receptacle (outlet) that is properly installed and grounded in accordance with all local codes and ordinances.
SECTION 3: SETUP Needed for Setup This machine presents serious injury hazards to untrained users. Read through this entire manual to become familiar with the controls and operations before starting the machine! Wear safety glasses during the entire setup process! HEAVY LIFT! Straining or crushing injury may occur from improperly lifting machine or some of its parts. To reduce this risk, get help from other people and use a forklift (or other lifting equipment) rated for weight of this machine.
Inventory The following is a list of items shipped with your machine. Before beginning setup, lay these items out and inventory them. Hardware (Figure 3) Qty 5 1 I. Flange Bolts ⁄ 16"-18 x ⁄ 2".......................... 16 J. Button Head Cap Screws 5 ⁄ 16"-18 x 1⁄ 2"........ 4 K. Hex Wrench 5mm........................................ 1 L. Open-End Wrench 10 x 12mm.................... 1 M. Flange Screw #10-24" x 3 ⁄ 8"......................... 1 A B G F K I M L Figure 3. Hardware inventory.
Hardware Recognition Chart 5mm Model T28798 (Mfd.
Site Considerations Weight Load Physical Environment Refer to the Machine Data Sheet for the weight of your machine. Make sure that the surface upon which the machine is placed will bear the weight of the machine, additional equipment that may be installed on the machine, and the heaviest workpiece that will be used. Additionally, consider the weight of the operator and any dynamic loading that may occur when operating the machine.
Assembly 2. Attach dust port to side of dust collector with (4) 5 ⁄ 16"-18 x 1⁄ 2" button head cap screws (see Figure 6). The machine must be fully assembled before it can be operated. Before beginning the assembly process, refer to Needed for Setup and gather all listed items. To ensure the assembly process goes smoothly, first clean any parts that are covered or coated in heavy-duty rust preventative (if applicable). x4 Note: Do not destroy packaging until after the Test Run.
4. Open access door. Remove protective wrap from collection drawer, and insert collection drawer where shown in Figure 8. Close and latch access door. 6. Install air filters in same sequence shown in Figure 10. Pleated Micro Filter Access Door Active Carbon Filter Stainless Mesh Filter Collection Drawer Filter Door Filter Door Figure 8. Collection drawer installed in dust collector. 5. Open filter door and verify dust tray is installed, as shown in Figure 9. Dust Tray Figure 10.
Ducting System Overview This dust collector is designed exclusively to collect dry metal, chips, and swarf. DO NOT use this dust collector to collect wood dust or metal chips containing cutting fluid or coolant. Due to fire or explosion risk, DO NOT use this machine to collect combustible or explosive metals, magnesium, niobium, tantalum, titanium, zirconium, hafnium, combustible liquids or fuels, gasoline, or oil- or solvent-based paints.
Flexible Duct System Grounding Flexible hose is generally used for short runs and at rigid duct-to-machine connections. The superior choice here is metal flex hose that is designed to be flexible, yet be as smooth as possible inside to reduce static pressure loss. DO NOT use dryer vent hose because it tends to collapse. To guard against static electrical buildup, we strongly recommend replacing any plastic dust ports on dust-producing machines with metal equivalents. Figure 12.
Test Run Once assembly is complete, test run the machine to ensure it is properly connected to power and safety components are functioning correctly. To test run machine: 1. Clear all setup tools away from machine. 2. Connect machine to power supply. 3. Remove disabling pin from paddle switch, as shown in Figure 15. If you find an unusual problem during the test run, immediately stop the machine, disconnect it from power, and fix the problem BEFORE operating the machine again.
SECTION 4: OPERATIONS Operation To reduce your risk of serious injury, read this entire manual BEFORE using machine. This metal dust collector draws metal dust into a collection drawer and discharges air through a 3-stage air-filter system. Metal dust is collected in a primary 1.0-cubic-foot drawer that slides into the main compartment behind the access door, as shown in Figure 16. A secondary dust tray in the air filter compartment holds 0.23 cubic feet of material (see Figure 16, inset).
SECTION 5: ACCESSORIES Installing unapproved accessories may cause machine to malfunction, resulting in serious personal injury or machine damage. To reduce this risk, only install accessories recommended for this machine by Grizzly. T30031—Active Carbon Filter The second-stage replacement active carbon filter for the T28798 Metal Dust Collector filters particles as small as 5 microns. It is cleanable and reusable for up to 300 hours of use. Measures 151⁄4" x 191⁄4" x 7⁄ 8 ".
Metal Ducting G6162—4" x 5' Straight Metal Pipe G7346—5" x 5' Straight Metal Pipe G7364—6" x 5' Straight Metal Pipe These laser welded straight pipes ensure a super smooth internal seam. Ends easily clamp together for a sealed fit without screws or silicone. H5293—4" Metal Duct Starter Kit H5295—5" Metal Duct Starter Kit H5297—6" Metal Duct Starter Kit Save over 20% with this great starter kit.
G6177—4" Metal Blast Gate G7340—5" Metal Blast Gate G7358—6" Metal Blast Gate Control airflow and resistance between machines. H2499—Small Half-Mask Respirator H3631—Medium Half-Mask Respirator H3632—Large Half-Mask Respirator H3635—Cartridge Filter Pair P100 Metal dust has been linked to nasal cancer and severe respiratory illnesses. If you work around dust every day, a half-mask respirator can be a lifesaver. Also compatible with safety glasses! H3635 Figure 25. Metal blast gates.
SECTION 6: MAINTENANCE Schedule For optimum performance from this machine, this maintenance schedule must be strictly followed. Ongoing To maintain a low risk of injury and proper machine operation, if you ever observe any of the items below, shut down the machine immediately and fix the problem before continuing operations: • • • • • Loose mounting bolts. Check/empty dust collection drawer/tray. Check/replace filters. Worn or damaged wires. Any other unsafe condition.
Cleaning Impeller 4. Remove motor/impeller assembly and carefully set it on capacitor covers (see Figure 32). The impeller normally requires no maintenance, but the blades can accumulate metal dust that can adversely affect impeller balance. Removing the motor/impeller assembly allows cleaning and inspection of the impeller blades. Tools Needed Qty Open-End Wrench 10 x 12mm........................... 1 Soft Bristle Brush...............................................
Cleaning/Replacing Filters The 5-Micron active carbon and 1-Micron pleated micro filters need regular cleaning. Replace every 300 hours or when airflow performance becomes noticeably reduced despite cleaning. Replacing Filters 1. DISCONNECT MACHINE FROM POWER! 2. Wear NIOSH-approved respirator, ANSIapproved goggles, and protective gloves while handling filters. 3. Unlatch filter door and open approximately 30 degrees. 4. Open (2) retaining clips on door and remove filters (see Figure 33).
SECTION 7: SERVICE Review the troubleshooting procedures in this section if a problem develops with your machine. If you need replacement parts or additional help with a procedure, call our Technical Support. Note: Please gather the serial number and manufacture date of your machine before calling. Troubleshooting Symptom Possible Cause Possible Solution Machine does not start or a breaker trips. 1. Disabling pin installed in switch. 2. Power supply circuit breaker tripped or fuse blown. 3.
SECTION 8: WIRING These pages are current at the time of printing. However, in the spirit of improvement, we may make changes to the electrical systems of future machines. Compare the manufacture date of your machine to the one stated in this manual, and study this section carefully. If there are differences between your machine and what is shown in this section, call Technical Support at (570) 546-9663 for assistance BEFORE making any changes to the wiring on your machine.
Wiring Diagram The motor wiring shown here is current at the time of printing, but it may not match your machine. Always use the wiring diagram inside the motor junction box. MOTOR 240V POWER SWITCH (from behind) Circuit Breaker Zing Ear ZE700-15 WARNING! SHOCK HAZARD! Disconnect power before working on wiring. TRATS 14 24 13 23 POTS Run Capacitor 30 uF 250 VAC Start Capacitor 300 MFD 125 VAC 240V Single-Phase Ground G Hot 240 VAC 6-15 Plug Gn Wt Bl Hot Figure 34.
SECTION 9: PARTS We do our best to stock replacement parts when possible, but we cannot guarantee that all parts shown are available for purchase. Call (800) 523-4777 or visit www.grizzly.com/parts to check for availability. Main 25 32 31 29-1 29-3 29 29-5 29-9 29-8 28 26 15 24 16 17 29-2 29-11 29-4 29-6 29-7 29-10 27 23 22 18 37 21 20 35 14 33 9 34 19 13V2 1 30 11 12 10 7 9 36 8 6 5V2 -30- 30 BUY PARTS ONLINE AT GRIZZLY.COM! Scan QR code to visit our Parts Store.
Main Parts List REF PART # DESCRIPTION REF PART # DESCRIPTION 1 2 3 5V2 6 7 8 9 10 11 12 13V2 14 15 16 17 18 19 20 21 22 23 24 25 CABINET FLANGE BOLT 5/16-18 X 1/2 CASTER 2-1/2" SWIVEL ACCESS DOOR V2.01.20 COLLECTION DRAWER INLET ADAPTER 6" X 4" X 2 INLET ADAPTER CAP 4" BUTTON HD CAP SCR 5/16-18 X 1/2 INLET 6" FLANGE SCREW 10-24 X 3/8 DUST TRAY FILTER DOOR V2.01.
Labels & Cosmetics MODEL T28798 1.5 HP METAL DUST COLLECTOR 110 WARNING! Specifications Motor: 1.5 HP, 240V, 1-Ph, 60 Hz Full-Load Current Rating: 9A Airflow: 650 CFM Max Static Pressure: 10.8" Inlet Size: 6" Filter 1: 30-Micron, Stainless Filter 2: 5-Micron, Active Carbon Filter 3: 1-Micron, Pleated Micro Max. Collection Capacity: 9.5 Gal. Weight: 183 lbs. INJURY HAZARD! To reduce risk of short and long-term injury, wear safety glasses, hearing protection, and a respirator when using this machine.
WARRANTY & RETURNS Grizzly Industrial, Inc. warrants every product it sells for a period of 1 year to the original purchaser from the date of purchase. This warranty does not apply to defects due directly or indirectly to misuse, abuse, negligence, accidents, repairs or alterations or lack of maintenance.