
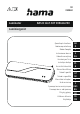
Manual


3
4.2 Hot lamination
Warning - Danger of burns on the housing
• Do not touch the housing.
• Be aware that laminated objects are hot.
• Place the laminated object on a level surface to cool down in order to prevent it
from curling up.
Note
Special pouches are needed for hot lamination. They are sealed using heat. This seal
is permanent and cannot be undone. Only objects that are insensitive to heat should
be laminated. From a pouch edge of around 4 mm, the objects are protected so they
are virtually waterproof. The thickness of the pouch determines the object's stability /
kink protection.
• The Ready LED (6) lights up solid green once the required temperature has been
reached.
• Place the object to be laminated in the corresponding hot lamination pouch.
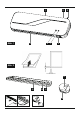
• Guide the pouch into the middle of the front opening (4) on the device. Ensure that the
sealed end (see Fig. 2) is introduced rst.
• The document is output again at the back (1).
• If the document has not been fully laminated, repeat the initial steps.
• To interrupt the lamination process (e.g. if the intake angle is incorrect), press the roller
unlocking button (2) and correct the position of the pouch.
4.3 Switching the device off
• Move the On/Off switch (5) to the "OFF" position to switch the device off.
• Both status LEDs (6/7) go out.
• Remove the mains lead from the socket.
• Allow the device to cool down completely before tidying it away.
5. Accessories
Warning - Risk of burns
• Be aware that the cutting tools were only designed to cut paper and laminated
documents.
• When using them, take care not to put ngers in the cutting area.
• Keep children away from the cutting tools.
5.1 Using the cutting ruler
• This kit includes cutting ruler (8) that allows paper as well as laminating pouches to be
easily cut to size.
• Set the cutting ruler (8) up on a level, horizontal and stable surface.
• Push the cutting head (9) to one side of the guide rail.
• Place the document to be cut under the guide rail (10) and push it downwards.
• Pull the cutting head (9) along the guide rail (10) to the other side of the cutting ruler.
• Remove the cut material.
5.2 Using the corner rounder
• This kit includes a corner rounder (11) to round off the corners of paper and laminated
documents.
• Set the corner rounder (11) up on a level, horizontal and stable surface.
• Place one corner of the document to be trimmed in the opening of the corner rounder.
• Press the upper half of the corner rounder downwards.
• A handy collecting bin (12) catches the left-over paper.
6. Care and maintenance
Danger – risk of death from electric shock
Disconnect the mains plug from the socket before starting any cleaning work.
Warning - Danger of burns on the housing
Do not touch the housing.
Warning - damage to the device from moisture
Ensure, when cleaning, that no moisture penetrates the device in order to avoid
irreparable damage to it.
The rollers on the laminator must be regularly cleared of dust and any glue residue. To do
so, proceed as follows:
• Switch the device on - as described in 4.1 Switching the device on.
• Wait until the Ready status LED (6) lights up solid green
• Guide a piece of paper into the middle of the front o pening (4).
• Repeat the process if there is a lot of dirt on the paper.
• Clean the outside of the device with a slightly damp cloth.
7. Troubleshooting
Error Possible cause Remedy
The Power LED (7) does
not light up solid red.
The On/Off switch (5) is in
the "OFF" position.
Move the On/Off switch
(5) to the "ON" position.
The mains cable (3) is not
connected correctly.
Ensure that the mains
plug is in the mains
socket.
The socket is not live. Check the domestic fuses.
The device is faulty. Notify Customer Services.
Pouches are not
laminated correctly.
The required temperature
has not yet been reached.
Wait until the Ready
status LED (6) lights up
solid green.
8. Technical data
Input voltage 220-240 V~
Mains Frequency 50 Hz
Dimensions (W x H x D) 33 x 6 x 10.6 cm
Maximum laminating width 230 mm
Maximum laminating thickness 0.6 mm
Maximum pouch thickness 125µ
Maximum heat-up time 3 - 4 minutes
Maximum speed 230 mm/minute
Number of heated rollers 2
9. Warranty Disclaimer
All of the technical information, data and instructions regarding operation contained in
these operating instructions was up to date at the time of printing and is provided based
on previous experience and to the best of our knowledge.
Hama GmbH & Co KG assumes no liability and provides no warranty for damage resulting
from improper installation/mounting, improper use of the product or from failure to observe
the operating instructions and/or safety notes.