00 118564 Digital Photo Frame More information Digitaler Bilderrahmen Operating Instructions Bedienungsanleitung Mode d‘emploi 118564 Instrucciones de uso Istruzioni per l‘uso Gebruiksaanwijzing Instrukcja obsługi Használati útmutató Návod k použití Návod na použitie Manual de instruções GB D F E I NL PL H CZ SK P
A 5 4 2 1 3 6 7 GB 8 9 10 11 B 1 3 5 8 2 2 4 6 7 9
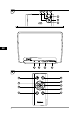
Design and functionality A A: Digital picture frame – Control and connection panel 1 2 3 ►II 4 p 5 t 6 u 7 q 8 9 10 11 • Switch on/off • Main menu direct access • Return to menu above • Pause/begin playback / confirm selection (in selection menus) • Quick selection menu • Playback settings • Cursor up (in selection menus) • Previous image/audio file • Rewind (in audio files) • Increase brightness (in video files) • Cursor left (in selection menus) • Decrease volume • Decrease brightness • Curs
Content 1. Explanation of Warning Symbols and Notes ........................................... 5 8. Causes of errors and error rectification ...................................... 18 2. Package Contents........................... 5 9. Care and Maintenance ................. 19 3. Safety Instructions ......................... 5 10. Warranty Disclaimer................... 20 4. Defective Pixels .............................. 6 11. Service and Support ................... 20 5.
Thank you for choosing a Hama product. Take your time and read the following instructions and information completely. Please keep these instructions in a safe place for future reference. If you sell the device, please pass these operating instructions on to the new owner. 1. Explanation of Warning Symbols and Notes Warning This symbol is used to indicate safety instructions or to draw your attention to specific hazards and risks.
Warning - Batteries • Immediately remove and dispose of dead batteries from the product. • Only use batteries (or rechargeable batteries) that match the specified type. • When inserting batteries, note the correct polarity (+ and - markings) and insert the batteries accordingly. Failure to do so could result in the batteries leaking or exploding. • Do not overcharge batteries. • Keep batteries out of the reach of children.
5. Technical Characteristics • Supported image formats: JPG, JPEG, BMP • Supported audio format: MP3 • Supported video formats: H.264 / DIVX / XVID / AVI / MOV / MPEG4 / MJPEG • Supported memory cards: SD, SDHC • Internal storage: 4GB • Connections: Micro-USB 2.0, DC power supply 6. Getting Started 6.1. Setting up • Remove the protection foil from the display. • Set the product on a flat, level surface where it will not slip. • Do not place any other objects on top of the device.
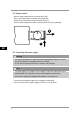
6.3 Remote control • Open the battery compartment of the remote control (Fig.). • Insert a type CR2032 button cell battery, observing polarity. • Remove the contact breaker strip from the battery if present. • Close the battery compartment. Make sure that the cover closes easily and tightly. 2 1 GB 6.4 Connecting the power supply Warning • Only connect the product to a socket that has been approved for the device. The socket must be installed close to the product and easily accessible.
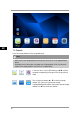
7. Operation • After connecting to the power supply, the product turns on automatically. • When you first turn select using the cursor buttons p / q your desired menu language and confirm your selection by pressing ►II. • Press and hold the on the device or on the remote control to turn the device on or off. • The Hama logo will appear for a few seconds while the device is starting up. Then the main menu will be displayed.
GB 7.2 Playback Insert the storage medium into the corresponding slot. Note • Make sure that the storage medium and the formats of the files on it are supported by the device. • Remember that this device does not support cross-folder playback of files. Do not create folders on the storage medium. Save all files in a single directory. In the main menu, use the CURSOR buttons t / u to choose the option corresponding to the type of files (image, audio or video).
General playback • Use the cursor buttons t / u / p / q to select first the correct folder if necessary and then the file to be played (or the image with which to begin the slide show). • Press ►II to begin playback.
Image file playback • Pressing►II also opens the playback settings. The window closes automatically after approx. 10 seconds. Alternatively, press to return to playback. GB • Press ►II repeatedly to pause and start playback. If ► is shown at upper left, then all image files in the selected folder are played back as a slide show. If II is shown, then only the current image is displayed. • In the playback settings, press p and then repeatedly press ►II to enable or disable background music playback.
• In the playback settings, press q and then ►II to open the quick selection menu. Alternatively press ì or press and hold ►II to open the quick slection menu. The window closes automatically after approx. 10 seconds. Alternatively, press ì or to return to playback. • Use the cursor buttons or p / q to select an option. • To select or change the option, press t / u or ►II once or repeatedly.
Video file playback • Press ì or ►II to open the quick selection menu. The window closes automatically after approx. 10 seconds. • Alternatively, press ì or to return to playback. • Press ►II repeatedly to pause and start playback. • Use the cursor buttons t / u to select an option. • To select or change an option, press ►II once or repeatedly.
Note • Please note the maximum storage capacity of the internal memory as well as the file formats that the device supports. • During the copying operation, its progress will be displayed. Copying directly • Use the cursor buttons p / q to choose the storage medium (USB or SD) from which files are to be copied to the internal storage. • Use the cursor buttons t / u / p / q to select the file or folder. • Press ì or press and hold ►II.
7.5 Settings Use the cursor buttons t / u to select the Settings option. • Press ►II to confirm the selection. • Use the cursor buttons p / q to select Clock & Calendar, Alarm, Timer or General. Confirm your selection by pressing ►II. • Use the cursor buttons p / q to select a function to configure. • Use the cursor buttons ►II, t / u / p / q to modify the settings of the selected function. • Press to return to the previous menu.
Display Function Set the system/menu language Select the colour scheme Enable/disable background music when playing back image BG Music files Start the firmware update Firmware update Attention! Enter the product code on www.hama.com to find out more about firmware updates. Revert to factory settings Default Settings Caution! This will erase all of your previous settings. Product info.
Warning – Data Loss • Ensure that data transfer is complete before you remove the memory card from the device. • Always use the “Eject” function of your operating system before removing the removable storage medium from the device or disconnecting the device (with inserted storage medium) from your computer. • If you do not do this, data may be lost. 8. Causes of errors and error rectification Note Contact our customer service department if the problem remains after taking the following steps.
Error Solution No storage medium is inserted Insert a storage medium. The storage medium does not contain data Check your storage medium. The device is set to “Mute” Increase the volume of the device No storage medium is inserted Insert a storage medium.
10. Warranty Disclaimer Hama GmbH & Co. KG assumes no liability and provides no warranty for damage resulting from improper installation/mounting, improper use of the product or from failure to observe the operating instructions and/or safety notes. 11. Service and Support Please contact Hama Product Consulting if you have any questions about this product. Hotline: +49 9091 502-115 (German/English) Further support information can be found here: www.hama.com 12.
13. Technical data 00118564 Digital Picture Frame Power supply in 100-240 V AC / 50/60 Hz / 0,13 A Power supply out 5 V DC / 1,0 A Power consumption ≤5W Dimensions (W x H x D) 195 x 140 x 52 mm Weight Approx.
14. Menu structure Photo Photo Slideshow Photo Slideshow with music Music Movie Folder Calendar Calendar without backround image Calendar with Photo Slideshow Setting Clock & Calendar Mode Time Date Date Format Week Start Background GB Alarm Alarm Status Alarm Time Alarm Repeat Alarm Tone Arlam Volume Timer Status Time on Time off Repeat General Language Theme Color BG Music Firmware Update Default Settings Product Info.
15. Recycling Information Note on environmental protection: After the implementation of the European Directive 2002/96/EU and 2006/66/EU in the national legal system, the following applies: Electric and electronic devices as well as batteries must not be disposed of with household waste. Consumers are obliged by law to return electrical and electronic devices as well as batteries at the end of their service lives to the public collecting points set up for this purpose or point of sale.
A 5 4 2 1 3 6 7 D 8 9 10 11 B 1 3 5 2 4 6 7 8 24 9
Bedienungselemente und Anzeigen A A: Digitaler Bilderrahmen – Bedien- und Anschlussfeld 1 2 3 ►II 4 p 5 t 6 u 7 q 8 9 10 11 • Ein-/ Ausschalten • Direktzugang ins Hauptmenü • Zurückspringen zu übergeordneter Menüseite • Wiedergabe anhalten/ starten bzw.
Inhaltsverzeichnis 1. Erklärung von Warnsymbolen und Hinweisen.................................. 27 2. Packungsinhalt ............................. 27 3. Sicherheitshinweise...................... 27 4. Pixelfehler..................................... 28 5. Technische Eigenschaften............. 29 6. Inbetriebnahme............................ 29 6.1 Aufstellen ........................................29 6.2 Bilderrahmen – Batterie einlegen, bzw. wechseln .......................................29 D 6.
Vielen Dank, dass Sie sich für ein Hama Produkt entschieden haben! Nehmen Sie sich Zeit und lesen Sie die folgenden Anweisungen und Hinweise zunächst ganz durch. Bewahren Sie diese Bedienungsanleitung anschließend an einem sicheren Ort auf, um bei Bedarf darin nachschlagen zu können. Sollten Sie das Produkt veräußern, geben Sie diese Bedienungsanleitung an den neuen Eigentümer weiter. 1.
• Nehmen Sie keine Veränderungen am Produkt vor. Dadurch verlieren Sie jegliche Gewährleistungsansprüche. • Versuchen Sie nicht, das Produkt selbst zu warten oder zu reparieren. Überlassen Sie jegliche Wartungsarbeit dem zuständigen Fachpersonal. • Halten Sie Kinder unbedingt von dem Verpackungsmaterial fern, es besteht Erstickungsgefahr. • Entsorgen Sie das Verpackungsmaterial sofort gemäß den örtlich gültigen Entsorgungsvorschriften.
5. Technische Eigenschaften • Unterstützte Bildformate: JPG / JPEG / BMP • Unterstütztes Audioformat: MP3 • Video-Support: H.264 / DIVX / XVID / AVI / MOV / MPEG4 / MJPEG • Unterstützte Speicherkarten: SD / SDHC • Interner Speicher: 4GB • Anschlüsse: Micro-USB 2.0 , Stromversorgung DC 6. Inbetriebnahme 6.1 Aufstellen • Entfernen Sie die Displayschutzfolie. • Stellen Sie das Produkt auf eine ebene, waagerechte und rutschfeste Fläche. • Stellen Sie keine anderen Gegenstände auf das Produkt.
6.3 Fernbedienung • Öffnen Sie das Batteriefach der Fernbedienung (Abb.) • Legen Sie die Knopfzelle des Typs CR2032 polrichtig ein. • Wahlweise entfernen Sie den Kontaktunterbrecherstreifen der Batterie. • Schließen Sie das Batteriefach wieder. Beachten Sie dabei, dass die Verriegelung sauber einrastet. 2 1 D 6.4 Anschluss der Stromversorgung Warnung • Betreiben Sie das Produkt nur an einer dafür zugelassenen Steckdose. Die Steckdose muss in der Nähe des Produktes angebracht und leicht zugänglich sein.
7. Betrieb • Nach Anschluss an die Stromversorgung schaltet sich das Produkt automatisch ein. • Beim ersten Einschalten wählen Sie mithilfe der CURSOR-Tasten p / q Ihre gewünschte Menüsprache aus und bestätigen die Auswahl durch Drücken von ►II. • Drücken und halten Sie am Produkt selbst oder auf der Fernbedienung, um das Produkt ein-/ auszuschalten. • Das Hama-Startlogo erscheint für einige Sekunden und wechselt dann standardmäßig in das Hauptmenü.
D 7.2 Wiedergabe Stecken Sie das gewählte Speichermedium in den entsprechenden Steckplatz. Hinweis • Achten Sie darauf, dass die Speichermedien, sowie die darauf abgespeicherten Dateien, den vom Produkt unterstütztem Formaten entsprechen. • Beachten Sie, dass dieses Produkt keine ordnerübergreifende Wiedergabe der Dateien unterstützt. Legen Sie keine Ordner auf dem Speichermedium an, sondern legen Sie die Dateien einzeln darauf ab.
Allgemeine Wiedergabe • Wählen Sie mit Hilfe der CURSOR-Tasten t / u / p / q die Bilddatei, Audiodatei oder Videodatei – ggfs. erst den entsprechenden Dateiordner und dann die Datei – aus, die wiedergegeben werden bzw. mit der die Diashow starten soll. • Drücken Sie ►II, um die Wiedergabe zu starten.
Wiedergabe Bilddateien • Bei Drücken von ►II werden auch die Abspieleinstellungen geöffnet. Nach ca. 10 Sekunden schließt sich das Fenster automatisch. Alternativ drücken Sie , um zur Wiedergabe zurück zu gelangen. D • Drücken Sie wiederholt ►II, um die Wiedergabe anzuhalten/ starten. Wird oben links ► bzw. II angezeigt, werden alle Bilddateien des ausgewählten Ordners (Diashow) bzw. nur das aktuelle Bild wiedergegeben.
• Drücken Sie in den Abspieleinstellungen q und anschließend ►II , um das Kurzwahlmenü zu öffnen. Alternativ drücken Sie ì oder drücken und halten Sie ►II, um das Kurzwahlmenü zu öffnen. Nach ca. 10 Sekunden schließt sich das Fenster automatisch. Alternativ drücken Sie ì oder , um zur Wiedergabe zurück zu gelangen. • Wählen Sie mithilfe der CURSOR-Tasten p / q die einzelnen Optionen aus. • Zum Auswählen/ Verändern der Option drücken Sie einmal/ wiederholt t / u oder ►II.
Wiedergabe Videodateien • Drücken Sie ì oder ►II, um das Kurzwahlmenü zu öffnen. Nach ca. 10 Sekunden schließt sich das Fenster automatisch. • Alternativ drücken Sie ì oder , um zur Wiedergabe zurück zu gelangen • Drücken Sie wiederholt ►II, um die Wiedergabe anzuhalten/ starten. • Wählen Sie mithilfe der CURSOR-Tasten t / u die einzelnen Optionen aus. • Zum Auswählen/ Verändern der Option drücken Sie einmal/ wiederholt ►II.
Hinweis • Beachten Sie die max. Speicherkapazität des internen Speichers, sowie die vom Produkt unterstützten Dateiformate! • Während des Kopiervorgangs wird Ihnen dessen Fortschritt angezeigt. Direktes Kopieren • Wählen Sie mit Hilfe der CURSOR-Tasten p / q das Speichermedium (USB oder SD), von welchem Dateien auf den internen Speicher kopiert werden sollen, aus. • Wählen Sie mit Hilfe der CURSOR-Tasten t / u / p / q die Datei / den Dateiordner aus.
7.5 Einstellungen Wählen Sie mit Hilfe der CURSOR-Tasten t / u die Option Einstellungen aus. • Drücken Sie ►II, um die Option auszuwählen. • Wählen Sie mit Hilfe der CURSOR-Tasten p / q Uhrzeit & Datum, Alarm, Timer oder Allgemeines aus. Bestätigen Sie die Auswahl durch Drücken von ►II. • Wählen Sie mit Hilfe der CURSOR-Tasten p / q die einzustellende Funktion aus. • Verändern Sie mit Hilfe der CURSOR-Tasten ►II, t / u / p / q die Einstellungen der ausgewählten Funktion.
Anzeige Sprache Farbe Hintergrundmusik Firmware Update Zurücksetzen Produkt Info. Start-up-Modus Funktion Einstellung der Menü- / Systemsprache Auswahl Farbschema Aktivierung / Deaktivierung Hintergrundmusik bei Wiedergabe Bilddateien Start des Firmware Updates Achtung! Informationen über Verfügbarkeit und Ausführung möglicher Updates finden Sie unter Eingabe der Artikel-Nummer auf www.hama.com Zurücksetzen auf die Einstellungen bei Auslieferung.
Warnung – Datenverlust • Bevor Sie eine Speicherkarte aus dem Produkt entnehmen, vergewissern Sie sich, dass der Datentransfer beendet ist. • Entfernen Sie den Wechseldatenträger immer über die Auswurffunktion Ihres Betriebssystems, bevor Sie das Speichermedium aus dem Produkt entnehmen oder das Produkt von Ihrem Computer trennen. • Bei Nichtbeachtung kann Datenverlust nicht ausgeschlossen werden! 8.
Fehler Kein Bild wird angezeigt Behebung Kein Speichermedium eingesteckt Stecken Sie ein Speichermedium ein. Speichermedium enthält keine Daten Überprüfen Sie Ihr Speichermedium. Gerät ist auf „lautlos“ gestellt Erhöhen Sie die Lautstärke am Gerät Kein Speichermedium eingesteckt Stecken Sie ein Speichermedium ein.
12. Unterstützte Dateiformate Photoformat JPEG, JPG, BMP 1280 x 768 Audioformat Bitrate MP3 32Kbps ~ 320Kbps (Bit rate) 32KHz ~ 48KHz (Sampling rate) Videoformat D max. Auflösung 20 Mio. Pixel Container Video Codec Max. Auflösung Bitrate mp4 AVI, MP4 MPEG 4, Divx, Xvid, H.264 1280 x 720 @ 30P 20Mbit/sec divx, avi AVI, DMF MPEG 4, Divx, Xvid, H.264 1280 x 720 @30P 20Mbit/sec Motion JPEG AVI, MOV JPEG 640 x 480 @ 30P 10Mbit/sec 13.
14. Menüstruktur Foto Foto Diashow Foto Diashow mit Musik Musik Video Ordner Kalender Kalender ohne Hintergrundbild Kalender mit Foto Slideshow Einstellungen Uhrzeit & Datum Modus Zeit Datum Datum Format Wochentag Hintergrund D Alarm Alarm Status Alarmzeit Alarm Wdh Alarmton Alarm Lautstärke / Volume Timer Status Einschaltzeit Ausschaltzeit Wiederholung Allgmein Sprache Farbe Hintergrundmusik Firmware Update Zurücksetzen Produkt Info.
15. Entsorgungshinweise Hinweis zum Umweltschutz: Ab dem Zeitpunkt der Umsetzung der europäischen Richtlinien 2002/96/EG und 2006/66/EG in nationales Recht gilt folgendes: Elektrische und elektronische Geräte sowie Batterien dürfen nicht mit dem Hausmüll entsorgt werden. Der Verbraucher ist gesetzlich verpflichtet, elektrische und elektronische Geräte sowie Batterien am Ende ihrer Lebensdauer an den dafür eingerichteten, öffentlichen Sammelstellen oder an die Verkaufsstelle zurückzugeben.
D 45
A 5 4 2 1 3 6 7 F 8 9 10 11 B 1 3 5 2 4 6 7 8 46 9
Commandes et indicateurs A A: Cadre photo numérique Panneau de commande et de connexion 1 2 3 ►II 4 p 5 t 6 u 7 q 8 9 10 11 • Mise sous/hors tension • Accès direct au menu principal • Retour vers le menu précédent • Pause/démarrage de la lecture ou confirmation de saisie dans le menu de sélection • Menu de sélection rapide • Réglages de lecture • Curseur vers le haut dans le menu de sélection • Fichier image/audio précédent • Retour rapide dans les fichiers audio • Augmenter la luminosité dans
Sommaire 1. Explication des symboles d‘avertissement et des remarques ... 49 2. Contenu de l‘emballage ............... 49 3. Consignes de sécurité................... 49 4. Erreur de pixels............................. 50 F 8. Causes et élimination des pannes 62 9. Soins et entretien ......................... 63 10. Exclusion de garantie ................. 63 11. Service et assistance .................. 63 5. Caractéristiques techniques ......... 51 12. Formats de fichiers pris en charge .................
Nous vous remercions d’avoir choisi un produit Hama. Veuillez prendre le temps de lire l‘ensemble des remarques et consignes suivantes. Veuillez conserver ce mode d‘emploi à portée de main afin de pouvoir le consulter en cas de besoin. Transmettez-le au nouveau propriétaire avec l’appareil le cas échéant. 1.
• Tenez les emballages d‘appareils hors de portée des enfants, risque d‘étouffement. • Recyclez les matériaux d’emballage conformément aux prescriptions locales en vigueur. Avertissement - Piles • Retirez les piles usagées immédiatement du produit pour les recycler. • Utilisez exclusivement des batteries (ou des piles) du type indiqué.
5. Caractéristiques techniques • Formats image pris en charge : JPG / JPEG / BMP • Format audio pris en charge : MP3 • Formats vidéo pris en charge : H.264 / DIVX / XVID / AVI / MOV / MPEG4 / MJPEG • Cartes mémoire prises en charge : SD / SDHC • Mémoire interne : 4 GB • Connexions : Micro-USB 2.0 , alimentation CC 6. Mise en service 6.1. Installation • Retirez le film protecteur situé sur l’écran. • Placez l‘appareil sur une surface plane horizontale antidérapante. • Ne placez aucun objet sur l‘appareil.
6.3 Télécommande • Ouvrez le compartiment à pile de la télécommande (fig.) • Insérez une pile bouton de type CR2032 conformément aux indications polarité • Retirez le film de protection situé sur la pile. • Refermez le compartiment à pile. Veuillez contrôler le bon verrouillage du couvercle. 2 1 F 6.4 Connexion de l’alimentation électrique Avertissement • Utilisez l‘appareil exclusivement branché à une prise de courant appropriée.
7. Fonctionnement • Après le raccordement à l‘alimentation électrique, le produit se met en marche automatiquement. • Lorsque vous allumez sélectionnez l‘aide des touches de curseur p / q votre langue de menu souhaitée et confirmez votre choix en appuyant sur ►II. • Appuyez et maintenir enfoncé sur la touche de l’appareil ou de la télécommande afin de mettre ce dernier sous/hors tension. • Le logo de démarrage de Hama apparaît brièvement à l’écran avant de faire place à l’affichage du menu principal.
F 7.2 Lecture - Insérez votre périphérique de stockage dans l’emplacement dédié de votre ordinateur. Remarque • Veillez à ce que le format du périphérique de stockage et les données stockées sur ce dernier correspondent aux caractéristiques de l’appareil. • Veuillez noter que cet appareil ne prend pas en charge la lecture de données de différents dossiers successivement. Ne créez aucun dossier sur le périphérique de stockage, mais faites glisser les différents fichiers sur ce périphérique.
Lecture générale • À l’aide des touches CURSOR t / u / p / q, sélectionnez le fichier image, le fichier audio ou le fichier vidéo - le cas échéant, sélectionnez premièrement le dossier concerné, puis le fichier que vous désirez lire ou à partir duquel vous désirez démarrer en diaporama. • Appuyez sur ►II pour démarrer la lecture.
Lecture des fichiers image • Si vous appuyez sur ►II, les paramètres de lecture s’ouvrent également. Après env. 10 secondes, la fenêtre se referme automatiquement. En alternative, appuyez sur pour accéder de nouveau à la lecture. F • Appuyez de nouveau sur ►II pour arrêter/démarrer la lecture. Si ► ou II s’affiche en haut à gauche, tous les fichiers image du dossier sélectionné (diaporama) ou seule l’image actuelle sont lus.
• Dans les paramètres de lecture, appuyez sur q, puis sur ►II pour ouvrir le menu de sélection rapide. En alternative, appuyez sur ì ou appuyez sur la touche ►II et maintenez-la enfoncée pour ouvrir le menu de sélection rapide. Après env. 10 secondes, la fenêtre se referme automatiquement. En alternative, appuyez sur ì ou pour accéder de nouveau à la lecture. • Sélectionnez une des options à l’aide des touches CURSOR p / q.
Lecture de fichiers vidéo • Appuyez sur ì ou ►II pour ouvrir le menu de sélection rapide. Après env. 10 secondes, la fenêtre se referme automatiquement. • En alternative, appuyez sur ì ou pour accéder de nouveau à la lecture • Appuyez de nouveau sur ►II pour arrêter/démarrer la lecture. • Sélectionnez une des options à l’aide des touches CURSOR t / u. • Pour sélectionner/modifier une option, appuyez une fois / plusieurs fois sur ►II.
Remarque • Veuillez noter la capacité maximale de stockage de la mémoire interne et les formats de fichiers pris en charge par l’appareil. • Un message vous indique la progression de la procédure de copie. Copier directement • À l’aide des touches CURSOR p / q, sélectionnez le périphérique de stockage (USB ou SD) à partir duquel des fichiers doivent être copiés dans la mémoire interne. • À l’aide des touches CURSOR t / u / p / q, sélectionnez le fichier / le dossier.
7.5 Paramètres À l’aide des touches CURSOR t / u, sélectionnez l’option Paramètres. • Appuyez sur ►II pour sélectionner l’option. • À l’aide des touches CURSOR p / q, sélectionnez Heure & date, Alarme, Minuteur ou Générale. Confirmez votre sélection en appuyant sur ►II. • Sélectionnez la fonction que vous désirez paramétrer à l’aide des touches CURSOR p / q. • Modifiez le paramétrage de la fonction sélectionnée à l’aide des touches CURSOR ►II, t / u / p / q.
Affichage Fonction Réglage de la langue des menus / du système Sélection du schéma de couleurs Activation/désactivation de la musique de fond lors de la BG Musiq lecture de fichiers image Rétablissement des réglages par défaut (état de livraison) Firmware Update Attention Tous vos réglages paramétrés seront supprimés. Rétablissement des réglages par défaut (état de livraison) Réinit. Attention Tous vos réglages paramétrés seront supprimés.
Avertissement concernant la perte de données • Assurez-vous que le transfert des données est terminé avant d’extraire la carte mémoire de l’appareil. • Retirez en tous les cas le support de données amovible à l‘aide de la fonction d‘extraction de votre système d‘exploitation avant d‘extraire le périphérique de stockage de l’appareil ou avant de déconnecter l’appareil de votre ordinateur. • Vous risquez sinon de perdre des données. 8.
Problème Cause possible Dépannage Aucun son Insérez un support d´information Le support d´information ne contient aucune donnée Vérifiez votre support d´information. L´appareil est mis sur „silencieux“ Augmentez le volume de l´appareil Aucun support d´information n´est inséré Insérez un support d´information Le support d´information ne contient aucun fichier Vérifiez votre support d´information La lecture de la musique ne démarre pas Format incorrect Convertissez le fichier musical en mp3.
12. Formats de fichiers pris en charge F 64 Format photo Résolution maximale JPEG, JPG, BMP 1280 x 768 Format audio Débit binaire MP3 32 Kbit/s ~ 320 Kbit/s (débit binaire) 32 KHz ~ 48 KHz (fréquence d’échantillonnage) 20 Mio de pixelsl Formats vidéo Container Video Codec Résolution maximale Débit binaire mp4 AVI, MP4 MPEG 4, Divx, Xvid, H.264 1280 x 720 @ 30P 20Mbit/sec divx, avi AVI, DMF MPEG 4, Divx, Xvid, H.
13. Caractéristiques techniques Cadre photo numérique 00118564 Alimentation électrique, entrée 100-240 V AC / 50/60 Hz / 0,13 A Alimentation électrique, sortie 5 V DC / 1,0 A Puissance absorbée ≤5W Dimensions (L x H x P) 195 x 140 x 52 mm Poids env.
14. Structure du menu Photo Diaporama Diaporama photos avec musique Musique Film Dossier Calendrier Calendrier sans image de fond Calendrier avec diaporama Paramétres Date, heure Mode Temps Date Format Début de semaine Fond d‘écran F Alarme Alarme T. Alarme Alarme Répéter Alarm Tone Alarme Volume Minuteur Status Démarrage automatique Temps d‘arrét atmomatique Répéter Générale Langue Couler de théme BG Musiq Firmware Update Réinit.
15. Consignes de recyclage Remarques concernant la protection de l’environnement: Conformément à la directive européenne 2002/96/CE et 2006/66/CE, et afin d‘atteindre un certain nombre d‘objectifs en matière de protection de l‘environnement, les règles suivantes doivent être appliquées: Les appareils électriques et électroniques ainsi que les batteries ne doivent pas être éliminés avec les déchets ménagers.
A 5 4 2 1 3 6 7 ES 8 9 10 11 B 1 3 5 2 4 6 7 8 68 9
Elementos de manejo e indicadores A A: Marco digital – Panel de manejo y conexiones 1 2 3 ►II 4 p 5 t 6 u 7 q 8 9 10 11 • Encender/apagar • Acceso directo al menú principal • Retroceder a la página de menú superior • Pausar/iniciar reproducción o confirmación de los datos introducidos en menús de selección • Menú de acceso directo • Ajustes de reproducción • Cursor hacia arriba en menús de selección • Archivo de imagen/audio anterior • Rebobinar en archivos de audio • Aumentar el brillo en arc
Índice 1. Explicación de los símbolos de aviso y de las indicaciones ............... 71 2. Contenido del paquete................. 71 3. Instrucciones de seguridad .......... 71 4. Fallo de píxel ................................ 72 5. Características técnicas................ 73 6. Puesta en funcionamiento ........... 73 6.1 Instalación .......................................73 6.2 Marco de fotos – Colocación o cambio de pilas ....................................73 ES 6.3 Mando a distancia .................
Le agradecemos que se haya decidido por un producto de Hama. Tómese tiempo y léase primero las siguientes instrucciones e indicaciones. Después, guarde estas instrucciones de manejo en un lugar seguro para poder consultarlas cuando sea necesario. Si vende el aparato, entregue estas instrucciones de manejo al nuevo propietario. 1.
Aviso - Pilas • Retire y deseche de inmediato las pilas gastadas del producto. • Utilice exclusivamente pilas recargables (o pilas) que sean del mismo tipo. • Observe siempre la correcta polaridad (inscripciones + y -) de las pilas y coloque éstas de forma correspondiente. La no observación de lo anterior conlleva el riesgo de derrame o explosión de las pilas. • No sobrecargue las pilas. • Mantenga las pilas fuera del alcance de los niños.
5. Características técnicas • Formatos de imagen compatibles: JPG / JPEG / BMP • Formato de audio compatible: MP3 • Formatos de vídeo compatibles: H.264 / DIVX / XVID / AVI / MOV / MPEG4 / MJPEG • Tarjetas de memoria compatibles: SD / SDHC • Memoria interna: 4GB • Conexiones: Micro-USB 2.0 , alimentación de corriente DC 6. Puesta en funcionamiento 6.1 Instalación • Retire la lámina protectora de la pantalla. • Coloque el producto sobre una superficie plana, horizontal y antideslizante.
6.3 Mando a distancia • Abra el compartimento de pilas del mando a distancia (fig.) • Coloque la pila de botón tipo CR2032 asegurándose de que la polaridad sea la correcta. • Si lo desea, retire la tira interruptora de contacto de la pila. • Cierre de nuevo el compartimento de pilas. Al hacerlo, asegúrese de que el cierre encaje completamente y sin impedimentos. 2 1 ES 6.4 Conexión de la alimentación de corriente Aviso • Utilice el producto sólo conectado a una toma de corriente autorizada.
7. Funcionamiento • Después de conectar a la red eléctrica, el producto se enciende automáticamente. • La primera vez que seleccione con las teclas de cursor p / q el idioma de menú deseado y confirme su selección pulsando ►II. • Pulse y mantenga pulsado en el producto o en el mando a distancia para encender/ apagar el producto. • El logo de inicio Hama se visualiza durante algunos segundos, tras los cuales se accede al menú principal de manera estándar.
ES 7.2 Reproducción Inserte el medio de memoria seleccionado en la ranura correspondiente. Nota • Asegúrese de que los medios de memoria y los archivos en ellos almacenados se corresponden con los formatos compatibles con el producto. • Tenga en cuenta que este producto no soporta la reproducción de archivos almacenados en carpetas.
Reproducción general • Seleccione, mediante las teclas CURSOR t / u / p / q, el archivo de imagen, audio o vídeo o, de ser necesario, en primer lugar la carpeta de archivos correspondientes y, después, el archivo, que deba reproducirse o con el que deba iniciarse la presentación de diapositivas. • Pulse ►II para iniciar la reproducción.
Reproducción archivos de imagen • Pulsando ►II se abren también los ajustes de reproducción. Tras aprox. 10 segundos, la ventana se cierra automáticamente. Alternativamente, pulse para regresar a la reproducción. ES • Pulse ►II repetidamente para detener/iniciar la reproducción. Si en el extremo superior izquierdo se visualiza ► o II , se reproducen todos los archivos de imagen de la carpeta seleccionada (presentación de diapositivas) o bien solo la imagen actual.
• En los ajustes de reproducción, pulse q y, ►II seguidamente, para abrir el menú de acceso directo. Alternativamente, pulse ì o pulse y mantenga pulsado ►II para abrir el menú de acceso directo. Tras aprox. 10 segundos, la ventana se cierra automáticamente. Alternativamente, pulse ì o , para regresar a la reproducción. • Seleccione cada opción mediante las teclas CURSOR p / q. • Para seleccionar/modificar la opción, pulse una vez/repetidamente t / u o ►II.
Reproducción archivos de vídeo • Pulse ì o ►II para abrir el menú de acceso directo. Tras aprox. 10 segundos, la ventana se cierra automáticamente. • Alternativamente, pulse ì o para regresar a la reproducción • Pulse ►II repetidamente para detener/iniciar la reproducción. • Seleccione las diferentes opciones mediante las teclas CURSOR t / u. • Para seleccionar/modificar la opción, pulse una vez/repetidamente ►II.
Nota • Tenga en cuenta la capacidad máx. de almacenamiento de la memoria interna, así como los formatos de archivo compatibles con el producto. • Durante el proceso de copia se le muestra el progreso del mismo. Copiado directo • Seleccione, mediante las teclas CURSOR p / q, el medio de memoria (USB o SD) desde el cual deban copiarse los archivos a la memoria interna. • Seleccione el archivo/la carpeta de archivos mediante las teclas CURSOR t / u / p / q.
7.5 Ajustes Seleccione, mediante las teclas CURSOR t / u la opción Instalación. • Pulse ►II para seleccionar la opción. • Con las teclas CURSOR p / q, seleccione Hora & fecha, Alarma, Temporizador o Común. Confirme la selección pulsando ►II. • Seleccione la función que desee ajustar mediante las teclas CURSOR p / q. • Modifique los ajustes de la función seleccionada mediante las teclas CURSOR ►II, t / u / p / q. • Pulse para acceder al nivel de menú previo.
Visualización Idioma Tema de color Función Ajuste del idioma del menú/sistema Selección del esquema de colores Activación/desactivación de la música de fondo en la BG Music reproducción de archivos de imagen Inicio de la actualización del firmware ¡Atención! Encontrará información relativa a la Firmware Update disponibilidad y la ejecución de posibles actualizaciones indicando el nº. de artículo en www.hama.com Restablecimiento de los ajustes de fábrica.
Aviso – Pérdida de datos • Antes de retirar una tarjeta de memoria del producto, asegúrese de que la transmisión de datos ha finalizado. • Siempre retire el medio extraíble de almacenamiento utilizando la función „Expulsar“ de su sistema operativo antes de proceder a extraer el medio de memoria del producto o desconectar el producto del ordenador. • De lo contrario, no se puede excluir la posibilidad de que se produzca una pérdida de datos. 8.
Fallo Posible causa Solución No hay ningún medio de memoria conectado Conecte un medio de memoria. El medio de memoria no contiene ningún dato Compruebe el medio de memoria. El aparato está ajustado a “Sin sonido” Suba el volumen en el aparato No hay ningún medio de memoria conectado Conecte un medio de memoria.
10. Exclusión de responsabilidad Hama GmbH & Co KG no se responsabiliza ni concede garantía por los daños que surjan por una instalación, montaje o manejo incorrectos del producto o por la no observación de las instrucciones de manejo y/o de las instrucciones de seguridad. 11. Servicio y soporte Si tiene que hacer alguna consulta sobre el producto, diríjase al asesoramiento de productos Hama. Línea directa: +49 9091 502-115 (Alemán/Inglés) Encontrar más información de soporte aquí: www.hama.com 12.
13. Datos técnicos Marco digital 00118564 Entrada de alimentación de corriente 100-240 V AC / 50/60 Hz / 0,13 A Salida de alimentación de corriente 5 V DC / 1,0 A Consumo de potencia ≤5W Dimensiones (An x Al x Pro) 195 x 140 x 52 mm Peso Ca.
14. Estructura del menú Foto Sesión de diapostivas Sesión de diapostivas con música Música Movie Carpeta Calendario Calendario sin imagen de fondo Calendario con Sesión de diapostivas Instalación Fecha, Hora Modo Tiempo Fecha Formato Semana de inicio Fondo ES Alarma Alarma Status Alarma Time Alarma repetición Alarma tone Alarma Volume Temporizador Status El arranque automático Automática de la hora de cierre Repetición Común Idioma Tema de color BG Music Firmware Update Formatear Info.
15. Instrucciones para desecho y reciclaje Nota sobre la protección medioambiental: Después de la puesta en marcha de la directiva Europea 2002/96/EU y 2006/66/EU en el sistema legislativo nacional, se aplicara lo siguiente: Los aparatos eléctricos y electrónicos, así como las baterías, no se deben evacuar en la basura doméstica.
A 5 4 2 1 3 6 7 I 8 9 10 11 B 1 3 5 8 90 2 4 6 7 9
Controlli e indicatori A A: Cornice digitale – Quadro dei comandi e degli attacchi 1 2 3 ►II 4 p 5 t 6 u 7 q 8 9 10 11 • Accensione/spegnimento • Accesso diretto al menu principale • Indietro alla pagina superiore del menu • Interruzione/avvio della riproduzione o conferma dell’immissione nel menu di selezione • Menu di scelta breve • Impostazioni di riproduzione • Cursore avanti nel menu di selezione • File immagine/audio precedente • Indietro nei file audio • Aumento della luminosità nei fil
Contenuto 1. Spiegazione dei simboli di avvertimento e delle indicazioni ...... 93 2. Contenuto della confezione ......... 93 3. Avvertenze di sicurezza ................ 93 4. Errori nei pixel .............................. 94 5. Caratteristiche tecniche ............... 95 6. Messa in esercizio......................... 95 6.1. Installazione ...................................95 6.2 Cornice digitale – inserimento o sostituzione della batteria......................95 I 6.3 Telecomando.......................
Grazie per avere acquistato un prodotto Hama! Prima della messa in esercizio, leggete attentamente le seguenti istruzioni e avvertenze, quindi conservatele in un luogo sicuro per una eventuale consultazione. In caso di cessione dell‘apparecchio, consegnate anche le presenti istruzioni al nuovo proprietario. 1.
Attenzione - batterie • Rimuovere e smaltire immediatamente le batterie scariche. • Utilizzare unicamente accumulatori (o batterie) conformi al tipo indicato. • Attenersi sempre alla corretta polarità (scritte + e -) delle batterie e inserirle di conseguenza. La mancata osservanza comporta la perdita di potenza o il rischio di esplosione delle batterie. • Non scaricare completamente le batterie. • Conservare le batterie al di fuori della portata dei bambini.
5. Caratteristiche tecniche • Formati immagini supportati: JPG / JPEG / BMP • Formato audio supportato: MP3 • Formati video supportati: H.264 / DIVX / XVID / AVI / MOV / MPEG4 / MJPEG • Memory card supportate: SD / SDHC • Memoria interna: 4GB • Attacchi: Micro-USB 2.0, alimentazione elettrica DC 6. Messa in esercizio 6.1. Installazione • Rimuovere la pellicola protettiva del display. • Mettere la cornice su una superficie piana, orizzontale e antiscivolo. • Non appoggiare oggetti sulla cornice.
6.3 Telecomando • Aprire il vano batterie dal telecomando (fig.) • Inserire la batteria a bottone del tipo CR2032 con la polarità corretta. • Rimuovere l’interruttore di contatto della batteria. • Richiudere nuovamente il vano batterie. Prestare attenzione che il coperchio sia ben chiuso. 2 1 I 6.
7. Funzionamento • Dopo il collegamento alla rete di alimentazione, il prodotto si accende automaticamente. • Alla prima accensione, selezionare con i tasti cursore p / q la lingua menu desiderata e confermare la selezione premendo ►II. • Premere il tasto sulla cornice digitale o sul telecomando per accendere o spegnere la cornice digitale. • Il logo di avvio Hama appare per alcuni secondi, quindi si passa al menu principale.
I 7.2 Riproduzione Inserire il supporto di memoria scelto nell’apposito slot. Nota • Verificare che i supporti di memoria e i dati ivi memorizzati siano compatibili con i formati supportati dal prodotto. • Il prodotto non supporta la riproduzione dei file archiviati in cartelle. Non copiare cartelle sul supporto di memoria. Copiare semplicemente i file singoli. Nel menu principale, scegliere mediante i tasti CURSORE t / u l’opzione dati immagini, audio o video.
Riproduzione generale • Selezionare con i tasti CURSORE t / u / p / q i file immagine, audio o video – eventualmente prima le cartelle, poi i file – che devono essere riprodotti o con cui si deve avviare la presentazione. • Premere ►II per avviare la riproduzione.
Riproduzione di file immagine • Se si preme ►II si aprono anche le impostazioni di riproduzione. Dopo ca. 10 secondi la finestra si chiude automaticamente. In alternativa premere , per tornare alla riproduzione. I • Premere nuovamente ►II per avviare/interrompere la riproduzione. Se in alto a sinistra viene visualizzato ► o II , vengono riprodotti tutti i file immagine della cartella selezionata (presentazione) oppure solo l’immagine attuale.
• Nelle impostazioni di riproduzione premere q quindi ►II per aprire il menu di selezione breve. In alternativa, premere ì o tenere premuto ►II , per aprire il menu di selezione breve. Dopo ca. 10 secondi la finestra si chiude automaticamente. In alternativa premere ì o per tornare alla riproduzione. • Selezionare mediante i tasti CURSORE p / q le singole opzioni. • Per selezionare/ modificare l’opzione premere una volta/ nuovamente t / u o ►II.
Riproduzione di file video • Premere ì o tenere premuto ►II per aprire il menu di selezione breve. Dopo ca. 10 secondi la finestra si chiude automaticamente. • In alternativa premere ì o per tornare alla riproduzione • Premere nuovamente ►II per avviare/interrompere la riproduzione. • Selezionare mediante i tasti CURSORE t / u le singole opzioni. • Per selezionare/ modificare l’opzione premere una volta/nuovamente ►II.
Nota • Attenersi alla capacità di memoria max. della memoria interna e i ai formati di file supportati dalla cornice digitale! • Durante la copia viene visualizzato questo progresso. Copia diretta • Mediante i tasti CURSORE p / q scegliere il supporto di memoria (USB oder SD) da cui si desiderano copiare i file sulla memoria interna. • Selezionare mediante i tasti CURSORE t / u / p / q il file / la cartella.
7.5 Impostazioni Selezionare mediante i tasti CURSORE t / u l’opzione Configurazione. • Premere ►II per scegliere l’opzione. Selezionare con i tasti CURSORE p / q Ora & data, Allarme, Timer o Comune generali. Confermare la selezione premendo ►II. • Selezionare mediante i tasti CURSORE p / q la funzione da impostare. • Modificare mediante i tasti CURSORE ►II, t / u / p / q l’impostazione della funzione selezionata. • Premere , per tornare al livello di menu precedente.
Display Funzione Impostazione della lingua dei menu/di sistema Selezione schema colori Attivazione / disattivazione musica di sottofondo durante la Musica BG riproduzione di file immagine Avvio dell’aggiornamento del firmware Attenzione! Informazioni sulla disponibilità ed esecuzione Firmware Update dei possibili aggiornamenti sono disponibili sul sito www. hama.com immettendo il numero di articolo Reset delle impostazioni allo stato di fornitura.
Attenzione – perdita di dati • Prima di rimuovere una memory card dal lettore schede, accertarsi che sia concluso il trasferimento dati. • Utilizzare sempre la funzione di rimozione sicura del proprio sistema operativo prima di rimuovere il supporto dati dal prodotto o di scollegare il prodotto dal proprio computer per evitare una eventuale perdita dei dati! 8.
Guasto Eliminazione Nessun supporto di memoria collegato. Inserire un supporto di memoria. Il supporto di memoria non contiene dati. Verificare il supporto di memoria. L‘apparecchio è impostato su „mute“ Aumentare il volume sull'apparecchio. Nessun supporto di memoria collegato. Inserire un supporto di memoria.
10. Esclusione di garanzia Hama GmbH & Co.KG non si assume alcuna responsabilità per i danni derivati dal montaggio o l‘utilizzo scorretto del prodotto, nonché dalla mancata osservanza delle istruzioni per l‘uso e/o delle indicazioni di sicurezza. 11. Assistenza e supporto In caso di domande sul prodotto, rivolgersi alla Consulenza prodotto Hama. Hotline: +49 9091 502-115 (ted./ing.) Ulteriori informazioni sul supporto sono disponibili qui: www.hama.com 12.
13. Dati tecnici Cornice foto digitale 00118564 Ingresso alimentazione elettrica 100-240 V AC / 50/60 Hz / 0,13 A Uscita alimentazione elettrica 5 V DC / 1,0 A Potenza assorbita ≤5W Misure (L x H x P) 195 x 140 x 52 mm Peso ca.
14. Struttura del menu Foto Dia show foto Dia show foto con musica Musica Video Cartella Calendario Calendario immagine di sfondo senza Calendario con Dia show foto Confrigurazione Data, ora Modalità Orario Data Formato Inizio settimana Sfondo I Allarme Status Allarme Tempo Allarme Allarme ripetizione Allarme tone Allarme Volume Timer Status Time on Time off ripetizione Comune Lingua Tema di colore Musica BG Firmware Update Reset Info.
15. Indicazioni di smaltimento Informazioni per protezione ambientale: Dopo l’implementazione della Direttiva Europea 2002/96/EU e 2006/66/EU nel sistema legale nazionale, ci sono le seguenti applicazioni: Le apparecchiature elettriche ed elettroniche e le batterie non devono essere smaltite con i rifiuti domestici.
A 5 4 2 1 3 6 7 NL 8 9 10 11 B 1 3 5 2 4 6 7 8 112 9
Bedieningselementen en indicatoren A A: Digitale fotolijst – Bedienings- en aansluitveld 1 2 3 ►II 4 p 5 t 6 u 7 q 8 9 10 11 • In-/ Uitschakelen • Directe toegang tot het hoofdmenu • Terugkeren naar overkoepelende menupagina • Weergave stoppen/ starten resp.
Inhoud 1. Verklaring van waarschuwingssymbolen en instructies ................. 115 8. Storingsoorzaken en verhelpen van storingen.................................. 128 2. Inhoud van de verpakking ......... 115 9. Onderhoud en verzorging .......... 129 3. Veiligheidsinstructies ................. 115 10. Uitsluiting van garantie en aansprakelijkheid ........................... 130 4. Pixelfouten ................................. 116 5. Technische eigenschappen ......... 117 6. Inbedrijfstelling .......
Hartelijk dank dat u voor een product van Hama heeft gekozen. Neem de tijd om de volgende aanwijzingen en instructies volledig door te lezen. Berg deze gebruiksaanwijzing vervolgens op een goede plek op zodat u hem als naslagwerk kunt gebruiken. Mocht u het toestel verkopen, geeft u dan ook deze gebruiksaanwijzing aan de nieuwe eigenaar. 1.
Waarschuwing - batterijen • Lege batterijen direct uit het product verwijderen en afvoeren. • Gebruik uitsluitend accu’s (of batterijen), welke met het vermelde type overeenstemmen. • Let absoluut op de correcte polariteit (opschrift + en -) van de batterijen en plaats deze dienovereenkomstig in het batterijvakje. Indien de batterijen verkeerd worden geplaatst kunnen deze gaan lekken of zelfs exploderen. • De batterijen niet overontladen. • Batterijen buiten het bereik van kinderen opbergen.
5. Technische eigenschappen • Ondersteunde fotoformaten: JPG / JPEG / BMP • Ondersteund audioformaat MP3 • Ondersteunde videoformaten: H.264 / DIVX / XVID / AVI / MOV / MPEG4 / MJPEG • Ondersteunde geheugenkaarten SD / SDHC • Intern geheugen: 4GB • Aansluitingen: Micro-USB 2.0, spanningsvoorziening DC 6. Inbedrijfstelling 6.1. Opstellen • Verwijder de display-beschermfolie. • Zet het product op een vlak, horizontaal en antislip oppervlak naar. • Plaats geen andere voorwerpen op het product.
6.3 Afstandsbediening • Open het batterijvak van de afstandsbediening (afb.). • Plaats de knoopcel van het type CR2032 en let daarbij op de juiste polariteit (+) en (-). • Indien van toepassing het contactonderbrekerstrookje van de batterij verwijderen. • Sluit het batterijvak weer. Let erop dat de vergrendeling van het deksel correct vastklikt. 2 1 NL 6.4 Aansluiten van de spanningsvoorziening Waarschuwing • Sluit het product alleen aan op een daarvoor geschikt en intact stopcontact.
7. Gebruik en werking • Na aansluiting op de stroomvoorziening, het product automatisch ingeschakeld. • Wanneer u eerst selecteren met de cursortoetsen p / q uw gewenste menutaal en bevestig uw keuze door te drukken ►II. • Druk op het product zelf of op de afstandsbediening teneinde het product in of uit te schakelen. • Het Hama-startlogo verschijnt gedurende enige seconden en het product schakelt vervolgens standaard om naar het hoofdmenu.
NL 7.2 Weergave • Steek het geselecteerde opslagmedium in het daarvoor bedoelde slot. Aanwijzing • Let erop dat de opslagmedia, alsmede de daarop opgeslagen bestanden, met de door het product ondersteunde formaten overeenkomen. • Houd er rekening mee dat dit product geen mapoverkoepelende weergave van de bestanden ondersteunt. Sla dus geen mappen op het opslagmedium op, maar sla de afzonderlijke bestanden op.
Algemene weergave • Selecteer met behulp van de CURSOR-toetsen t / u / p / q het fotobestand, audiobestand of videobestand – evt. eerst de betreffende bestandsmap en dan het bestand –, welke dienen te worden weergegeven resp. waarmee de diashow dient te starten. • Druk op ►II teneinde de weergave te starten.
Weergave fotobestanden • Bij het indrukken van ►II worden tevens de instellingen voor het afspelen geopend. Na ca. 10 seconden sluit het venster automatisch. Alternatief drukt u op , teneinde naar de weergave terug te keren. NL • Druk bij herhaling op ►II, teneinde de weergave te pauzeren/starten. Indien boven links ► resp. II wordt weergegeven, dan worden alle fotobestanden van de geselecteerde map (diashow) resp. wordt alleen de actuele foto weergegeven.
• Druk in de afspeelinstellingen op q en aansluitend op ►II, teneinde het snelkeuzemenu te openen. Alternatief drukt u op ì of houdt u ►II ingedrukt, teneinde het snelkeuzemenu te openen. Na ca. 10 seconden sluit het venster automatisch. Alternatief drukt u op ì of , teneinde naar de weergave terug te keren. • Selecteer met behulp van de CURSOR-toetsen p / q de afzonderlijke opties. • Voor het selecteren/wijzigen van de optie drukt u eenmaal/bij herhaling op t / u of ►II..
Weergave videobestanden • Druk op ì of ►II, teneinde het snelkeuzemenu te openen. Na ca. 10 seconden sluit het venster automatisch. • Alternatief drukt u op ì of , teneinde naar de weergave terug te keren • Druk bij herhaling op ►II, teneinde de weergave te pauzeren/starten. • Selecteer met behulp van de CURSOR-toetsen t / u de afzonderlijke opties. • Voor het selecteren/ wijzigen van de optie drukt u eenmaal/ bij herhaling op ►II.
Aanwijzing • Neem de max. geheugencapaciteit van het interne geheugen alsmede de door het product ondersteunde bestandsformaten in acht! • Tijdens het kopiëren wordt de voortgang daarvan weergegeven. Direct kopiëren • Selecteer met behulp van de CURSOR-toetsen p / q het opslagmedium (USB oder SD), van welk bestanden op het interne geheugen dienen te worden gekopieerd. • Selecteer met behulp van de CURSOR-toetsen t / u / p / q het bestand / de bestandsmap.
7.5 Instellingen Selecteer met behulp van de CURSOR-toetsen t / u de optie Instellingen. • Druk op ►II, teneinde de optie te selecteren. • Selecteer met behulp van de CURSOR-toetsen p / q Tijd & Datum, Alarm, Timer of Algemeen. Bevestig de selectie door op ►II te drukken. • Selecteer met behulp van de CURSOR-toetsen p / q de in te stellen functie. • Wijzig met behulp van de CURSOR-toetsen ►II, t / u / p / q de instellingen van de geselecteerd functie.
Weergave Taal Themakleur achtergrond muziek firmware Update standaard Instellingen Productinfo. Start-up-modus Functie Instelling van de menu- / systeemtaal Selectie kleurschema Activeren / deactiveren achtergrondmuziek bij weergave fotobestanden Start van de firmware update Attentie! Informatie over beschikbaarheid en uitvoering van mogelijke updates vindt u onder invoer van het artikelnummer op www.hama.com Resetten op de instellingen bij uitlevering.
Waarschuwing – verlies van gegevens • Voordat u een geheugenkaart uit het product wegneemt, dient u er zeker van te zijn dat de gegevensoverdracht is voltooid. • Verwijder de gegevensdrager te allen tijde via de functie „Uitwerpen“ van uw besturingssysteem, voordat u het opslagmedium uit het product wegneemt of het product van uw computer scheidt. • Indien hier niet op wordt gelet, dan kan gegevensverlies niet worden uitgesloten! 8.
Storing Mogelijke oorzaak Oplossing Geen opslagmedium geplaatst Plaats een opslagmedium. Opslagmedium bevat geen gegevens Controleer het opslagmedium. Toestel staat op „mute“ Verhoog het volume op het toestel. Geen opslagmedium geplaatst Plaats een opslagmedium. Opslagmedium bevat geen bestand Controleer het opslagmedium. Muziek wordt niet afgespeeld Verkeerd formaat Converteer het muziekbestand in mp3.
10. Uitsluiting van garantie en aansprakelijkheid Hama GmbH & Co. KG aanvaardt geen enkele aansprakelijkheid of garantieclaims voor schade of gevolgschade, welke door ondeskundige installatie, montage en ondeskundig gebruik van het product ontstaan of het resultaat zijn van het niet in acht nemen van de bedieningsinstructies en/of veiligheidsinstructies. 11. Service en support Neem bij vragen over het product contact op met de afdeling Productadvies van HAMA.
13. Technische gegevens Digitale fotolijst 00118564 Spanningsvoorziening ingang 100-240 V AC / 50/60 Hz / 0,13 A Spanningsvoorziening uitgang 5 V DC / 1,0 A Vermogensopname ≤5W Afmetingen (B x H x D) 195 x 140 x 52 mm Gewicht ca.
14. Menustructuur Foto Foto-diashow Foto-diashow met muziej Muziek Film Map Kalender Kalender afbeelding achtergrond zonder Kalender met Foto-diashow Instelling Datum,Tijd Mode Tijd Datum Format Week begin Achtergrond NL Alarm Alarm Status Alarm Time Alarm herhalen Alarmtoon Alarm Volume Timer Toestand Automatisch opstarten Automatisch afsluiten Herhalen Algemeen Taal Themakleur Achtergrond muziek Firmware Update Standaard Instellingen Productinfo.
15. Aanwijzingen over de afvalverwerking Notitie aangaande de bescherming van het milieu: Ten gevolge van de invoering van de Europese Richtlijn 2002/96/EU en 2006/66/EU in het nationaal juridisch system, is het volgende van toepassing: Elektrische en elektronische apparatuur, zoals batterijen mag niet met het huisvuil weggegooid worden.
A 5 4 2 1 3 6 7 PL 8 9 10 11 B 1 3 5 2 4 6 7 8 134 9
Elementy obsługi i sygnalizacji A A: Elektroniczna ramka do zdjęć – Pole obsługowe i przyłączeniowe 1 2 3 ►II 4 p 5 t 6 u 7 q 8 9 10 11 • Włączanie / wyłączanie • Bezpośredni dostęp do głównego menu • Powrót do nadrzędnego poziomu menu • Wstrzymanie/ uruchamianie odtwarzania lub potwierdzenie danych w menu wyboru • Menu szybkiego wyboru • Ustawienia odtwarzania • Kursor do góry w menu wyboru • Poprzedni plik obrazkowy/ audio • Przewijanie wstecz pliku audio • Rozjaśnianie plików wideo • Kursor
Spis treści 1. Objaśnienie symboli ostrzegawczych i wskazówek......... 137 2. Zawartość opakowania .............. 137 3. Wskazówki bezpieczeństwa ....... 137 4. Błędy pikselowe.......................... 138 5. Dane techniczne ......................... 139 6. Uruchamianie ............................. 139 6.1 Ustawianie.....................................139 6.2 Ramka do zdjęć - wkładanie lub wymiana baterii .................................139 PL 6.3 Pilot zdalnego sterowania..............140 6.
Dziękujemy za zakup naszego produktu! Przed pierwszym użyciem należy dokładnie przeczytać instrukcję obsługi. Instrukcję należy przechować, gdyż może być jeszcze potrzebna. 1. Objaśnienie symboli ostrzegawczych i wskazówek Ostrzeżenie Używane w celu zwrócenia uwagi na szczególne niebezpieczeństwo lub ryzyko. Wskazówki Używane w celu zwrócenia uwagi na szczególnie przydatne informacje. 2.
Ostrzeżenie - baterie • Natychmiast usunąć z produktu zużyte baterie i poddać je utylizacji. • Używać wyłącznie akumulatorów (lub baterii) odpowiadających podanemu typowi. • Wkładając baterie, zwrócić koniecznie uwagę na właściwe podłączenie biegunów (znak + i -). Nieprzestrzeganie grozi wyciekiem lub wybuchem baterii. • Nie przeciążać baterii. • Przechowywać baterie poza zasięgiem dzieci. • Nie zwierać akumulatorów / baterii oraz trzymać je z dala od odkrytych przedmiotów metalowych.
5. Dane techniczne • Obsługiwane formaty obrazów: JPG / JPEG / BMP • Obsługiwane formaty audio: MP3 • Obsługiwane formaty wideo: H.264 / DIVX / XVID / AVI / MOV / MPEG4 / MJPEG • Obsługiwane karty pamięci: SD / SDHC • Pamięć wewnętrzna: 4GB • łącza: Micro-USB 2.0, zasilanie elektryczne DC 6. Uruchamianie 6.1 Ustawianie • Usunąć z ekranu folię zabezpieczającą. • Ustawić produkt na równej, poziomej i antypoślizgowej powierzchni. • Nie ustawiać na urządzeniu innych przedmiotów.
6.3 Pilot zdalnego sterowania • Otworzyć schowek na baterie pilota (rys.) • Włożyć baterię guzikową typu CR2032, zwracając uwagę na właściwą biegunowość. • Ewentualnie usunąć pasek przerywacza stykowego baterii. • Ponownie zamknąć schowek na baterię. Zwrócić przy tym uwagę, aby blokada dokładnie się zatrzasnęła. 2 1 PL 6.4 Podłączanie zasilanie elektrycznego Ostrzeżenie • Podłączać produkt tylko do odpowiedniego gniazda wtykowego.
7. Obsługa • Po podłączeniu do źródła zasilania, urządzenie włącza się automatycznie. • Przy pierwszym włączeniu wybierz za pomocą klawiszy kursora p / q żądany język menu i potwierdź wybór wciskając ►II. • Produkt można włączać/wyłączać przyciskiem na produkcie lub na pilocie zdalnego sterowania. • Po uruchomieniu urządzenia przez kilka sekund wyświetlane jest logo Hama, a następnie pojawia się menu główne. • W zależności od ustawienia odtwarzane są pliki obrazkowe/ audio/ wideo lub kalendarz.
PL 7.2 Odtwarzanie Włożyć wybrany nośnik danych do odpowiedniego slotu. Wskazówki • Należy pamiętać, że nośniki danych oraz zapisane na nich pliki muszą odpowiadać formatom obsługiwanym przez produkt. • Należy pamiętać, że produkt ten nie obsługuje odtwarzania plików zapisanych w różnych folderach. Nie tworzyć folderów na nośniku danych, lecz każdy plik zapisywać osobno. W menu głównym wybrać za pomocą przycisków KURSORA t / u opcję plików obrazkowych, audio lub wideo.
Ogólne odtwarzanie • Za pomocą przycisków KURSORA t / u / p / q wybrać plik obrazkowy, audio lub wideo (ewent. najpierw odpowiedni folder z plikami, a następnie plik), który ma być odtwarzany lub od którego ma rozpocząć się pokaz slajdów. • Nacisnąć przycisk ►II , aby uruchomić odtwarzanie.
Odtwarzanie plików obrazkowych • Naciśnięcie ►II otwiera także ustawienia odtwarzania. Po ok. 10 sekundach okno zamyka się automatycznie. Alternatywnie nacisnąć , aby powrócić do odtwarzania. PL • Ponownie nacisnąć ►II, aby zatrzymać/uruchomić odtwarzanie. Jeżeli w lewym górnym rogu pojawi się ► lub II , odtwarzane są pliki obrazkowe wybranego folderu (pokaz slajdów) lub tylko aktualny obraz. • W ustawieniach odtwarzania nacisnąć p, a następnie ponownie ►II , aby włączyć/wyłączyć muzykę w tle.
• W ustawieniach odtwarzania nacisnąć q, a następnie ►II , aby otworzyć menu szybkiego wyboru. Alternatywnie można otworzyć menu szybkiego wyboru, naciskając ì lub naciskając ►II dłużej. Po ok. 10 sekundach okno zamyka się automatycznie. Alternatywnie nacisnąć ì lub , aby powrócić do odtwarzania. • Za pomocą przycisków KURSORA p / q wybrać poszczególne opcje. • Aby wybrać/ zmienić opcję, nacisnąć jednokrotnie/ kilkakrotnie t / u lub ►II.
Odtwarzanie plików wideo • Nacisnąć ì lub ►II, aby otworzyć menu szybkiego wyboru. Po ok. 10 sekundach okno zamyka się automatycznie. • Alternatywnie nacisnąć ì lub , aby powrócić do odtwarzania. • Ponownie nacisnąć ►II, aby zatrzymać/uruchomić odtwarzanie. • Za pomocą przycisków KURSORA t / u wybrać poszczególne opcje. • Aby wybrać/ zmienić opcję, nacisnąć jednokrotnie/ kilkakrotnie przycisk ►II.
Wskazówki • Uwzględnić maks. ilość wolnego miejsca w pamięci wewnętrznej oraz formaty obsługiwane przez produkt! • Podczas procesu kopiowania wyświetlany jest jego postęp. Bezpośrednie kopiowanie • Za pomocą przycisków KURSORA p / q wybrać nośnik danych (USB lub SD), z którego mają być kopiowane pliki do pamięci wewnętrznej. • Za pomocą przycisków KURSORA t / u / p / q wybrać pliki / folder z plikami.
7.5 Ustawienia Za pomocą przycisków KURSORA t / u wybrać opcję Ustawienia. • Nacisnąć przycisk ►II, aby wybrać opcję. • Przyciskami KURSORA wybrać p / q Godzina & Data, Budzik, Minutnik lub Ogólnie. Potwierdzić wybór, naciskając przycisk ►II. • Za pomocą przycisków KURSORA p / q wybrać funkcję, która ma być skonfigurowana. • Za pomocą przycisków KURSORA ►II, t / u / p / q zmienić ustawienia wybranej funkcji. • Nacisnąć , aby powrócić do poprzedniego poziomu menu.
Wskaźnik Funkcja Ustawienia języka menu / systemu Wybór koloru Włączanie / wyłączanie muzyki w tle podczas odtwarzania Muzyka w tle plików obrazkowych Uruchamianie aktualizacji oprogramowania sprzętowego Aktualizacja Uwaga! Informacje o dostępności i możliwości wykonania oprogramowania aktualizacji dostępne są po wprowadzeniu numeru artykułu na stronie www.hama.com Przywracanie ustawień fabrycznych Ustawienia Uwaga! Wszystkie wcześniejsze ustawienia zostaną fabryczne utracone.
Ostrzeżenie – przed utratą danych • Przed wyjęciem karty pamięci z produktu upewnić się, czy transfer danych został zakończony. • Przed wyjęciem nośnika danych z produktu, bądź odłączeniem produktu od komputera należy zawsze usunąć wymienny nośnik danych za pomocą funkcji bezpiecznego usuwania sprzętu systemu operacyjnego. • Nieprzestrzeganie może prowadzić do utraty danych! 8.
Usterka Możliwa przyczyna Usuwanie Nie podłączono żadnego nośnika danych. Podłączyć nośnik danych. Nośnik nie zawiera żadnych danych. Sprawdzić nośnik danych. Urządzenie jest wyciszone. Zwiększyć głośność. Nie podłączono żadnego nośnika danych. Podłączyć nośnik danych. Nośnik nie zawiera żadnych plików. Sprawdzić nośnik danych. Muzyka nie jest odtwarzana Nieprawidłowy format. Przekonwertować plik muzyczny na format mp3. Wideo nie jest odtwarzane lub obraz „skacze” Nieprawidłowy format.
10. Wyłączenie odpowiedzialności Hama GmbH & Co. KG nie udziela gwarancji ani nie odpowiada za szkody wskutek niewłaściwej instalacji, montażu oraz nieprawidłowego stosowania produktu lub nieprzestrzegania instrukcji obsługi i/lub wskazówek bezpieczeństwa. 11. Serwis i pomoc techniczna W razie pytań dotyczących produktu prosimy zwrócić się do infolinii Hama. Gorąca linia: +49 9091 502-115 (niem./ang.) Dodatkowe informacje są dostępne na stronie: www.hama.com 12.
13. Dane techniczne Elektroniczna ramka do zdjęć 00118564 Zasilanie na wejściu 100-240 V AC / 50/60 Hz / 0,13 A Zasilanie na wyjściu 5 V DC / 1,0 A Pobór mocy ≤5W Wymiary (szer. x wys. x gł.) 195 x 140 x 52 mm Waga Ca.
14. Struktura menu Zdjęcie Pokaz zdjęc /slajdów pokaz slajdów z muzyką Muzyka Film Folder Kalendarz Kalendarz bez tła Kalendarz z pokaz slajdów Ustawienie Data, godzina Tryb Czas Data Format daty Początek tygodnia Tło PL Budzik Stan budzika Czas budz. Powtorz alarm Dzwięk alarmu Glosnosc´ alarmu Minutnik Status Time on Time off Powtórz Ogólnie Język Kolor tematu Muzyka w tle Aktualizacja oprogramowania Ustawienia fabryczne Informacje o prod.
15. Informacje dotycząca recyklingu Wskazówki dotyczące ochrony środowiska: Od czasu wprowadzenia europejskiej dyrektywy 2002/96/EU i 2006/66/EU do prawa narodowego obowiązują następujące ustalenia: Urządzeń elektrycznych, elektronicznych oraz baterii jednorazowych nie należy wyrzucać razem z codziennymi odpadami domowymi! Użytkownik zobowiązany prawnie do odniesienia zepsutych, zniszczonych lub niepotrzebnych urządzeń elektrycznych i elektronicznych do punktu zbiórki lub do sprzedawcy.
A 5 4 2 1 3 6 7 H 8 9 10 11 B 1 3 5 2 4 6 7 8 156 9
Kezelőelemek és kijelzők A A: Digitális képkeret – Kezelő- és csatlakozómező 1 2 3 ►II 4 p 5 t 6 u 7 q 8 9 10 11 • Be-/ kikapcsolás • Közvetlen hozzáférés a főmenühöz • Visszaugrás a fölérendelt menüoldalra • Lejátszás megállítása/ elindítása ill.
Tartalomjegyzék 1. Figyelmeztető szimbólumok és előírások ismertetése ..................... 159 2. A csomag tartalma ..................... 159 3. Biztonsági utasítások ................. 159 4. Képponthiba............................... 160 5. Műszaki tulajdonságok .............. 161 6. Üzembevétel ............................... 161 6.1 Felállítás ........................................161 6.2 Képkeret – Az elem behelyezése, ill. cseréje ...........................................161 H 6.3 Távirányító...
Köszönjük, hogy ezt a Hama terméket választotta! Kérjük, hogy felszerelés előtt szánjon rá időt és olvassa el végig az alábbi útmutatót. A későbbiekben tartsa biztonságos helyen ezt a füzetet, hogy ha szükség van rá, bármikor megtalálja. Ha eladja ezt a terméket, vele együtt adja tovább ezt az útmutatót is az új tulajdonosnak. 1. Figyelmeztető szimbólumok és előírások ismertetése Figyelmeztetés Figyelmeztető jeleket használunk a biztonsági tényezők bemutatására, ill.
• Ne végezzen módosítást a készüléken. Ebben az esetben minden garanciaigény megszűnik. • Ne kísérelje meg a készülék saját karbantartását vagy javítását. Bármely karbantartási munkát bízzon illetékes szakemberre. • Feltétlenül tartsa távol a gyermekeket a csomagolóanyagtól, mert fulladásveszély áll fenn. • Azonnal ártalmatlanítsa a csomagolóanyagot a helyileg érvényes ártalmatlanítási előírások szerint.
5. Műszaki tulajdonságok • Támogatott képformátumok: JPG / JPEG / BMP • Támogatott hangformátum: MP3 • Támogatott videoformátumok: H.264 / DIVX / XVID / AVI / MOV / MPEG4 / MJPEG • Támogatott memóriakártyák: SD / SDHC • Belső memória: 4GB • Csatlakozók: Micro-USB 2.0, DC áramellátás 6. Üzembevétel 6.1 Felállítás • Távolítsa el a kijelzővédő fóliát. • Állítsa a terméket sík, vízszintes és csúszásmentes felületre. • Ne állítson más tárgyakat a termékre.
6.3 Távirányító • Nyissa ki a távirányító elemfiókját (ábra) • Helyezze be helyes polaritással a CR2032 típusú gombelemet. • Tetszés szerint távolítsa el az elem megszakító szalagját. • Zárja vissza az elemfiókot. Ügyeljen, hogy a retesz tisztán kattanjon be. 2 1 H 6.4 Az áramellátás csatlakoztatása Figyelmeztetés • Kizárólag egy erre a célra engedélyezett csatlakozó aljzattal üzemeltesse a terméket. A csatlakozó aljzatnak a termék közelében kell elhelyezkednie, és könnyen hozzáférhetőnek kell lennie.
7. Használat • Miután csatlakozott az áramellátás, a termék automatikusan bekapcsol. • Amikor először kapcsolja válasszuk a kurzor gombok p / q a kívánt nyelvet, és hagyja jóvá a kiválasztást ►II. • Nyomja meg magát a terméket vagy a távirányítót, hogy a terméket be-/kikapcsolja. • Néhány másodpercig megjelenik a Hama induló logo és utána alapértelmezésben a főmenüre vált. • Beállítás függvényében kép-/ hang-/ videofájlok vagy naptár kerülnek lejátszásra.
H 7.2 Lejátszás Dugja a kiválasztott tárolómédiumot a megfelelő nyílásba. Hivatkozás • Ügyeljen, hogy a tárolómédiumok, valamint az ezeken tárolt fájlok megfeleljenek a termék által támogatott formátumoknak. • Vegye figyelembe, hogy a termék nem támogatja a fájlok mappát meghaladó lejátszását. Ne hozzon létre mappákat a tárolómédiumon, hanem helyezze el egyenként a fájlokat. A főmenüben a KURZOR, t / u gombok segítségével válassza ki a képadatok, hangadatok vagy videoadatok opciót.
Általános lejátszás • Válassza ki a KURZOR t / u / p / q gombok segítségével a képfájlt, hangfájlt vagy videofájlt - adott esetben először a megfelelő mappát és utána a fájlt -, amelyiket le szeretné játszani, illetve amelyikkel a diavetítés kezdődjön. • Nyomja meg ►II gombot a lejátszás elindításához.
Képfájlok lejátszása • A ►II gomb lenyomásakor a lejátszási beállítások is megjelennek. Kb. 10 másodperc után az ablak automatikusan záródik. Alternatív nyomja meg a gombot, hogy visszajusson a lejátszáshoz. H • Nyomja meg ismételten a ►II gombot, hogy leállítsa/elindítsa a lejátszást. Amennyiben fent balra ► ill. II jelenik meg, a kiválasztott mappa valamennyi képfájlja (diavetítés), ill. csak az aktuális kép jelenik meg.
• Nyomja le a lejátszási beállításoknál a q és utána a ►II gombot a gyorsválasztó menü megnyitásához. Alternatív nyomja meg a ì vagy ►II gombot és tartsa lenyomva a gyorsválasztó menü megnyitásához. Kb. 10 másodperc után az ablak automatikusan záródik. Alternatív nyomja meg a ì vagy a gombot, hogy visszajusson a lejátszáshoz. • Válassza ki az egyes opciókat a KURZOR gombok p / q segítségével. • Az opció kiválasztásához/ módosításához nyomja le egyszer/ ismételten a t / u vagy ►II gombot.
Videofájl lejátszás • Nyomja meg a ì vagy ►II gombot a gyorsválasztó menü megnyitásához. Kb. 10 másodperc után az ablak automatikusan záródik. • Alternatív nyomja meg a ì vagy a gombot, hogy visszajusson a lejátszáshoz • Nyomja meg ismételten a ►II gombot, hogy leállítsa/elindítsa a lejátszást. • Válassza ki az egyes opciókat a KURZOR t / u gombok segítségével. • Az opció kiválasztásához/módosításához nyomja le egyszer/ismételten a ►II gombot.
Hivatkozás • Vegye figyelembe a belső memória max. tárolóképességét, valamint a termék által támogatott fájlformátumokat! • A másolási folyamat során megjelenik ennek haladása. Közvetlen másolás • Válassza ki a KURZOR gombok p / q segítségével a tárolómédiumot (USB vagy SD), amelyről a fájlok a belső memóriába legyenek másolva. • Válassza ki a KURZOR gombok t / u / p / q segítségével a fájlt / fájlmappát.
7.5 Beállítások A KURZOR gombok t / u segítségével válassza ki a Beállitás opciót. • Az opció kiválasztásához nyomja meg a ►II, gombot. • Válassza ki a KURZOR gombok p / q segítségével a Òra és naptár , Èbresztés , Időzitő vagy Általános opciót. Nyugtázza a választást a ►II. megnyomásával. • Válassza ki a beállítandó funkciót a KURZOR gombok p / q segítségével. • Módosítsa a kiválasztott funkció beállításait a KURZOR gombok ►II, t / u / p / q segítségével.
Kijelzés Nyelv Téma szín Háttérzene Firmver frissítés Alapértelmezett beállitások Termék info Start-up-modus Funkció Menü-/rendszernyelv beállítása Színséma kiválasztása A háttérzene aktiválása / kikapcsolása a képfájlok lejátszásakor Firmver frissítés elindítása Figyelem! Információkat a lehetséges frissítések rendelkezésre állásáról és kiviteléről a cikkszám megadása után a www.hama.com címen talál. A gyári beállítások visszaállítása. Figyelem! Valamennyi előző beállítás elvesztődik.
Figyelmeztetés – Adatvesztés • Mielőtt kivenné a memóriakártyát a termékből, bizonyosodjon meg arról, hogy az adatátvitel befejeződött. • A cserélhető adathordozót mindig az operációs rendszere adathordozó biztos eltávolítása funkciójával távolítsa el, mielőtt kivenné a tárolómédiumot a termékből, vagy mielőtt a terméket lekapcsolná számítógépéről. • Ha ezt nem tartja be, az adatvesztés nem zárható ki! 8.
Hiba Nem jelenik meg kép DPF Nincs hang Nincs videó/zene lejátszás Lehetséges ok Megszüntetés Nincs tárolómédium bedugva Dugjon bele egy tárolómédiumot. A tárolómédium nem tartalmaz Ellenőrizze a tárolómédiumot. adatot A készülék „hangtalan“ állásba Növelje a hangerőt a készüléken van kapcsolva Nincs tárolómédium bedugva Dugjon bele egy tárolómédiumot. A tárolómédium nem tartalmaz Ellenőrizze a tárolómédiumot.
10. Szavatosság kizárása A Hama GmbH & Co. KG semmilyen felelősséget vagy szavatosságot nem vállal a termék szakszerűtlen telepítéséből, szereléséből és szakszerűtlen használatából, vagy a kezelési útmutató és/vagy a biztonsági előírások be nem tartásából eredő károkért. 11. Szerviz és támogatás Kérjük, hogy a termékkel kapcsolatos kérdéseivel forduljon a Hama terméktanácsadásához. Közvetlen vonal Közvetlen vonal: +49 9091 502-115 (Deu/Eng) További támogatási információt itt talál: www.hama.com 12.
13. Műszaki tulajdonságok Műszaki adatok 00118564 Tápellátás (bemenet) 100-240 V AC / 50/60 Hz / 0,13 A Tápellátás (kimenet) 5 V DC / 1,0 A Teljesítményfelvétel ≤5W Méretek (sz x ma x mé) 195 x 140 x 52 mm Súly Ca.
14.
15. Ártalmatlanítási előírások Környezetvédelmi tudnivalók: Az európai irányelvek 2002/96/EU és 2006/66/EU ajánlása szerint, a megjelölt időponttól kezdve, minden EU-s tagállamban érvényesek a következők: Az elektromos és elektronikai készülékeket és az elemeket nem szabad a háztartási szemétbe dobni! A leselejtezett elektromos és elektronikus készülékeket és elemeket, akkumulátorokat nem szabad a háztartási szemétbe dobni.
A 5 4 2 1 3 6 7 CZ 8 9 10 11 B 1 3 5 8 178 2 4 6 7 9
Ovládací prvky a indikace A A: Digitální fotorámeček – Obslužné a připojovací pole 1 2 3 ►II 4 p 5 t 6 u 7 q 8 9 10 11 • Zapnutí / vypnutí • Přímý přístup do hlavní nabídky • Zpět na nadřazenou stránku nabídky • Zastavit / spustit přehrávání resp.
Obsah 1. Vysvětlení výstražných symbolů a pokynů .......................... 181 2. Obsah balení............................... 181 3. Bezpečnostní pokyny.................. 181 4. Chyba pixelů............................... 182 CZ 8. Příčiny poruch a jejich odstranění194 9. Údržba a čištění.......................... 195 10. Vyloučení záruky ...................... 196 11. Servis a podpora....................... 196 5. Technické vlastnosti ................... 183 12. Podporované souborové formáty .........
Děkujeme, že jste si vybrali výrobek Hama. Přečtěte si, prosím, všechny následující pokyny a informace. Uchovejte tento text pro případné budoucí použití. Pokud výrobek prodáte, předejte tento text novému majiteli. 1. Vysvětlení výstražných symbolů a pokynů Upozornění Tento symbol označuje bezpečnostní upozornění, které poukazuje na určitá rizika a nebezpečí. Poznámka Tento symbol označuje dodatečné informace nebo důležité poznámky. 2.
Upozornění - baterie • Použité baterie odstraňte a likvidujte z výrobku ihned. • Používejte výhradně akumulátory (nebo baterie) odpovídající udanému typu. • Při vkládání baterií vždy dbejte správné polarity (označení + a -) a • baterie vkládejte podle uvedené polarity. Při nedodržení hrozí nebezpečí vytečení baterií nebo exploze. • Baterie zcela nevybíjejte. • Baterie uchovávejte mimo dosah dětí. • Akumulátory/baterie nezkratujte a zabraňte jejich umístění v blízkosti holých kovových předmětů.
5. Technické vlastnosti • Podporované formáty snímků: JPG / JPEG / BMP • Podporovaný formát audio: MP3 • Podporované formáty video: H.264 / DIVX / XVID / AVI / MOV / MPEG4 / MJPEG • Podporované paměťové karty: SD / SDHC • Interní paměť: 4GB • Přípojky: Micro-USB 2.0, napájení DC 6. Uvedení do provozu 6.1 Instalace • Sejměte ochrannou fólii displeje. • Výrobek postavte na rovnou, vodorovnou a neklouzavou plochu. • Na výrobek neumisťujte žádné další předměty.
6.3 Dálkové ovládání • Otevřete přihrádku na baterie dálkového ovládání (obr.) • Vložte knoflíkový článek typu CR2032, dbejte na správné pólování. • Volitelně odstraňte proužek na přerušení kontaktu baterie. • Kryt přihrádky na baterie opět uzavřete. Dbejte na to, aby zapadlo blokování. 2 1 CZ 6.4 Připojení napájení Upozornění • Výrobek provozujte pouze připojený ke schválené zásuvce. Zásuvka se musí nacházet v blízkosti výrobku a být snadno přístupná.
7. Provoz • Po připojení k elektrické síti, produkt se automaticky zapne. • Při prvním zapnutí vyberte pomocí kurzorových tlačítek p / q požadovaný jazyk menu a výběr potvrďte stisknutím tlačítka ►II. nebo na dálkovém ovládání pro zapnutí / vypnutí výrobku. • Stiskněte na výrobku • Na několik sekund se zobrazí se úvodní logo Hama a standardně se pak přejde do hlavní nabídky. • V závislosti na nastavení dojde k přehrávání souborů snímků / audio, video nebo kalendáře.
CZ 7.2 Reprodukce Zvolené paměťové médium zastrčte do příslušného slotu. Poznámka • Dbejte na to, aby se paměťová média s uloženými soubory shodovala s formáty podporovanými výrobkem. • Dbejte na to, že tento výrobek nepodporuje přehrávání souborů přesahující složky. Na paměťovém médiu nezakládejte složky, soubory na nich zakládejte jednotlivě. Pomocí KURZOROVÝCH tlačítek. t / u zvolte v hlavní nabídce volbu obrazové soubory, data audio nebo data video.
Obecné přehrávání • Pomocí KURZOROVÝCH tlačítek t / u / p / q zvolte obrazový soubor, soubor audio nebo video – popř. nejprve odpovídající složku souborů a poté soubor, které chcete přehrát resp. se kterým chcete spustit diashow. • Pro spuštění přehrávání stiskněte ►II .
Přehrávání obrazových souborů • Při stisknutí ►II se otevřou také nastavení přehrávání. Po cca 10 sekundách se okénko zavře automaticky. Pro návrat zpět k přehrávání stiskněte alternativně . CZ • Pro zastavení/spuštění přehrávání opakovaně stiskněte ►II. Je-li vlevo nahoře zobrazeno ► resp. II , budou přehrávány všechny obrazové soubory zvolené složky (diashow) resp. jen aktuální snímek. • Pro aktivaci/deaktivaci hudby v pozadí stiskněte v nastavení přehrávání p a poté opakovaně ►II .
• Pro otevření krátké nabídky volby stiskněte v nastavení přehrávání q a poté ►II . Alternativně stiskněte ì nebo stiskněte a podržte ►II pro otevření krátké nabídky volby. Po cca 10 sekundách se okénko zavře automaticky. Pro návrat zpět k přehrávání stiskněte alternativně ì nebo . • Pomocí KURZOROVÝCH tlačítek p / q zvolte jednotlivé možnosti. • Pro zvolení / změnu možnosti jednou / opakovaně stiskněte t / u nebo ►II.
Přehrávání souborů video • Pro otevření krátké nabídky volby stiskněte ì nebo ►II. Po cca 10 sekundách se okénko zavře automaticky. • Pro návrat zpět k přehrávání stiskněte alternativně ì nebo • Pro zastavení/spuštění přehrávání opakovaně stiskněte ►II. • Pomocí KURZOROVÝCH tlačítek t / u zvolte jednotlivé možnosti. • Pro zvolení / změnu možnosti jednou / opakovaně stiskněte ►II.
Poznámka • Dbejte na max. kapacitu interní paměti a také na formáty podporované výrobkem! • Během kopírování je zobrazen pokrok kopírování. Přímé kopírování • Pomocí KURZOROVÝCH tlačítek p / q zvolte paměťové médium (USB nebo SD), ze kterého chcete kopírovat soubory do interní paměti. • Pomocí KURZOROVÝCH tlačítek t / u / p / q zvolte soubor / souborovou složku.
7.5 Nastavení Pomocí KURZOROVÝCH tlačítek t / u zvolte možnost Nastavení. • Pro zvolení možnosti stiskněte ►II. • Pomocí KURZOROVÝCH tlačítek p / q zvolte Hodiny a Kalendář, Budik, Časový spínač nebo Obecné. Volbu potvrďte stisknutím tlačítka ►II. • Pomocí KURZOROVÝCH tlačítek p / q zvolte nastavovanou funkci. • Pomocí KURZOROVÝCH tlačítek ►II, t / u / p / q změňte nastavení zvolené funkce. • Pro návrat do předchozí struktury menu stiskněte .
Indikace Funkce Nastavení jazyka menu/systému Volba barevného schéma Aktivace / deaktivace hudby v pozadí při přehrávání Hudba na pozadi obrazových souborů Spuštění aktualizace firmwaru Aktualizace Pozor! Informace o existenci a provedení možných firmware aktualizací najdete při zadání čísla výrobku na stránkách www.hama.com Výchozi Nastavení zpět na nastavení v okamžiku dodávky. nastaveni Pozor! Všechna dříve provedená nastavení jsou ztracena. Info.
Výstraha – ztráta dat • Než vyjmete paměťovou kartu z výrobku, ubezpečte se, že přenos dat je ukončen. • Výměnný datový vodič vždy odstraňte pomocí funkce vyhodit vašeho operačního systému předtím, než z výrobku vyjmete paměťové médium nebo produkt odpojte od vašeho počítače. • Při nedodržení nelze vyloučit ztrátu dat! 8. Příčiny poruch a jejich odstranění Poznámka Pokud není problém odstraněn pomocí níže uvedených opatření, obraťte se na zákaznický servis.
Porucha Možná příčina Odstranění Není připojeno žádné paměťové médium. Připojte paměťové médium. Paměťové médium neobsahuje žádná data. Zkontrolujte Vaše paměťové médium. Přístroj je nastaven na „tichý provoz“ Zesilte hlasitosti přístroje Není připojeno žádné paměťové médium. Připojte paměťové médium.
10. Vyloučení záruky Hama GmbH & Co. KG nepřebírá žádnou odpovědnost nebo záruku za škody vzniklé neodbornou instalací, montáží nebo neodborným použitím výrobku nebo nedodržováním návodu k použití a/ nebo bezpečnostních pokynů. 11. Servis a podpora Máte otázky k produktu ? Obraťte na na poradenské oddělení Hama. Horká linka: +49 9091 502-115 (německy/anglicky) Další podpůrné informace naleznete na adrese: www.hama.com 12. Podporované souborové formáty CZ 196 Formát fotografie max.
13. Technické údaje Digitální fotorámeček 00118564 Napájení vstup 100-240 V AC / 50/60 Hz / 0,13 A Napájení výstup 5 V DC / 1,0 A Příkon ≤5W Rozměry (Š x V x H) 195 x 140 x 52 mm Hmotnost Ca.
14. Struktura menu Fotografie Foto prezentàce Foto rezentáce s hudbou Hudba Film Složka Kalendař Kalendář bez obrázek na pozadí Kalendař s Foto prezentáce Nastaveni Hodiny a Kalendář Režim Čas Datum Formát data Začátek týdne Pozadi CZ Budik Stav budiku Čas budiku Opakovani budiku Ton budiku Hlasitost budiku Časový spínač Stav Čas zapnuti Čas vypnuti Opakování Obecné Jazyk Barevné téma Hudba na pozadi Aktualizace firmware Výchozi nastaveni Info.
15. Pokyny k likvidaci Ochrana životního prostředí: Evropská směrnice 2002/96/EG a 2006/66/EU ustanovujete následující: Elektrická a elektronická zařízení stejně jako baterie nepatří do domovního odpadu. Spotřebitel se zavazuje odevzdat všechna zařízení a baterie po uplynutí jejich životnosti do příslušných sběren. Podrobnosti stanoví zákon příšlušné země. Symbol na produktu, návod k obsluze nebo balení na toto poukazuje. Recyklací a jinými způsoby zužitkování přispíváte k ochraně životního prostředí.
A 5 4 2 1 3 6 7 SK 8 9 10 11 B 1 3 5 2 4 6 7 8 200 9
Ovládacie a indikačné prvky A A: Digitálny fotorámik – Ovládacie a pripájacie pole 1 2 3 ►II 4 p 5 t 6 u 7 q 8 9 10 11 • Zapínanie/vypínanie • Priamy prístup do hlavného menu • Návrat na nadradenú stránku menu • Zastaviť/spustiť prehrávanie resp.
Obsah 1. Vysvetlenie výstražných symbolov a upozornení .................. 203 2. Obsah balenia............................. 203 3. Bezpečnostné upozornenia ........ 203 4. Pixelová chyba............................ 204 5. Technické vlastnosti ................... 205 6. Uvedenie do prevádzky .............. 205 6.1 Inštalácia .......................................205 6.2 Fotorámček – vloženie resp. výmena batérie ..................................205 SK 6.3 Diaľkové ovládanie ........................206 6.
Ďakujeme, že ste sa rozhodli pre výrobok Hama. Prečítajte si všetky nasledujúce pokyny a informácie. Uchovajte tento návod na použitie pre prípadné budúce použitie. Pokiaľ výrobok predáte, dajte tento návod novému majiteľovi. 1. Vysvetlenie výstražných symbolov a upozornení Upozornenie Tento symbol označuje bezpečnostné upozornenie, ktoré poukazuje na určité riziká a nebezpečenstva. Poznámka Tento symbol označuje dodatočné informácie, alebo dôležité poznámky. 2.
Upozornenie - batérie • Spotrebované batérie bezodkladne odstráňte z výrobku a likvidujte ich. • Používajte výlučne nové akumulátory (alebo batérie) zodpovedajúce uvedenému typu. • Dbajte bezpodmienečne na správnu polaritu batérií (značenie + a -) a vložte ich príslušne. V prípade nerešpektovania hrozí nebezpečenstvo vytečenia alebo výbuchu batérií. • Batérie nevybíjajte do úplného vybitia. • Batérie uchovávajte mimo dosahu detí.
5. Technické vlastnosti • Podporované grafické formáty: JPG / JPEG / BMP • Podporovaný audio formát: MP3 • Podporované video formáty: H.264 / DIVX / XVID / AVI / MOV / MPEG4 / MJPEG • Podporované pamäťové karty: SD / SDHC • Interná pamäť: 4GB • Prípojky: Micro-USB 2.0, napájanie DC 6. Uvedenie do prevádzky 6.1 Inštalácia • Odstráňte fóliu na ochranu displeja. • Postavte výrobok na rovnú, vodorovnú a nekĺzavú plochu. • Na výrobok nepokladajte žiadne iné predmety.
6.3 Diaľkové ovládanie • Otvorte batériovú priehradku diaľkového ovládania (Obr.) • Vložte gombíkovú batériu typu CR2032 so správnym pólovaním. • Voliteľne odstráňte pásik prerušovača kontaktov batérie. • Zatvorte opäť batériovú priehradku. Dbajte pritom, aby blokovanie správne zacvakne. 2 1 SK 6.4 Pripojenie napájania Upozornenie • Výrobok napájajte iba zo schválenej zásuvky. Zásuvka musí byť umiestnená v blízkosti výrobku a musí byť ľahko prístupná.
7. Prevádzka • Po pripojení k elektrickej sieti, produkt sa automaticky zapne. • Pri prvom zapnutí vyberte pomocou kurzorových tlačidiel p / q požadovaný jazyk menu a výber potvrďte tlačidlom ►II. • Na zapnutie/vypnutie výrobku stlačte na výrobku alebo na diaľkovom ovládaní. • Na niekoľko sekúnd sa zobrazí štartovacie logo Hama a prepína sa štandardne do hlavného menu. • Podľa nastavenia sa začnú prehrávať obrázkové-/ audio- alebo video-súbory alebo kalendár..
SK 7.2 Prehrávanie Zasuňte zvolené pamäťové médium do príslušného slotu. Poznámka • Dbajte na to, aby pamäťové médiá ako aj údaje na nich uložené zodpovedali formátom, ktoré výrobok podporuje. • Všimnite si, že tento výrobok nepodporuje prehrávanie z iných úrovní priečinkov. Nevytvárajte na pamäťovom médiu žiadne priečinky, ale ukladajte na ňom súbory jednotlivo. V hlavnom menu zvoľte pomocou KURZOROVÝCH klávesov t / u možnosť Údaje obrázku, Údaje audio alebo Údaje video.
Všeobecné prehrávanie • Pomocou KURZOROVÝCH klávesov t / u / p / q vyberte obrázkový, audio alebo video súbor – prípadne najprv súborový priečinok a potom súbor určený na prehrávanie, resp. súbor, s ktorým sa má spustiť prezentácia. • Na spustenie prehrávania stlačte ►II .
Prehrávanie obrázkových súborov • Pri stlačení ►II sa otvoria tiež nastavenia prehrávania. Po cca 10 sekundách sa okno automaticky zatvorí. Alternatívne stlačte , aby ste sa dostali späť na prehrávanie. SK • Stlačte opakovane ►II, aby ste zastavili/spustili prehrávanie. Ak sa v ľavom hornom rohu zobrazí ► resp. II , prehrajú sa všetky obrázkové súbory zvoleného priečinku (diashow) resp. prehrá sa iba aktuálny obrázok.
• V nastaveniach prehrávania stlačte q a následne ►II , aby ste otvorili menu skrátenej voľby. Alternatívne stlačte ì alebo a podržte stlačené ►II, aby ste otvorili menu skrátenej voľby. Po cca 10 sekundách sa okno automaticky zatvorí. Alternatívne stlačte ì alebo , aby ste sa dostali späť na prehrávanie. • Pomocou KURZOROVÝCH klávesov. p / q vyberte jednotlivé možnosti. • Pre výber/zmenu voľby stlačte jedenkrát/opakovane t / u alebo ►II.
Prehrávanie video súborov • Stlačte ì alebo ►II, aby ste otvorili menu skrátenej voľby. Po cca 10 sekundách sa okno automaticky zatvorí. • Alternatívne stlačte ì alebo , aby ste sa dostali späť na prehrávanie. • Stlačte opakovane ►II, aby ste zastavili/spustili prehrávanie. • Pomocou KURZOROVÝCH klávesov t / u vyberte jednotlivé možnosti. • Pre výber/zmenu voľby stlačte jedenkrát/opakovane ►II.
Poznámka • Dbajte na max. pamäťovú kapacitu internej pamäti a na výrobkom podporované formáty súborov! • Počas kopírovania sa zobrazuje jeho priebeh. Priame kopírovanie • Pomocou KURZOROVÝCH klávesov p / q zvoľte pamäťové médium (USB alebo SD), z ktorého sa majú skopírovať súbory na internú pamäť. • Pomocou KURZOROVÝCH klávesov t / u / p / q zvoľte súbor/súborový priečinok.
7.5 Nastavenia Pomocou KURZOROVÝCH klávesov t / u zvoľte možnosť Nastavenia. • Ak chcete zvoliť danú možnosť, stlačte ►II. • Pomocou KURZOROVÝCH klávesov p / q zvoľte Hodiny a kalendár, Budik , Časový spinač alebo Všeobecnyš. Výber potvrďte stlačením tlačidla ►II. • Pomocou KURZOROVÝCH klávesov p / q vyberte funkciu, ktorú chcete nastaviť. • Pomocou KURZOROVÝCH klávesov ►II, t / u / p / q zmeňte nastavenie zvolenej funkcie. • Stlačte , aby ste sa dostali na predchádzajúcu štruktúru menu.
Indikácia Funkcia Nastavenie jazyka menu/systémového jazyka Výber farebnej schémy Aktivovanie/deaktivovanie hudby v pozadí pri reprodukcii Hudba na pozadi obrázkových súborov Štart aktualizácie firmvéru Aktualizácia Pozor! Informácie o dostupnosti a vykonaní možných firmvéru aktualizácií nájdete po zadaní čísla výrobku na adrese www. hama.com Východiaskové Obnovenie nastavení pri expedícii. nastavenia Pozor! Všetky predtým uskutočnené nastavenia sa stratia. Info.
Upozornenie – strata dát • Skôr ako vyberiete pamäťovú kartu z výrobku, ubezpečte sa, či je prenos dát ukončený. • Skôr, ako pamäťové médium vyberiete z výrobku alebo odpojíte výrobok od vášho počítača, odoberte vymeniteľný dátový nosič vždy cez funkciu vysúvania vášho operačného systému. • Ak tak neurobíte, nemožno vylúčiť stratu dát! 8. Príčiny chýb a ich odstránenie Poznámka Ak nemôžete použiť nasledujúce kroky na vyriešenie problému, prosím kontaktujte zákaznícky servis.
Chyba Možná príčina Odstránenie Nie je zasunuté žiadne pamäťové médium Zasuňte pamäťové médium. Na pamäťovom médiu sa nenachádzajú žiadne údaje Skontrolujte pamäťové médium. Prístroj je nastavený na stav „bez zvuku“ Zvyšte hlasitosť na prístroji Nie je zasunuté žiadne pamäťové médium Zasuňte pamäťové médium.
10. Vylúčenie záruky Firma Hama GmbH & Co KG neručí/nezodpovedá za škody vyplývajúce z neodbornej inštalácie, montáže alebo neodborného používania výrobku alebo z nerešpektovania návodu na používanie a/alebo bezpečnostných pokynov. 11. Servis a podpora S otázkami týkajúcimi sa výrobku sa prosím obráťte na poradenské oddelenie firmy Hama. Hotline: +49 9091 502-115 (nem./angl.) Ďalšie informácie o podpore nájdete tu: www.hama.com 12. Podporované formáty súborov SK 218 Formát fotografií max.
13. Technické údaje Digitálny fotorámik 00118564 Napájanie na vstupe 100-240 V AC / 50/60 Hz / 0,13 A napájanie na výstupe 5 V DC / 1,0 A Príkon ≤5W Rozmery (Š x V x H) 195 x 140 x 52 mm Hmotnosť Ca.
14. Štruktúra menu Foto Diashow fotografii Diashow fotografii s hudbou Hudba Film Priečinok Kalendár Kalendár bez obrázok na pozadí Kalendár s Diashow fotografii Nastavenie Hodiny a kalendár Režim Cas Dátum Form.času Začiatok tyždňa Pozadie SK Budik Status budika Čas budika Opakovanie budika Ton budika Hlasitost budikať Časový spinač Postavenie Čas zapnuti Čas vypnuti Opakovanie Všeobecnyš Jazyk Farebná téma Hudba na pozadi Aktualizácia firmvéru Východiaskové nastavenia Info.
15. Pokyny pre likvidáciu Ochrana životného prostredia: Európska smernica 2002/96/EU a 2006/66/EU stanovuje: Elektrické a elektronické zariadenia, rovnako ako batérie sa nesmú vyhadzovať do domáceho odpadu. Spotrebiteľ je zo zákona povinný zlikvidovať elektrické a elektronické zariadenia, rovnako ako batérie na miesta k tomu určené. Symbolizuje to obrázok v návode na použitie, alebo na balení výrobku.
A 5 4 2 1 3 6 7 P 8 9 10 11 B 1 3 5 2 4 6 7 8 222 9
Elementos de comando e indicadores A A: Moldura digital – Painel de operação e ligação 1 2 3 ►II 4 p 5 t 6 u 7 q 8 9 10 11 • Ligar/desligar • Acesso direto ao menu principal • Retroceder ao nível do menu anterior • Iniciar/interromper a reprodução ou confirmação da introdução no menu de seleção • Menu de seleção rápida • Definições de reprodução • Cursor para cima no menu de seleção • Ficheiro de imagem/áudio anterior • Retroceder em ficheiros de áudio • Aumentar a luminosidade em ficheiros de
Índice 1. Descrição dos símbolos de aviso e das notas............................ 225 2. Conteúdo da embalagem ........... 225 3. Indicações de segurança ............ 225 4. Erros de píxeis ............................ 226 P 8. Causas e resolução de erros....... 238 9. Manutenção e conservação........ 239 10. Exclusão de garantia ................ 240 11. Contactos e apoio técnico........ 240 5. Características técnicas.............. 227 12. Formatos de ficheiro suportados................................
Agradecemos que se tenha decidido por este produto Hama! Antes de utilizar o produto, leia completamente estas indicações e informações. Guarde, depois, estas informações num local seguro para consultas futuras. Se transmitir o produto para um novo proprietário, entregue também as instruções de utilização. 1. Descrição dos símbolos de aviso e das notas Aviso É utilizado para identificar informações de segurança ou chamar a atenção para perigos e riscos especiais.
Aviso - pilhas • Retire imediatamente pilhas gastas do produto e elimine-as adequadamente. • Utilize exclusivamente baterias (ou pilhas) que correspondam ao tipo indicado. • Ao colocar as pilhas, tenha em atenção a polaridade correcta (inscrições + e -). A não observação da polaridade correcta poderá levar ao derrama das pilhas ou explosão. • Não sobrecarregue as pilhas. • Mantenha as pilhas fora do alcance das crianças.
5. Características técnicas • Formatos de imagem suportados: JPG / JPEG / BMP • Formato de áudio suportado: MP3 • Formatos de vídeo suportados: H.264 / DIVX / XVID / AVI / MOV / MPEG4 / MJPEG • Cartões de memória suportados: SD / SDHC • Memória interna: 4GB • Ligações: Micro-USB 2.0, alimentação DC 6. Colocação em funcionamento 6.1 Posicionamento • Retire a película de proteção do visor. • Coloque o produto numa superfície plana, horizontal e antiderrapante. • Não coloque nenhum objeto sobre o produto.
6.3 Telecomando • Abra o compartimento da pilha do telecomando (fig.). • Coloque a pilha do tipo CR2032, com a polaridade correta. • Em alternativa, retire a fita isoladora da pilha. • Volte a fechar o compartimento da pilha. Certifique-se de que o bloqueio encaixa corretamente. 2 1 P 6.4 Ligação à alimentação elétrica Aviso • Ligue o produto apenas a uma tomada elétrica adequada. A tomada elétrica deve estar localizada na proximidade do produto e deve ser facilmente acessível.
7. Operação • Depois de se conectar à fonte de alimentação, o produto liga automaticamente. • Quando você liga selecione com as teclas de cursor p / q seu idioma de menu desejado e confirme a seleção pressionando ►II. • Prima o respetivo botão no produto ou no telecomando para ligar/desligar o produto. • O logótipo inicial da Hama é apresentado durante alguns segundos e, em seguida, é apresentado, por predefinição, o menu principal.
P 7.2 Reprodução Insira o dispositivo de memória escolhido no respetivo local. Nota • Certifique-se de que os dispositivos de memória, assim como os ficheiros guardados nos mesmos, correspondem aos formatos suportados pelo produto. • Tenha em atenção que este produto não suporta a reprodução de ficheiros em diferentes pastas. Não crie quaisquer pastas no dispositivo de memória. Coloque simplesmente os ficheiros individuais no mesmo.
Reprodução geral • Com os botões do CURSOR t / u / p / q selecione o ficheiro de imagem, ficheiro de áudio ou ficheiro de vídeo – se aplicável, primeiro a pasta correspondente e depois o ficheiro – que deve ser reproduzido ou no qual deve ser iniciada a apresentação de diapositivos. • Prima ►II para iniciar a reprodução.
Reprodução de ficheiros de imagem • Premindo ►II também são abertas as definições de reprodução. Após aprox. 10 segundos, a janela fecha-se automaticamente. Em alternativa, prima , para voltar à reprodução. P • Prima repetidamente ►II para interromper/iniciar a reprodução. Se em cima à esquerda for apresentado ► ou II , são reproduzidos todos os ficheiros de imagem da pasta selecionada (apresentação de diapositivos) ou apenas a imagem atual.
• Nas definições de reprodução prima q e, depois, ►II para abrir o menu de seleção rápida. Em alternativa, prima ì ou prima e mantenha premido ►II para abrir o menu de seleção rápida. Após aprox. 10 segundos, a janela fecha-se automaticamente. Em alternativa, prima , para voltar à reprodução. ì ou • Com os botões do CURSOR p / q, selecione as opções individuais. • Para selecionar/alterar a opção, prima uma vez/repetidamente t / u ou ►II.
Reprodução ficheiros de vídeo • Prima ì ou ►II para abrir o menu de seleção rápida. Após aprox. 10 segundos, a janela fecha-se automaticamente. • Em alternativa, prima ì ou ►II, para voltar à reprodução • Prima repetidamente ►II para interromper/iniciar a reprodução. • Com os botões do CURSOR ou t / u, selecione as opções individuais. • Para selecionar/alterar a opção, prima uma vez/repetidamente ►II.
Nota • Tenha em atenção a capacidade de armazenamento máxima da memória interna, assim como os formatos de ficheiro suportados pelo produto! • Durante o processo de cópia, é-lhe apresentado o progresso do mesmo. Copiar diretamente • Com os botões de CURSOR p / q selecione o dispositivo de memória (USB ou SD), a partir do qual os dados devem ser copiados para a memória interna. • Com os botões de CURSOR t / u / p / q selecione o ficheiro / a pasta de ficheiros.
7.5 Definições Com os botões de CURSOR t / u selecione a opção Instalação. • Prima ►II, para selecionar a opção. • Com os botões de CURSOR p / q selecione Hora e data, Alarme, Timer ou Comum. Confirme a seleção, premindo ►II. • Com os botões de CURSOR p / q, selecione a função a definir. • Altere a definição da função selecionada com os botões de CURSOR ►II, t / u / p / q. • Prima para regressar ao nível de menu anterior.
Indicação Função Definição do idioma do menu / sistema Seleção do esquema de cores Ativação / desativação da música de fundo na reprodução BG Music de ficheiros de imagem Início da atualização do firmware Atenção! Poderá consultar informações sobre a Firmware Update disponibilidade e a execução de possíveis atualizações, introduzindo o número do artigo em www.hama.com. Reposição das definições de origem. Formato Atenção! Todas as definições anteriormente efetuadas são perdidas com esta operação.
Aviso – Perda de dados • Antes de retirar um cartão de memória do produto, certifique-se de que a transferência de dados está concluída. • Remova sempre o dispositivo amovível através da função de ejetar do seu sistema operativo antes de retirar o dispositivo de memória do produto ou antes de remover o produto do seu computador. • Caso contrário, não é possível excluir a hipótese de perda de dados! 8.
Problema Possível causa Resolução Não está inserido nenhum dispositivo de armazenamento Insira um dispositivo de armazenamento. O dispositivo de armazenamento não contém dados O aparelho está ajustado para „som desligado“ Não está inserido nenhum dispositivo de memória Verifique o seu dispositivo de memória externo.
10. Exclusão de garantia A Hama GmbH & Co KG não assume qualquer responsabilidade ou garantia por danos provocados pela instalação, montagem ou manuseamento incorrectos do produto e não observação do das instruções de utilização e/ou das informações de segurança. 11. Contactos e apoio técnico Em caso de dúvidas sobre o produto, contacte o serviço de assistência ao produto da Hama.
13. Dados técnicos Moldura digital 00118564 Entrada de alimentação elétrica 100-240 V AC / 50/60 Hz / 0,13 A Saída de alimentação elétrica 5 V DC / 1,0 A Consumo de energia ≤5W Dimensões (L x A x P) 195 x 140 x 52 mm Peso Ca.
14. Estrutura do menu Foto Apresntaçã de diapositivos Apresntaçã de diapositivos com música Música Movie Pastas Calendário Calendário sem imagem de fund Calendário com Apresntaçã de diapositivos Instalação Data, Hora Modo Tempo Data Formato Inicio da semana fundo P Alarme Alarme Status Alarme Time Alarme repita Alarme tone Alarme Volume Timer Status Tempo de inicialização automáticia Tempo desligar auto Repita Comum Linguagem Cor do tema BG Music Firmware Update Formato Info produto.
15. Indicações de eliminação Nota em Protecção Ambiental: Após a implementação da directiva comunitária 2002/96/EU e 2006/66/EU no sistema legal nacional, o seguinte aplica-se: Os aparelhos eléctricos e electrónicos, bem como baterias, não podem ser eliminados juntamente com o lixo doméstico. Consumidores estão obrigados por lei a colocar os aparelhos eléctricos e electrónicos, bem como baterias, sem uso em locais públicos específicos para este efeito ou no ponto de venda.
All listed brands are trademarks of the corresponding companies. Errors and omissions excepted, and subject to technical changes. Our general terms of delivery and payment are applied. 00118564/09.15 Hama GmbH & Co KG 86652 Monheim / Germany www.hama.