
User's Manual


6
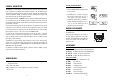
PRINCIPLE OF OPERATION
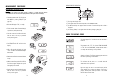
Precision is how closely repeated
measurements agree with each other. Precision
is usually expressed as standard deviation (SD).
Accuracy is defined as the nearness of a test
result to the true value.
Although good precision suggests good
accuracy, precise results can be inaccurate.
The figure explains these definitions.
In a laboratory using a standard solution of
100 mg/L chlorine and a representative lot of
reagent, an operator obtained with a single
instrument a standard deviation of 2 mg/L.
PRECISION AND ACCURACY
Absorption of Light is a typical phenomenon of interaction between electromagnetic radiation and
matter. When a light beam crosses a substance, some of the radiation may be absorbed by
atoms, molecules or crystal lattices.
If pure absorption occurs, the fraction of light absorbed depends both on the optical path length
through the matter and on the
physical-chemical characteristics of the substance according to the
Lambert-Beer Law:
-log I/I
o
= ε
λ
c d
or
A = ε
λ
c d
Where:
-log I/I
o
= Absorbance (A)
I
o
= intensity of incident light beam
I = intensity of light beam after absorption
ε
λ
= molar extinction coefficient at wavelength λ
c = molar concentration of the substance
d = optical path through the substance
Therefore, the concentration "c" can be calculated from the absorbance of the substance as the
other factors are known.
19
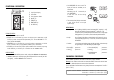
Note: It is possible to interrupt calibration procedure at any time by pressing ON/OFF.
Warning: do not validate or calibrate the instrument with standard solutions other than the Hanna
CAL CHECK™
Standards, otherwise erroneous results will be obtained. For accurate Validation and
Calibration results, please perform test at room temperature: 18 to 25°C (64.5 to 77.0°F).
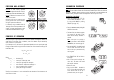
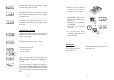
CALIBRATION PROCEDURE
CALIBRATION PROCEDURE
• Select the parameter code “771” for
chlorine ULTRA HIGH RANGE or “701”
for chlorine LOW RANGE by holding
ZERO/SET (see page 13).
• Enter the calibration mode by holding CAL
CHECK
for three seconds.
• The date of the last calibration appears
(e.g.: month “01”, day “08”). “F.CAL”
means that the factory calibration is
selected.
Note: at this point it is possible to
reset the instrument to restore FACTORY
CALIBRATION, see instructions page 21.
• Place the CAL CHECK™ Standard Cuvet A
into the holder and ensure that the
notch on the cap is positioned securely
into the groove.
• Press ZERO/SET and “SIP” will blink on
the display.
• After a few seconds the display will
show “-0.0-”. The meter is now zeroed
and ready for calibration.
• Remove the cuvet.
• Place the CAL CHECK™ Standard HI
95771-11 Cuvet B into the holder and
ensure that the notch on the cap is
positioned securely into the groove.
or