Installation Instructions / Warranty Axor Montreux 16532XX1 Axor Montreux 16534XX1
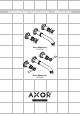
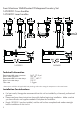
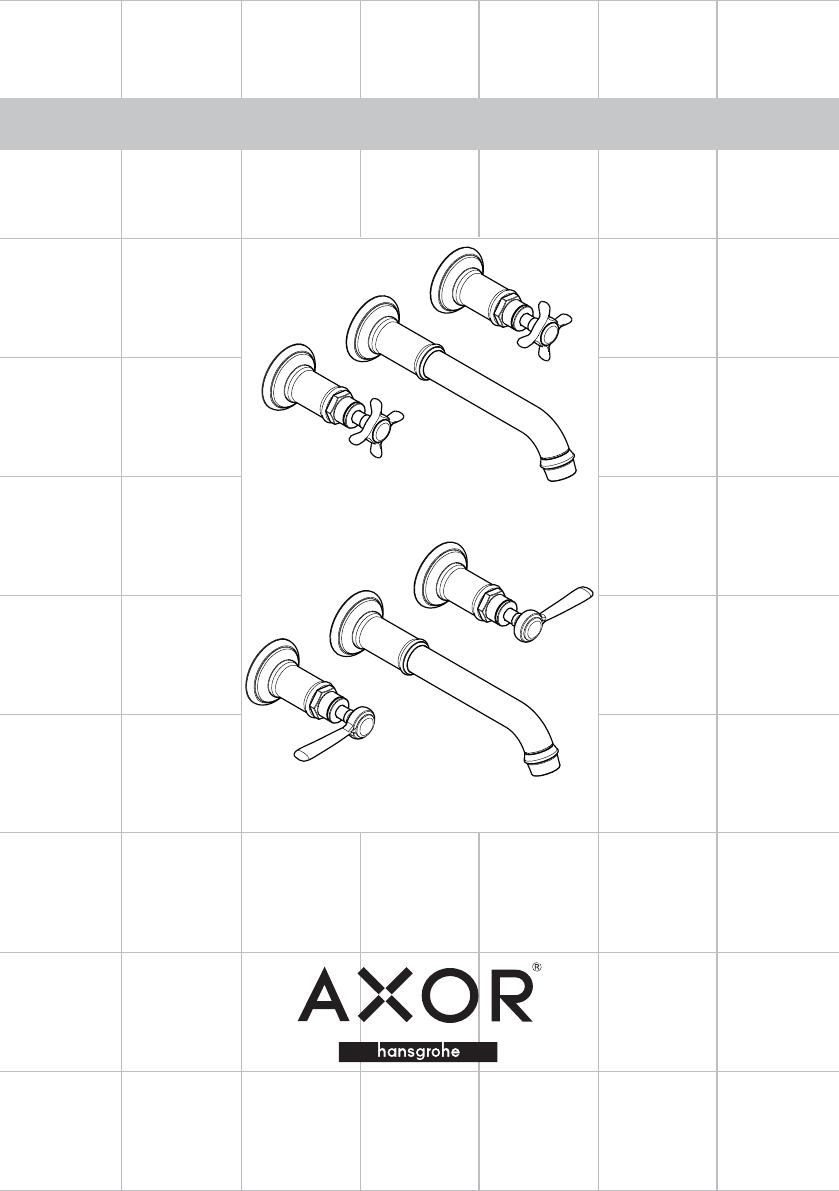
Axor Montreux Wall-Mounted Widespread Lavatory Set 16532XX1 Cross handles 16534XX1 Lever handles 16532XX1 16534XX1 Technical Information Recommended water pressure Max. water pressure Recommended hot water temp. Max. hot water temp Flow rate 14.7 - 72.5 psi 147 psi 120˚ - 140˚ F* 176˚F* 1.5 gpm *Please know and follow all applicable local plumbing codes when setting the temperature on the water heater.
Installation Make sure that the water is turned off at the main before beginning! Remove the caps from the plaster shields. Cut the plaster shields so that they extend 1/16" outside the wall. Seal the wall around the plaster shields with waterproof sealant. Failure to seal the wall can lead to possible water damage. Model 16534XX1 only: Remove the cartridges. Install the new cartridges included with the trim. The new hot cartridge is marked with notches on the wrench flats.
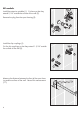
All models: Install the extension spindles (1). Cut them so that they extend 9/16" outside the surface of the wall (2). Remove the plug from the spout housing (3). Install the slip couplings (1). Cut the slip couplings so that they extend 1 5/16" outside the surface of the wall (2). Measure the distance between the front of the spout housing and the surface of the wall. Record this measurement (“x”).
Add 9/16" to X. Record this measurement. Cut the threaded end of the spout so that it extends 9/16" + X from the rear of the flange. Remove the aerator (1). Wrap the threads on the spout with Teflon tape. Install the sealing ring and spout. Use a rod or dowel inserted into the end of the spout to assist in tightening it (2). Do not overtighten the spout, or damage may result. Tighten the spout flange against the wall (1). Install the aerator (2). Push the sealing ring and handle over the rough.
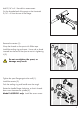
Model 16534XX1 only: Both levers should be parallel to the floor. If one is not, remove the slip coupling (1), turn it slightly (2), and reinstall it. 2 Install the screw covers (3).
It is also possible to remove the lever, turn it slightly, and reinstall it. Install the screw covers (3). 2 1 3 User Instructions Turn the handle upward to turn the water on -- clockwise for hot, counter-clockwise for cold. Turn the handle downward to turn the water off. In the off position, the handles should be parallel to the floor.
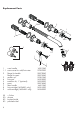
Replacement Parts 2 25x2 2 1 6 4 16x2 5 3 1.1 7 1 1.1 2 3 4 5 6 7 8 9 cross handle screw cover for cold/hot water flange for handle flange for spout aerator cpl.
Cleaning Recommendation for Hansgrohe Products Modern lavatory faucets, kitchen faucets, and showers consist of very different materials to comply with the needs of the market with regard to design and functionality. To avoid damage and returns, it is necessary to consider certain criteria when cleaning.
Limited Lifetime Consumer Warranty This product has been manufactured and tested to the highest quality standards by Hansgrohe, Inc. (“Hansgrohe”). This warranty is limited to Hansgrohe products which are purchased by a consumer in the United States after March 1, 1996, and installed in either the United States or Canada. WHO IS COVERED BY THE WARRANTY This warranty extends to the original consumer purchaser only. This warranty is non-transferable.
Some States do not allow the exclusion or limitation of incidental or consequential damages, so the above limitation or exclusion may not apply to you. This warranty gives you specific legal rights, and you may have other rights which vary from State to State. You may be required by law to give us a reasonable opportunity to correct or cure any failure to comply before you can bring any action in court against us under the Magnuson-Moss Warranty Act.
www.hansgrohe-usa.com US - Installation Instructions • Part No. 90595624 • Revised 01/2009 Hansgrohe, Inc. • 1490 Bluegrass Lakes Parkway • Alpharetta, GA 30004 Tel.