
Instructions / Assembly


-5-200199-01
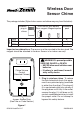
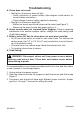
Troubleshooting
• Redlightonthesensordoesnotlight.
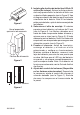
– Check orientation of sensor battery (See diagram inside sensor for
correct battery orientation.)
– Check charge of sensor battery, replace if necessary.
• Redlightonthesensordoeslight.
– Make sure sensor and chime codes are the same (see Figure 7).
– Make sure the plug-in chime has power going to it.
Chime is receiving
interference from another wireless device; change the code setting (see
Code Setting below).
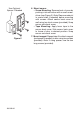
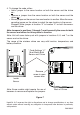
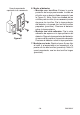
• Donotmountthesensoronmetalornearmetalstuds.Thisreducesthe
sensor range. Use 1/4" to 1/2" (6 to 13 mm) wood shims to move the sen-
sor off the metal surface.
• Concreteoorsmayreducerange.Movechimeawayfromoor.
• Trylocatingchimeclosertosensor.
Continued
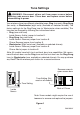
reconnecting to power.
It is recommended to only change one code position at a time and then check
to see if system is functioning properly.
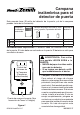
1. Unplug chime from power source.
2. Open the cases and locate the jumpers on both the sensor and chime (see
Figure 7).
3. The sensor and chime both have eight different jumper locations. Jumper
positions 1 through 7 are used for setting the code.