
Installation Guide


LOCATION AND PREPARATION
PREPARATION AND UNPACKING
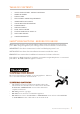
Before moving the refrigerator:
• Protect any finished flooring to prevent damage.
• The grille and trim pieces are packaged on the back of the unit. Handles and other items
may also be packaged on the back. Remove all such items before removing the appliance
from the pallet. See "PREPARING THE INSTALLATION" on page 10 for additional
information.
• Make sure that power can be provided to the location selected.
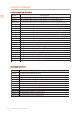
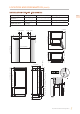
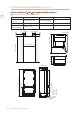
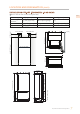
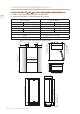
PACKAGED DIMENSIONS AND WEIGHTS
Width Height Depth Weight
24” Models 25-5/8” [650 mm] 89” [2260 mm] 31-1/2” [800 mm] 507 lb [230 kg]
30” Models 31-1/2” [800 mm] 89” [2260 mm] 31-1/2” [800 mm] 606 lb [275 kg]
36” Models 37-3/8” [950 mm] 89” [2260 mm] 31-1/2” [800 mm] 650 lb [295 kg]
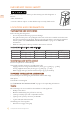
ELECTRICAL AND WATER SUPPLY
Electrical requirement: 110V 60Hz 15a
Units with icemaker: Connect to potable water only.
Supply pressure: If using external filtration, from 7.3 to 73 PSI [0.5 - 5.0 Bar]
If using supplied water filter, from 25.4 to 73 PSI [1.75 - 5.0 Bar].
Water supply tube: 3/4” female attachment (see pg. 13 for details)
PROVIDED INSTALLATION ACCESSORIES
Customized panel mounting kit (included with -OV models only)
Anti-tip kit
Lateral/side connecting kit
See "PREPARING THE INSTALLATION" on page 10 for unpacking information.
TOOLS
The following tools are needed for the installation of the appliance:
• Phillips screw driver
• Drill and 1/8”drill bit, plus 3/8” bit for masonry
• 17mm (or 11/16”) open-end or adjustable wrench
• 13mm (or 1/2”) socket, extension, and handle
• 2.5 mm and 4mm allen wrenches
If installing two units together
• Hand rivet tool (pop rivet gun)
IMPORTANT CHILD SAFETY
Risk of child entrapment. Before you throw away your old refrigerator or
freezer:
• Take off the doors
• Leave the shelves in place so that children may not easily climb inside.
©2019 Hestan Commercial Corporation
4
EN