
Installation & Assembly

Necessary materials: A sharp, blade or cutting
blade (such as a utility knife or box cutter), a
squeegee, and both, a damp and dry cloth.
Suggestion: Use a leveling ruler to ensure fi rst
panel is aligned
Do not know what to do with
your leftover wallpaper? Here
are some suggestions of where
to apply it:
Trays
Cabinets
Doors
Bookshelves
Quick Installation
Guide
Important information BEFORE starting
installation
Allow at least 30 days prior to installation
for recently painted walls.
Make sure surface is clean and even.
Do not peel entire backing off at once.
Apply wallpaper immediately after
unrolling. If not, roll back until you are
ready.
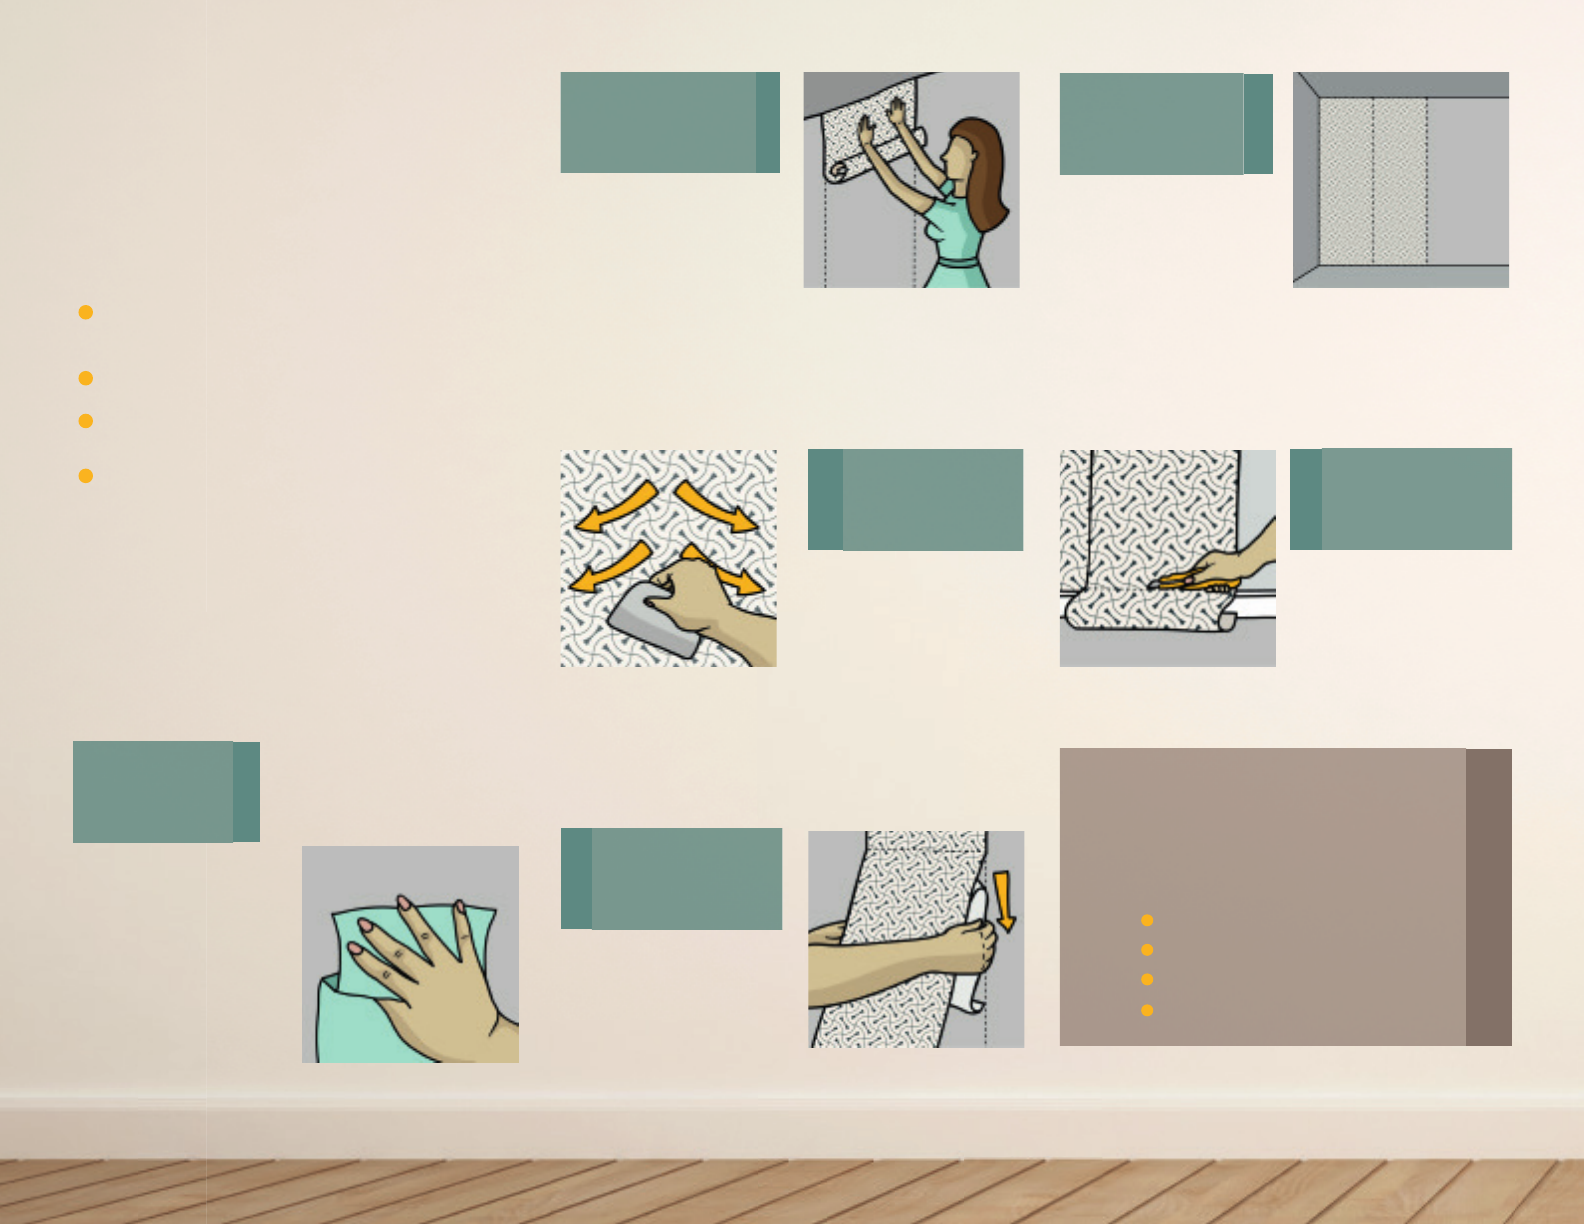
Use a damp cloth to
clean the surface.
Dry moisture with
a dry cloth. Allow
time for drying and
make sure it is dry
prior to starting the
application.
1
Place the wallpaper
face-down on a fl at
surface. Pull the liner
down about 6’’ and cut
the liner. Start applying
wallpaper from the top
corner of the wall. Stick
a little above of the top
of the wall.
2
Use a squeegee to
smooth out the paper
as you go. Remember
to smooth from the
center outwards. If
wrinkles or bubbles
appear simply peel
back and reapply that
section.
3
Once you have applied
the fi rst 6’’ repeat the
process until reaching
the bottom of the wall.
4
Repeat steps 2 to 5
with the remaining
panels. This time be
sure to match the
design. You should
expect up to ½ inch of
overlapping.
5
After applying wallpa-
per to all of the walls ,
trim excess wallpaper
on the top and bottom
of each wall using a
sharp blade.
6