
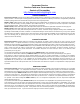
Instructions / Assembly


For Customer Assistance:
www.evolutionlightingllc.com
Made In China
1
Installing the mounting bracket
3
Installing the Fixture
Making the electrical connections
Connect the white wires from the fixture to the white wire of
the supply circuit.
Connect the black wires from the fixture to the black wire of
the supply circuit.
Wrap the bare copper grounding wire from the xture around the
green screw on the mounting bracket (B), then connect it to the
grounding conductor of the supply circuit.
Use U.L./C.S.A. listed wire connectors (BB) suitable for the size,
type and number of conductors. Secure the wire connectors (BB)
with U.L./C.S.A. listed electrical tape.
Place the face plate (A) against the mounting surface, allowing
the preassembled screws on mounting bracket (B) to pass
through the face plate (A) and secure with decorative nuts (C).
Make the connections to a 120V AC 60Hz circuit.
NOTE:
Carefully unpack and lay all parts on a clean, level surface.
Unscrew the decorative nuts (C) from face plate (A) and
detach the mounting bracket (B).
Attach the mounting bracket (B) to the junction box
(not included) with junction box screws (AA).
NOTE: The preassembled screws from the mounting bracket
should be in a horizontal position.
2
4
Installing the shade & light bulb
Install one 40 Watt E26 Type A or Type S Bulb or CFL or
LED equivalent (not included).
Place the glass shade (F) into the metal cage (G), raise
metal cage (G) toward socket cup (E) until both threads pass
through the holes of socket cup (E) and secure with two
decorative nuts (C).
Loosen the joint knob (D) and adjust the lamp to the desired
position. Retighten the joint knob (D) to secure.
Restore electrical power when complete. Turn on lamp
using the wall switch.
AA
B
B A
C
B
C
B
A
BB
C
F
G
E
D
Installation