
Installation Guide


Doc. ID: 186 Rev: 2 Effective: 1/7/2015 Page | 3
Moisture Barrier and Moisture Retarder
Concrete Subfloor: For floating installation only, it is recommended to use 6 mil polyethylene film or other means with equivalent
permeability.
Wood Subfloor: Not required.
Sound Control Underlayment
Additional sound control underlayment is allowed. Check with sound control manufacturer for application guidelines. Generally, the less
compressive and thinner underlayment is preferred.
Expansion Gap
Required gap width range is 5/16” to 3/8”. It is required around the perimeter of the floor and between floor and all vertical obstructions.
Do not place permanently installed structures such as kitchen counter/cabinet on the installed floor.
Wet Areas
This product can be installed in kitchens, mud rooms, powder rooms, bathrooms and laundry rooms.
Do not install in saunas, swimming pool areas and other similar extreme hot, cold or wet areas.
Fill all expansion gaps with water repellant caulk.
Tools and Materials
Basics:
Power saw with no-melt plastic cutting blades, utility knife, chalk line, chalk, pencil, T-square, tape measure, spacers, broom, hand saw or
jamb saw, eye protection, work gloves.
Helpful Pointers
General Tips
• Make sure your work area is well lit. Good visibility ensures that color is consistent and that visually defective planks are detected and
removed.
• Preferred minimum length of the first and last plank is 12”. The remainder of the last plank can be used as a starter board on the following
rows.
• Using a shorter piece at undercut door jams will help when fitting flooring in place. Remove upper part of the tongue and use glue when
joining ends.
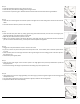
Cutting the Last Row to Width
• Most often the entire length of the last row will need to be cut so that it is narrow enough to fit the remaining space.
• Measure the distance between the floor face edge (exclude the tongue) to the wall. Subtract 5/16” – 3/8” from this measurement for
expansion gap. Draw a line. Cut through the line. Discard the excess piece. Proceed with installation. Another option is to follow
procedure in Step 1 below.
Floating Installation
Step 1 - Pre-install Activities
• Ensure that the width of first and last row is not less than 2 inches wide. Measure the distance of room in the direction of the width of the
plank. Divide by the width of the plank. Multiply the decimal by the width of the plank. This is the width of the last plank. If it is less than
2 inches, modify the width of the first plank. Determine the width of the first and last row by adding the calculated width of the last plank
to the width of the whole plank. Divide this number by 2. Subtract expansion gap from the result. The result is the width of the first and
last row.
• Rack up planks from several boxes.
• Ensure that end joints are staggered at least 12” between the rows.
• Inspect product for defects. If material is questionable, contact the retailer immediately. Do not proceed with installation
Step 2
• If the first row of floor panels had already been trimmed in width to meet minimum requirement, there is no need to trim it again.
Safety and Health Precautions
Power tools can be dangerous. Operate in strict accordance to manufacturer’s operating instructions and safety precautions. Unsafe
and improper use can cause serious injuries.
Avoid inhalation and exposures to wood dust by mechanical means and by wearing personal protective equipment.
Wear appropriate personal protective equipment (PPE) which include NIOSH or OSHA approve dust masks, safety goggle and work gloves.
or deliver flooring to the jobsite until moisture problems are corrected. Read adhesive manufacturer’s instruction carefully. Certain
wood flooring adhesives may se of it can cause serious injuries.
Avoid inhalation and exposures to wood dust by mechanical means and by wearing personal protective equipment.
Wear appropriate personal protective equipment (PPE) which include NIOSH or OSHA approve dust masks, safety goggle and work gloves.