www.h00ver.c0m IMPORTANT:READCAREFULLYBEFOREASSEMBLYAND USE. Questions or concerns? For assistance, please call Customer Service at 1-800-944-9200 Mon-Fri 8am-7pm EST. PLEASE DO NOT RETURN THIS PRODUCT TO THE STORE. THIS PRODUCTIS INTENDEDFORHOUSEHOLDUSEONLY. IF USED COMMERCIALLYWARRANTYIS VOID. @2012 Techtronic Floor Care Technology Limited. All Rights Reserved.
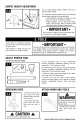
Thankyou for choosing a HOOVER_ product. Please enter the complete Code in the spaces provided. model and Manufacturing MODEL Techtro_ic Floor Care Technology Lirn_ed VACUUM ULEAUERJ AUPlRATEUR/AUPIUADORA MOD[L/MODELE/MODEJLO MFG. XXXXXXX ] ] N./ CODE Hint: Attach your sales receipt to this owner's manual. Verification of date of purchase may be required for warranty service of your HOOVER _ product. Be sure to register your product online at Hoover.
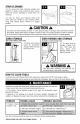
IMPORTANTSAFETYINSTRUCTIONS SAVETHESEINSTRUCTIONS When using an electrical appliance, basic precautions should always be followed, including the following: READ ALL INSTRUCTIONS BEFORE USING THIS APPLIANCE. WARNING:TOREDUCETHERISKOFFIRE, ELECTRIC SHOCKORINJURY: • • • • • • • • • • • • • • • • • • • • Fully assemble before operating. Operate cleaner only at voltage specified on data label on back of cleaner. Do not leave appliance when plugged in.
CAUTION:TO REDUCETHE RISKOF DAMAGE: • • • Avoidpicking up hard, sharp objects with this product, as they may cause damage. Store appropriately indoors in a dry place. Do not expose machine to freezing temperatures. Brushroll continues to turn while product is turned on and handle is in upright position. To avoid damage to carpet, rugs, furniture and flooring, avoid tipping cleaner or setting it on furniture, fringed area rugs, or carpeted stairs during tool use.
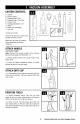
m CARTON CONTENTS A. Handle* C E G B. Vacuum Base C. Powered Hand Tool* H I D. Powered Hand Tool Clip* E. Crevice Tool F. Dusting/Upholstery G. Wand Tool* H. Screw (for assembly) I. Dirt Cup *Varies r_ A hi per model Remove al! parts from carton identify each item shown. and ,_b Make sure all parts are located before disposing of packing materials. ATTACHHANDLE (varies per model) Note: Remove the screw located in the vacuum base and set aside until instruction 1.3 1.
VACUUM DESCRIPTION f. 2. 3. 4. 5. 6. 7. 8. 9. 10. 11. 12. 13. 14. 15. 16. 17. 18. 19. 20. 21. 22. 23.
CARPET HEIGHT ADJUSTMENT 2.4 To adjust height setting, desired height setting. ie,l_ | TURN knob (A) to For maximum cleaning performance, the following carpet height settings are recommended: • LOW setting for all types of carpet, for bare floors turn dial to "Hard Floor" setting. • Higher settings: for very deep pile carpet, where easier pushing effort is desired, while maintaining good cleaning performance. H)_H LOW • IMPORTANT.
STAIR CLEANING 3.4 Lift vacuum by Stair Cleaning Handle and position on stairs. Clean forward to back. Never leave the vacuum standing on stairs when not cleaning. 3.5 Use the Hose and Powered Hand Tool (Tool varies per model) for stair cleaning. When using tools, always ensure handle is in upright position. CAUTIONA Use extra care when cleaning on stairs. To avoid personal injury or damage, and to prevent the cleaner from falling, always place cleaner at bottom of stairs on floor.
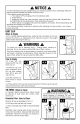
A NOTICE,& A Thermal Protector has been designed into your cleaner to protect it from overheating. When the thermal protector activates the cleaner will stop running. If this happens proceed as follows: 1. Turn cleaner OFF and unplug it from the electrical outlet. 2. Empty dirt cup. 3. Inspect the nozzle inlet, hose connector, hose, dirt cup inlet, cyclonic filter, Rinsable filter, and HEPA filter for any obstructions. Clear obstructions if present. 4.
• IMPORTANT• Allow filter to dry completely before replacing. Dry filter on edge so air circulates on both sides of filter. This may take up to 24 hours. Replace filter, tab side out. Close lid securely by pushing at (B) until it clicks as shown in Fig. 4.6. Replace dirt cup as described in Fig 4.5. ,&WARNINGA Filter Made With HEPAMedia:Howto Clean 4.8 With fingers in slots, pull filter straight out. Hold filter over a trash and tap out dirt and debris.
BRUSHROLL: How to Clean Z ,A CAUTION,A To reduce the risk of injury from moving parts - Unplug before servicing. 4.13 Depress handle release handle in low position. Lay hortizontal position with nozzle Fig. 4.14. Remove (4) screws on pedal and place vacuum down in facing down as in nozzle lid. m 4.14 Pivot off nozzle cover. 4.15 Remove any debris and/or hair from brushro!! (A). 4.16 Reposition screws. nozzle plate cover and insert (4) HOSE:How to Clean AWARNINGA 4.t7 To remove hose end out.
HEADLIGHT:How to Replace (available on select models only) WARNINGA To reduce the risk of electrical shock - Unplug before cleaning or servicing. RemovingLens Press Handle low position. Release Pedal and place 4.21 Using a Phillips screwdriver, screws as shown and lift off lens. handle in remove (2) Installing Bulb 4.22 Pull old bulb straight out of socket. Push new bulb straight into socket until locked in place. Excessive force is not required. Twisting or turning bulb not required.
If a minor problem occurs, it usually can be solved quite easily when the cause is found by using the checklist below. Any other servicing should be done by an authorized service representative. If appliance is not working as it should, has been dropped, damaged, leftoutdoors, or dropped into water, take it to a service center prior to continuing use. WARNINGA To reduce risk of personal injury - Unplug vacuum before servicing. PROBLEM POSSIBLECAUSE POSSIBLESOLUTION 2. Blown fuse or tripped breaker. 2.
To obtain approved Hoover _;service and genuine Hoover_ parts, locate the nearest Authorized Hoover _ Warranty Service Dealer (Depot) by: • Checking the Yellow Pages under "Vacuum Cleaners" or "Household". • Visit our website at hoover.corn (U.S. Customers) or hoover.ca (Canadian customers). Follow the service center link to find the service outlet nearest you. • For an automated referral of authorized service outlet locations call 1-800-944-9200. Do not send your vacuum to Hoover_;,Inc.
LIMITED TWO YEAR WARRANTY (Domestic Use) WHAT THIS WARRANTY COVERS When used and maintained in normal household use and in accordance with the Owner's Manual, your HOOVER _ product is warranted against original defects in material and workmanship for a full two year from date of purchase (the "Warranty Period"). During the Warranty Period, Hoove¢"_will provide labor and parts, at no cost to you, to correct any such defect in products purchased in the United States, U.S. Military Exchanges and Canada.