
Manual

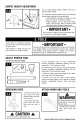


HEADLIGHT:Howto Replace
(available on select models only)
WARNINGA
To reduce the risk of electrical shock - Unplug
before cleaning or servicing.
RemovingLens
Press Handle Release Pedal and place handle in
low position.
4.21 Using a Phillips screwdriver, remove (2)
screws as shown and lift off lens.
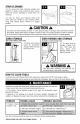
InstallingBulb
4.22 Pull old bulb straight out of socket. Push new
bulb straight into socket until locked in place.
Excessive force is not required.
Twisting or turning bulb not required.
ReplacingLens
4.23 Reposition lens and secure with screws.
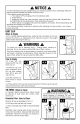
BELT
A CAUTIONA
To reduce the risk of injury from moving parts
- Unplug before servicing.
The belt is located under the cover of the vacuum
and should be checked from time to time to be sure
it is in good condition.
WhenTo Replace
Replace belt if it is stretched, cut or broken.
To check the belt, refer to Fig. 4.24 - 4.26.
HowTo Replace
4.24 Depress handle release pedal and place han-
dle in low position. Lay vacuum down in hortizontal
position with nozzle facing down as in Fig. 4.14.
Remove (4) screws on nozzle lid.
4.25 Pivot off nozzle cover.
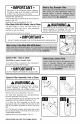
4.26 Remove old and worn belt. With lettering on
outside of belt, slide new belt over motor shaft
(metal rod) (A).
Push other end of belt through belt guide and slip
around area of brushroll without bristles (B).
With belt in place, pull and slide brushroll into nozzle
making sure that the brushroll end caps are in the
correct orientation.
4.27 Reposition nozzle plate cover and insert (4)
screws.
B A
LUBRICATION:
The motor and brushroll are equipped with bearings which contain sufficient lubrication for their lifetime. The
addition of lubricant could cause damage. Do not add lubricant to motor or brushroll.
Actual model may vary from images shown. 12
• IMPORTANT- [
Rotate brushroll manually to make sure belt is
not twisted.