
- Xerox 3535 printer/copier user guide

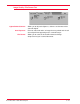
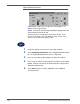
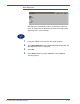
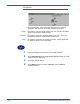
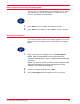
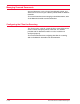
Table Of Contents
- Electrical Safety
- Laser Safety
- Maintenance Safety
- Operational Safety
- Ozone Safety
- Radio Frequency Emissions
- Safety Extra Low Voltage Approval
- Certifications in Europe
- It’s Illegal in the USA
- It’s Illegal in Canada
- Environmental Notices for the USA
- Environmental Notices for Canada
- Product Recycling and Disposal
- Symbols
- Getting to Know Your Copier
- Quick Start Guide to Copying
- Copier Features
- Duplex Automatic Document Feeder (DADF)
- Job Status
- Machine Status
- Overview
- Overview
- How to Scan
- Creating Job Templates
- Scanning Features
- How to Pause or Cancel a Scanning Job
- Scanning in Batches
- Managing Scanned Documents
- Configuring the Client for Scanning
- Overview
- System Settings
- Setting and Changing the Administrator Password
- Entering and Exiting the System Settings Mode
- Changing Settings in System Settings Mode
- Common Settings
- Copy Mode Settings
- Network Settings
- Scan Mode Settings
- Auditron Administration
- Loading Paper
- Machine Specifications
- Finisher (Optional Accessory)
- Ordering Consumables
- Cleaning the DADF and Document Glass
- Cleaning the ROS Window
- Changing Toner Cartridges
- Changing Staple Cartridges
- Changing the Fuser
- Changing the Waste Toner Container
- Changing Drum Cartridges
- Paper Jam Clearance
- Document Jams
- Stapler Faults
- Resolving Hardware Problems
- Resolving Programming Problems
- Resolving Processor Problems
- Resolving Output Problems using Basic Copying, Added Features, and Image Quality Tabs
- Calling for Service
- Fault Codes
3–25Xerox DocuColor 3535 Printer/Copier
How to Pause or Cancel a Scanning Job
You can cancel a scan job during the scanning process or delete
scan jobs that are stored in the machine. In order to pause or
cancel a scan job the procedure below:
1 Press Stop to pause scanning. The machine will stop.
2 Press Stop to end scanning, or press Start to resume scanning.
Scanning in Batches
This section describes how to scan multiple originals as one scan
job if you have more originals to be scanned than can fit into the
DADF.
1 Begin scanning your first original, then select Next Original.
NOTE: When using the DADF, wait until the machine has
completed scanning the first batch of originals before loading the
next batch.
NOTE: If no action is carried out after the above screen has been
displayed, the machine will assume that there are no more
originals to be scanned and end the job.
2 Load the next original and then press Start.
3 Select Last Original after all originals have been scanned.