
Quick Reference Guide
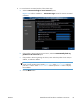

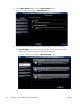


7. Click the Next button to proceed to the Enable HP Web Services screen.
Figure 2-7 Software installation — Enable HP Web Services screen
▲
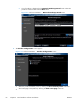
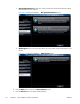
Select the check box next to Yes, open my Web browser to enable HP Web
services for my printer. to navigate to an HP web site and set up the Web services
HP ePrint for your product.
When Web Services are enabled, ePrint information appears in the HP Embedded Web
Server. Look for the e-mail address that is automatically assigned to the product. The product
also prints an HP Web Services page that contains this e-mail address and instructions for
using the service.
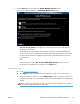
-or-
Select the check box next to No, do not enable Web services if you do not want
HP Web services enabled for your product. Click the Exit button.
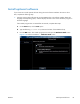
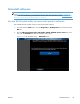
Configure HP ePrint
a. Go to
www.hpeprintcenter.com.
b. Click Sign In to enter your HP ePrintCenter credentials or to sign up for a new account.
c. Select your product from the list, or click + Add printer to add it. To add the product, you
need the printer code, which is the segment of the product e-mail address that is before the @
symbol.
NOTE: This code is valid for only 24 hours. If it expires, follow the instructions to enable
HP Web Services again, and obtain a new code.
ENWW
Detailed Microsoft Windows installation instructions
37