AvPrn.
AvPrn.book Page 2 Monday, February 28, 2000 11:13 AM ©Copyright Hewlett-Packard Company 2000 All rights are reserved. No part of the document may be photocopied, reproduced, or translated to another language without the prior written consent of Hewlett-Packard Company. Publication number: C6736-90144 First edition: December 1999 Printed in U.S.A., Germany, or Singapore Windows® and Windows NT® are U.S.-registered trademarks of Microsoft Corporation.
AvPrn.book Page i Monday, February 28, 2000 11:13 AM HP OfficeJet G Series Contents 1 Additional setup information . . . . . . . . . . . . . . . . . . . . . . . . . . . . . . 1 Microsoft’s plug-and-play messages do not appear . . . . . . . . . . . . . . . . . . . . . . . . . . 1 New Hardware message appears (Windows 95, 98, or 2000) . . . . . . . . . . . . . . . . . . 2 Your PC is unable to communicate with your HP OfficeJet . . . . . . . . . . . . . . . . . . . . 3 Windows Add Printer feature . . . . .
AvPrn.book Page ii Monday, February 28, 2000 11:13 AM HP OfficeJet G Series 6 Use the print features . . . . . . . . . . . . . . . . . . . . . . . . . . . . . . . . . . . 27 Start a print job . . . . . . . . . . . . . . . . . . . . . . . . . . . . . . . . . . . . . . . . . . . . . . . . . . . . . 27 7 Use the scan features. . . . . . . . . . . . . . . . . . . . . . . . . . . . . . . . . . . 29 Begin a scan . . . . . . . . . . . . . . . . . . . . . . . . . . . . . . . . . . . . . . . . . . . . . . . . .
AvPrn.book Page 1 Monday, February 28, 2000 11:13 AM 1 Additional setup information This section provides assistance in resolving installation and configuration issues, setting fax header information using the front panel, and adding and removing software. The standard installation instructions are provided in your Setup Poster. Retain the poster in case you need to refer to it at a later time. For comprehensive information, see the fully searchable Onscreen Guide.
AvPrn.book Page 2 Monday, February 28, 2000 11:13 AM HP OfficeJet G Series New Hardware message appears (Windows 95, 98, or 2000) If you set up your HP OfficeJet and connect it directly to your PC before you install the software, you may encounter one of the following: If the message is still visible on your screen, do the following: 1 Press Esc to exit the message without making any changes. 2 Turn off your HP OfficeJet.
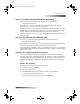
AvPrn.book Page 3 Monday, February 28, 2000 11:13 AM HP OfficeJet G Series 3 If you selected Win95 or Win98, double-click that folder (Win95 or Win98), and then choose the appropriate language folder (for example, d:\drivers\Win98\enu for English). Folder Name Language deu enu esn fra ita nld ptb kor cht German English Spanish French Italian Dutch Portuguese Brazilian Korean traditional Chinese 4 Click OK or Next, whichever is appropriate for your operating system.
AvPrn.book Page 4 Monday, February 28, 2000 11:13 AM HP OfficeJet G Series Connect your HP OfficeJet G95 directly to your PC (not through the HP JetDirect Print Server) If you purchased model G95 and you decide that you want to connect it directly to your PC (that is, not through a network), do the following: 1 Following the instructions in step 13 of your Setup Poster, install the software. 2 After you reach the Setup Type dialog box, choose Local.
AvPrn.book Page 5 Monday, February 28, 2000 11:13 AM HP OfficeJet G Series Set up for network printing using Windows sharing For the latest information regarding networking, visit the HP Web site at: www.hp.com/go/all-in-one If your PC is on a network, and another PC on the network has an HP OfficeJet connected to it, you can use that unit as your printer. You can only access print features in this configuration; other network features are only supported if you use an HP JetDirect Print Server.
AvPrn.book Page 6 Monday, February 28, 2000 11:13 AM HP OfficeJet G Series Set the fax header Follow these steps to enter your name and fax number. 1 On the front panel, press Menu. 2 Press 5, and then press 2. 3 Enter your name using the guidelines provided in the next section, Enter text. 4 Using the keypad, enter your fax number. 5 After you finish entering your fax number, press ENTER. Enter text The following list provides tips for entering text using the front-panel keypad.
AvPrn.book Page 7 Monday, February 28, 2000 11:13 AM HP OfficeJet G Series Set the Rings to Answer setting This setting tells your HP OfficeJet how many rings should occur before it answers an incoming call. Follow these steps to change the Rings to Answer setting manually. To use this feature, Auto Answer must be enabled. The light next to Auto Answer is on when the feature is enabled. Press the Auto Answer button to turn it on or off. 1 Press Menu. 2 Press 5, and then press 3.
AvPrn.
AvPrn.book Page 9 Monday, February 28, 2000 11:13 AM 2 Review your unit’s front panel You can perform many functions using either the front panel or the HP OfficeJet G Series software. The method you choose may depend on the function you need to perform, or it may depend on which is the most convenient. Even if you do not connect your HP OfficeJet to a PC (also called stand-alone use), you can use the front panel to process fax and copy jobs.
AvPrn.
AvPrn.book Page 11 Monday, February 28, 2000 11:13 AM 3 Use your HP OfficeJet with a PC If you connect your HP OfficeJet to a PC, you can work from the front panel or from the HP OfficeJet G Series software on your Windows desktop. The software offers more features and ease of use. For comprehensive information, see the fully searchable Onscreen Guide. To access the guide, go to the Director, click Help, and choose Onscreen Guide.
AvPrn.book Page 12 Monday, February 28, 2000 11:13 AM HP OfficeJet G Series Review the status window The status window is similar to the display included on the front panel of your HP OfficeJet. It describes the current state of your HP OfficeJet, and it is always available via the status icon in the Windows system tray (lower-right corner of the Windows taskbar).
AvPrn.book Page 13 Monday, February 28, 2000 11:13 AM HP OfficeJet G Series Change the PC’s friendly name when using a networked HP OfficeJet The HP OfficeJet G Series software lets you select a name to use for your computer. This is particularly useful if you intend to initiate a scan from a networked HP OfficeJets front panel, which requires that you select which PC to send the scan to. 1 In the Director, click Settings, and then choose Director Settings.
AvPrn.
AvPrn.book Page 15 Monday, February 28, 2000 11:13 AM 4 Get help This section explains where you can find information about your unit. For comprehensive information, see the fully searchable Onscreen Guide. To access the guide, go to the Director, click Help, and choose Onscreen Guide. Where can I find help? For hardware and setup information: See the HP OfficeJet G Series Setup Poster. The Setup Poster is available in printed format in the box your unit came in.
AvPrn.
AvPrn.book Page 17 Monday, February 28, 2000 11:13 AM 5 Load paper or transparency film, or load originals Your unit is designed to print and copy onto a variety of transparency films and paper types, weights, and sizes. It is important, however, that you choose the right paper and make sure that it is not damaged. Your unit lets you place originals directly on the glass. With the fax model, you can also load them in the automatic document feeder (ADF).
AvPrn.book Page 18 Monday, February 28, 2000 11:13 AM HP OfficeJet G Series 18 4 Slide the paper-width and -length adjusters in until they stop at the edges of the paper, and be sure that the paper stack lies flat in the input tray and fits under the tab of the paper-length adjuster. 5 Push the input tray back in until it stops. 6 To prevent paper from possibly falling off the tray, pull out the output-tray extender.
AvPrn.book Page 19 Monday, February 28, 2000 11:13 AM HP OfficeJet G Series Review tips for loading specific types of paper The following sections provide guidelines for loading certain types of paper and film. For best results, adjust the paper settings each time you change paper types. For more information, see Set the paper type. HP papers HP Premium Inkjet Paper: Locate the gray arrow on the nonprinting side of the paper, and insert paper with the arrow side facing up.
AvPrn.book Page 20 Monday, February 28, 2000 11:13 AM HP OfficeJet G Series Continuous (banner) paper (only works with printing) Continuous, banner paper is also known as computer or z-fold paper. Before loading banner paper, remove all other paper from the input tray, and then raise the output tray above the catch on the right side. Raise the output tray above the catch on the right side. If you use non-HP paper, use 20-lb. paper and fan the paper before loading it.
AvPrn.book Page 21 Monday, February 28, 2000 11:13 AM HP OfficeJet G Series If you are printing multiple envelopes, remove all paper from the input tray, and then slide a stack of envelopes into the tray, with the envelope flaps up and to the left (print-side down), until they stop. Adjust the left paper guide against the envelopes (be careful not to bend the envelopes). Make sure the envelopes fit within the tray (do not overload it).
AvPrn.book Page 22 Monday, February 28, 2000 11:13 AM HP OfficeJet G Series Set the paper type After you have loaded paper or film in the unit, tell it what type of paper is loaded. Change this setting whenever you change the type of paper or film. The paper types you specify for copying are independent of the paper types you specify for printing. For more information, see Recommended paper-type settings for copying or Recommended paper-type settings for printing in the Onscreen Guide.
AvPrn.book Page 23 Monday, February 28, 2000 11:13 AM HP OfficeJet G Series Load originals on the glass You can process any original by placing it on the glass. 1 Lift the lid, and make sure that the glass is clean. For more information, see Clean the glass in the Onscreen Guide. 2 Place the original face down on the glass with the top edge along the green border, and align the upper-right corner of your original with the top of the white arrow and the end of the green border.
AvPrn.book Page 24 Monday, February 28, 2000 11:13 AM HP OfficeJet G Series Process letter- or A4-size originals exclusively If you are processing only letter or A4-size originals, follow these steps. 1 Lift the lid, and make sure that the glass is clean. For more information, see Clean the glass in the Onscreen Guide. 2 Close the lid. 3 Place your originals in the ADF with the printed side facing toward the back and with the top to the right (sideways).
AvPrn.book Page 25 Monday, February 28, 2000 11:13 AM HP OfficeJet G Series To use the ADF 1 Lift the lid, and make sure that the glass is clean. For more information, see Clean the glass in the Onscreen Guide. 2 Close the lid. 3 Place all originals in the legal-size tray with the printed side facing toward the back and with the top of the document pointing down. 4 Align the paper with the left side of the legal-size tray. Insert legal-size or mix of legal- and letter-size originals vertically.
AvPrn.
AvPrn.book Page 27 Monday, February 28, 2000 11:13 AM 6 Use the print features Most print settings are automatically handled by the program you are printing from or by HPs ColorSmart technology. You only need to change the settings manually when you change print quality, print on specific types of paper or film, or use special features, such as two-sided printing. For comprehensive information, see the fully searchable Onscreen Guide.
AvPrn.book Page 28 Monday, February 28, 2000 11:13 AM HP OfficeJet G Series 3 Make sure that the selected printer is HP OfficeJet G Series Printer (or the friendly name that you have assigned to the unit). For more information, see Select a printer in the Onscreen Guide. Select HP OfficeJet G Series Printer.
AvPrn.book Page 29 Monday, February 28, 2000 11:13 AM 7 Use the scan features To use the scan features, your HP OfficeJet and PC must be connected. Scanning is the process of converting text and pictures into an electronic format for your PC, and then using the converted items for professional and personal projects. Professional uses: Scan text from an article you read, and bring it into your word processor so you can quote it in your report. Include pictures of your product in your brochure.
AvPrn.book Page 30 Monday, February 28, 2000 11:13 AM HP OfficeJet G Series Begin a scan You can initiate a scan from your PC or from your HP OfficeJet. The steps are different depending on whether your PC and HP OfficeJet are directly connected or set up through a network and depending on whether you load the original in the ADF or place it on the glass. Use an HP OfficeJet that is connected directly to your PC You can initiate a scan from your PC or from your HP OfficeJet.
AvPrn.book Page 31 Monday, February 28, 2000 11:13 AM HP OfficeJet G Series 2 In the Director, click Scan. Click here to scan. 3 If you loaded your original in the ADF, choose one of the following when the Scan from Automated Document Feeder dialog box appears: To scan your original and send it directly to a specific destination, go to the Send To list, and select the appropriate destination. In the Image Type area, select the image type, and then click OK.
AvPrn.book Page 32 Monday, February 28, 2000 11:13 AM HP OfficeJet G Series Use an HP OfficeJet that is networked You can initiate a scan from your HP OfficeJet or PC. To do this from your HP OfficeJet 1 Load your original. For more information, see Load originals on the glass or Load originals in the automatic document feeder (ADF). 2 Press Scan To repeatedly until your PCs name appears on the front-panel display, and then press START SCAN.
AvPrn.book Page 33 Monday, February 28, 2000 11:13 AM HP OfficeJet G Series 2 After the Network Scan Setup dialog box appears, choose one of the following: To scan your original and send it directly to a specific destination, go to the Send To list, and select the appropriate destination. In the Image Type area, select the image type, and then click OK. To scan your original and preview each page, select the Preview each page check box, and then click OK.
AvPrn.
AvPrn.book Page 35 Monday, February 28, 2000 11:13 AM 8 Use the copy features Using your HP OfficeJet, you can: Produce high-quality color and black-and-white copies using a variety of paper types and sizes, including iron-on transfers. Enlarge or reduce the size of the copies you make from 25% to 400% of the copys original size. (Percentages may vary between models.) Make the copy lighter or darker, adjust the color intensity, and specify the quality of the copies you make.
AvPrn.book Page 36 Monday, February 28, 2000 11:13 AM HP OfficeJet G Series Make copies You can make copies using the front panel of your unit or using your PC. All copy features are available using either method. You may want to use your PC for easier access to special copy features. All copy settings selected on the front panel are reset two minutes after the unit completes the copy job unless you save the settings as the default settings.
AvPrn.book Page 37 Monday, February 28, 2000 11:13 AM HP OfficeJet G Series 3 In the Director, click Copy. Click here to copy. The Copy dialog box appears, with the Settings tab visible. 4 Change any other applicable settings, such as reduction, enlargement, or special features. Set the number of copies. Select the paper type. Choose the color. Click here to start copying. 5 Click Start Copy. Stop copying You can stop a copy job from your unit or your PC.
AvPrn.
AvPrn.book Page 39 Monday, February 28, 2000 11:13 AM 9 Use the fax features Using your HP OfficeJet (fax model only), you can: Send and receive paper faxes, and send PC faxes. A PC fax is a file that you send from your PC. Fax documents from the automatic document feeder (ADF) or from the glass. Send and receive color faxes.
AvPrn.book Page 40 Monday, February 28, 2000 11:13 AM HP OfficeJet G Series 3 After 1. Automatic Reports Setup appears, press ENTER. 4 Press X (>) until Print Report Send Only appears. 5 Press ENTER to select it. To do this using the PC 1 In the Director, click Settings, and then choose Fax Settings. The Fax Settings dialog box appears, with the Reporting tab visible. 2 In the Automatic Report Printing list, choose After a fax send, and then click OK.
AvPrn.book Page 41 Monday, February 28, 2000 11:13 AM HP OfficeJet G Series 2 In the Director, click Fax. Click here to fax. 3 In the Send Fax dialog box, enter the fax number (or select one from the address book or Recent Faxes list) and other recipient information. For more information, see Save frequently used fax numbers. Enter the recipient information, or, to send a fax to a recent recipient, click Recent Faxes, and choose the recipient from the list. Select the appropriate resolution.
AvPrn.book Page 42 Monday, February 28, 2000 11:13 AM HP OfficeJet G Series Initiate the process from within a program You can fax directly from other software programs such as word processing or spreadsheet programs. 1 Open the file that you want to fax. 2 From your programs File menu, choose Print. 3 In the Print dialog box, select HP OfficeJet G Series Fax as the printer, and click Print.
AvPrn.book Page 43 Monday, February 28, 2000 11:13 AM HP OfficeJet G Series Receive a fax Depending on how you set up your HP OfficeJet, you will either receive faxes automatically or manually. For more information, see Set the answer mode. Your HP OfficeJet is automatically set to print received faxes. If you receive a legal-size fax and your HP OfficeJet is not currently set to use legal-size paper, the unit automatically reduces the fax so that it fits on the paper that is loaded.
AvPrn.book Page 44 Monday, February 28, 2000 11:13 AM HP OfficeJet G Series 3 In the Phone answering area, select Manual. Answer fax calls manually. 4 After you are finished, click OK. 5 When your HP OfficeJet rings, pick up the handset of a telephone that is on the same telephone line as your HP OfficeJet.
AvPrn.book Page 45 Monday, February 28, 2000 11:13 AM 10 Support services and warranty This section explains the service and warranty information provided by Hewlett-Packard. For comprehensive information, see the fully searchable Onscreen Guide. To access the guide, go to the Director, click Help, and choose Onscreen Guide.
AvPrn.book Page 46 Monday, February 28, 2000 11:13 AM HP OfficeJet G Series Call elsewhere in the world The numbers listed below are current as of the printing date of this guide. For a list of current international HP Support Service numbers, visit this address: www.officejet-support.com For Korea, you can also visit this address: www.hp.co.kr/ You can call the HP support center in the following countries.
AvPrn.book Page 47 Monday, February 28, 2000 11:13 AM HP OfficeJet G Series To order HP OfficeJet software, call the phone number for your country. Region Number for ordering U.S.
AvPrn.
AvPrn.book Page 49 Monday, February 28, 2000 11:13 AM 11 Technical information For comprehensive information, see the fully searchable Onscreen Guide. To access the guide, go to the Director, click Help, and choose Onscreen Guide. Power specifications Power consumption: 50W maximum Source (Input) Voltage: 100 to 240 VAC*, grounded Input Frequency: 50 to 60 Hz Current: 1A maximum * Figures are based on using the AC adapter that came with your unit (HP part number 0950-2880).
AvPrn.book Page 50 Monday, February 28, 2000 11:13 AM HP OfficeJet G Series an identification of the business, other entity, or other individual sending the message and the telephone number of the sending machine or such business, other entity, or individual. (The telephone number provided may not be a 900 number or any other number for which charges exceed local or long-distance transmission charges.
AvPrn.book Page 51 Monday, February 28, 2000 11:13 AM HP OfficeJet G Series CAUTION Users should not attempt to make such connections themselves, but should contact the appropriate electric inspection authority, or electrician, as appropriate. Notice: The Ringer Equivalence Number (REN) assigned to each terminal device provides an indication of the maximum number of terminals allowed to be connected to a telephone interface.
AvPrn.book Page 52 Monday, February 28, 2000 11:13 AM HP OfficeJet G Series Notice to users of the German telephone network The HP OfficeJet G Series products (G85, G85xi, and G95) are designed to connect only to the analogue publicswitched telephone network (PSTN). Please connect the TAE N telephone connector plug, provided with the HP OfficeJet G Series, into the wall socket (TAE 6) code N.
AvPrn.book Page 53 Monday, February 28, 2000 11:13 AM HP OfficeJet G Series Declaration of Conformity According to ISO/IEC Guide 22 and EN 45014 Manufacturers Name and Address: Hewlett-Packard Company, 16399 West Bernardo Drive, San Diego, CA 92127-1899, USA declares that the product Product Name: OfficeJet G55, G55xi, G85, G85xi, G95 Model Number(s): C67xxA, where x=34, 35, 36, 37, 38, 39, and 40 Product Options: None Note: See Declaration of Similarity for product descriptions.
AvPrn.
AvPrn.
AvPrn.
ENTER 6. Adv anced F ax Setup Menu ENTER Use Menu to display the menu options. Use arrows to move to the setting you want. Press ENTER to select the displayed setting. The asterisk (*) indicates the current setting. 7. Maintenance ENTER 5. Basic F ax Setup ENTER ENTER 4. Speed-Dial Setup 2. F ax Functions ENTER ENTER 1. Cop y Setup 3. Pr int Repor t ENTER HP OfficeJet Menu 1. Clean Print Cartridges 2. Align Print Cartridges 3. Restore Factory Defaults 4. Reprint Faxes in Memory 5.
AvPrn.book Page 58 Monday, February 28, 2000 11:13 AM 9LVLW WKH +3 $OO LQ 2QH ,QIRUPDWLRQ &HQWHU ,W¬V HYHU\WKLQJ \RX QHHG WR JHW WKH PRVW YDOXH IURP \RXU +3 2IILFH-HW 7HFKQLFDO 6XSSRUW 6XSSOLHV DQG 2UGHULQJ ,QIRUPDWLRQ 3URMHFW 7LSV :D\V WR (QKDQFH