
HP 3PAR Online Import for EMC Storage Data Migration Guide


4. The Destination Folder dialog box opens and prompts you to select an install directory for
Solutions Enabler and EMC SMI-S Provider. It is recommended that you choose the default
directory.
5. Click Next to continue. The Provider list dialog box opens.
6. Select Array Provider.
7. Click Next to continue. The Ready to Install Program dialog box opens.
8. Click Install to begin installing files to your selected folder. This may take several minutes.
9. When the Installation Wizard Completed dialog box opens, click Finish to complete the setup.
NOTE: Please read product release notes for full installation details:
https://developer-content.emc.com/developer/devcenters/storage/snia/smi-s/downloads/
SMI_Provider_RN.pdf
Configuring SMI-S Provider on a Windows Server
Installing the SMI-S Provider is a pre-requisite to allow remote software to connect to the EMC
Storage system.
1. Either work directly on the SMI-S Provider Server or start a Remote Desktop Connection to it.
2. Open a DOS command prompt.
3. Change directory to the location of the SMI-S installation. The default is C:\Program
Files\EMC\ECIM\ECOM\bin.
4. In the DOS command prompt, type C:\Program Files\EMC\ECIM\ECOM\bin>
testsmiprovider
5. Accept all default settings when prompted.
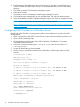
6. Use the addsys command to attach a EMC CLARiiON or VNX storage system to SMI-S
Provider.
(localhost:5988) ? addsys
Add System {y|n} [n]: y
ArrayType (1=Clar, 2=Symm) [1]:
One or more IP address or Hostname or Array ID
Elements for Addresses
IP address or hostname or array id 0 (blank to quit): <IP address of SPA>
IP address or hostname or array id 1 (blank to quit): <IP address of SPB>
IP address or hostname or array id 2 (blank to quit):
Address types corresponding to addresses specified above.
(1=URL, 2=IP/Nodename, 3=array ID)
Address Type (0) [default=2]:
Address Type (1) [default=2]:
User: <Global Administrator>
global administrator user for CX4 array
Password [null]: <password>
++++EMCAddSystem++++
10 Installation and Setup for Data Migration