
Brocade Network Advisor SAN User Manual v11.1x (53-1002167-01, May 2011)


304 Brocade Network Advisor SAN User Manual
53-1002167-01
Importing storage port mapping
12
Importing storage port mapping
The Storage Port Mapping dialog box enables you to import externally created storage port
mapping information into the application. The imported file must be in CSV format. The first row
must contain the headers (wwn, name) for the file, which is ignored during the import.
Example
wwn,name
20:00:00:04:CF:BD:89:6E,name1
20:00:00:04:CF:BD:6F:32,name2
20:00:00:04:CF:BD:70:2F,name1
20:00:00:04:CF:BD:6F:52,name2
To import storage port mapping, complete the following steps.
1. Open the Storage Port Mapping dialog box by performing one of the following actions:
- Select a storage port icon in the topology view, then select Discover > Storage Port
Mapping.
- Right-click any storage port icon in the topology view and select Storage Port Mapping.
- Right-click any storage port in the Device Tree and select Storage Port Mapping.
The Storage Port Mapping dialog box displays.
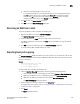
2. Click Import.
The Import dialog box displays.
3. Browse to the file (CSV format only) you want to import.
4. Click Open on the Import dialog box.
The file imports, reads, and applies all changes line-by-line and performs the following:
• Checks for correct file structure (first entry must be the storage node name (WWN) and
second entry must be the storage array name), well formed WWNs, and counts number of
errors
If more than 5 errors occur, import automatically cancels. Edit the storage port mapping
file and try again.
• Checks for duplicate storage ports (the same storage port mapped to more than one
storage array)
If duplicates exist, a message displays with the duplicate mappings detailed. Click Yes to
continue. Click No to edit the storage port mapping file and try again.
• Checks if mapping exists in current map
If mappings already exist, a message displays with the current mapping information. Click
Yes to overwrite the current mapping. Click Yes to All to overwrite all mapping conflicts.
Click No to leave the current mapping. Click No to All to leave all current mappings when
conflict occurs. Click Cancel to cancel the import.