
Brocade Network Advisor SAN User Manual v11.1x (53-1002167-01, May 2011)


890 Brocade Network Advisor SAN User Manual
53-1002167-01
Pseudo events
30
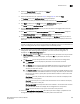
12. Click Next to advance to the Summary pane.
13. Click Finish.
For more information about adding an event action, refer to “Event action definitions” on page 867.
Adding a pseudo event on the flapping policy
The flapping policy checks to see if the event consistently transitions between two opposite states
during a specified length of time. If it does, then the specified action in the definition is performed.
The following two-part procedure uses both the Add Pseudo Events dialog box and the Add Event
Actions dialog box to create an event action with the flapping policy.
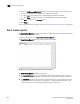
1. Select Monitor > Event Processing > Pseudo Events.
The Pseudo Events dialog box displays.
2. Click Add.
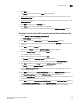
The Identification pane of the Add Pseudo Event dialog box displays.
3. Enter a name and description for the pseudo event, and click the Enabled check box to enable
the event.
4. Click Next.
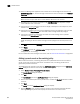
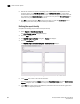
The Policy pane of the Add Pseudo Event dialog box displays.
5. Click the Flapping button, and then enter the duration of time the Event Processor will wait
before generating the pseudo event. Specify the number of flapping times in minutes or hours.
6. Click Next.
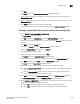
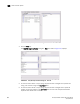
The Events pane of the Add Pseudo Event dialog box displays.
7. Select a critical event, such as LinkDown, and click the right arrow button to move it to the
Selected Down Trap list.
8. Select a remediation event, such as LinkUp, and click the right arrow button to move it to the
Selected Up Trap list.
9. Click Next to advance to the Summary pane.
10. Click Finish to complete the pseudo event configuration.
Now, you must create a new event action definition using the Add Event Actions dialog box.
Creating an event action with a pseudo event on the flapping policy
1. Select Monitor > Event Processing > Event Actions.
The Event Actions dialog box displays.
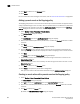
2. Click Add to display the Identification pane of the Add Event Action dialog box.
3. Enter a name and description for the event action and click the Enabled check box to enable
the event.
4. Click Next to display the Events pane.
By default, the Add Event Action - Traps dialog box displays.