
Data Center Fabric Manager Enterprise User Manual v10.3.X (53-1001357-01, November 2009)


538 DCFM Enterprise User Manual
53-1001357-01
Assigning ports to a logical switch
17
Assigning ports to a logical switch
A port can be assigned to only one logical switch.
All ports are initially assigned to the default logical switch. When you create a logical switch, it has
no ports and you must explicitly assign ports to it.
When you assign a port to a logical switch, it is removed from the original logical switch and
assigned to the new logical switch.
To assign ports to a logical switch, complete the following steps.
1. Select a switch on the Product List or Connectivity Map and select Configure > Logical
Switches.
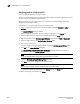
The Logical Switches dialog box displays.
2. Select the physical chassis from which you want to assign ports in the Chassis list.
3. Select the ports you want to include in the logical switch from the Ports table.
4. Right-click anywhere in the Existing Logical Switches table and select Table > Expand All.
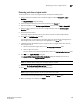
5. Select the logical switch in the Existing Logical Switches table.
6. Click the right arrow button.
The ports display in the selected logical switch node in the Existing Logical Switches table.
7. Click OK on the Logical Switches dialog box.
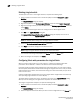
The Logical Switch Change Confirmation and Status dialog box displays with a list of all
changes you made in the Logical Switches dialog box.
NOTE
Ports are disabled before moving from one logical switch to another.
8. Select the Re-Enable ports after moving them check box.
9. Click Start to send these changes to the affected chassis.
NOTE
Most changes to logical switches will disrupt data traffic in the fabric.
The status of each change is displayed in the Status column and Status area.
10. When the changes are complete, click Close.