
Brocade Network Advisor SAN User Manual v11.1x (53-1002167-01, May 2011)

148 Brocade Network Advisor SAN User Manual
53-1002167-01
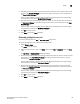
Roles
5
Roles
NOTE
You must have User Management Read and Write privileges to view, add, modify, or delete roles.
A role is a group of Management application tasks or privileges that can be assigned to several
users who have similar functions.
When you create a role, it immediately becomes available in the Users dialog box.
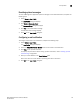
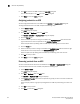
Creating a new role
To create a new role, complete the following steps.
1. Select Server > Users.
The Users dialog box displays.
2. Click Add under the Roles table.
The Add Role dialog box displays.
3. Enter a name of the role in the Name field.
4. (Optional) Enter a short description for the role in the Description field.
5. Add or remove privileges as needed.
For step-by-step instructions, refer to “Adding privileges to a role” on page 148 or “Removing
privileges from a role” on page 149.
6. Click OK to save the new role and close the Add Role dialog box.
The new role displays in the Roles list of the Users dialog box. To add users to this role, follow
the instructions in “Assigning roles and areas of responsibility to a user account” on page 139.
7. Cl ic k Close to close the Users dialog box.
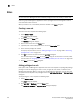
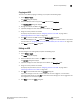
Adding privileges to a role
Each option under the Management application main menu corresponds to a privilege. By adding a
privilege to a role and assigning that role to a user, you give the user access to a feature of the
Management application. When a user logs in to the Management application, the user sees only
the options that correspond to the privileges listed in the Add Roles, Edit Roles, or Duplicate Roles
dialog box.
To add privileges to a role, complete the following steps.
1. Select Server > Users.
The Users dialog box displays.
2. Click Add, Edit, or Duplicate under the Roles table.
The Add Roles, Edit Roles, or Duplicate Roles dialog box displays.