
Data Center Fabric Manager Enterprise User Manual v10.3.X (53-1001357-01, November 2009)


DCFM Enterprise User Manual 537
53-1001357-01
Finding the physical chassis for a logical switch
17
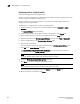
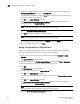
15. Select the ports you want to include in the logical switch from the Ports table.
16. Click the right arrow button.
The ports display in the selected logical switch node in the Existing Logical Switches table.
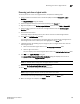
17. Click OK on the Logical Switches dialog box.
The Logical Switch Change Confirmation and Status dialog box displays with a list of all
changes you made in the Logical Switches dialog box.
NOTE
Ports are disabled before moving from one logical switch to another.
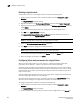
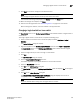
18. Select the Re-Enable ports after moving them check box.
19. Click Start to send these changes to the affected chassis.
NOTE
Most changes to logical switches will disrupt data traffic in the fabric.
The status of each change is displayed in the Status column and Status area.
20. When the changes are complete, click Close.
21. Discover the new logical fabric. See “Discovering fabrics” on page 39 for instructions.
When entering the IP address, use the IP address of the physical fabric.
Finding the physical chassis for a logical switch
The Management application enables you to locate the physical chassis in the Product List from
which the logical switch was created.
To find the physical chassis for a logical switch, right-click the logical switch in the Connectivity Map
or Product List and select Chassis.
The physical chassis is highlighted in the Product List.
Finding the logical switch from a physical chassis
The Management application enables you to locate the logical switch from the physical chassis.
To find the logical switch, right-click the physical chassis within the Chassis Group in the Product
List and select Logical Switches > <Logical_Switch_Name>.
The logical switch you selected is highlighted in the Product List and Connectivity Map.