
Data Center Fabric Manager Enterprise User Manual v10.3.X (53-1001357-01, November 2009)


DCFM Enterprise User Manual 543
53-1001357-01
Changing a logical switch to a base switch
17
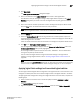
9. Click Start to send these changes to the affected chassis.
NOTE
Most changes to logical switches will disrupt data traffic in the fabric.
The status of each change is displayed in the Status column and Status area.
10. When the changes are complete, click Close.
11. Discover the new logical fabric. See “Discovering fabrics” on page 39 for instructions.
When entering the IP address, use the IP address of the physical fabric.
Changing a logical switch to a base switch
The Base Switch column in the Existing Logical Switches table indicates whether a logical switch is
a base switch.
To change a logical switch to a base switch, complete the following steps.
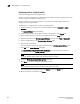
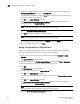
1. Select a switch on the Product List or Connectivity Map and select Configure > Logical
Switches.
The Logical Switches dialog box displays.
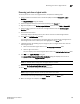
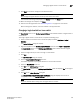
2. Right-click anywhere in the Existing Logical Switches table and select Table > Expand All.
The Base Switch column in the Existing Logical Switches table indicates whether a logical
switch is a base switch.
3. Select the logical switch you want to change to a base switch.
4. Click Edit.
The Edit Properties dialog box displays.
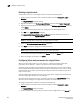
5. Clear the Base Fabric for Transport check box.
This field is applicable only to logical switches that are not base switches.
6. Select the Base Switch check box.
7. Click OK on the Edit Properties dialog box.
The Base Switch column in the Existing Logical Switches table now displays Yes for the logical
switch.
8. Click OK on the Logical Switches dialog box.
The Logical Switch Change Confirmation and Status dialog box displays with a list of all
changes you made in the Logical Switches dialog box.
NOTE
Ports are disabled before moving from one logical switch to another.