
Data Center Fabric Manager Enterprise User Manual v10.3.X (53-1001357-01, November 2009)
558 DCFM Enterprise User Manual
53-1001357-01
Removing an object from a zone alias
18
5. Click Edit.
The Edit Alias dialog box displays.
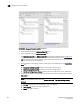
6. Add members to the alias by completing the following steps.
a. Select WWN or Domain, Port Index to choose how to display the objects in the Potential
Members list.
b. Show all discovered fabrics in the Potential Members list by right-clicking in the Potential
Members list and selecting Expand All.
c. Select one or more members that you want to add to the alias in the Potential Members
list. (Press SHIFT or CTRL and click each member to select more than one member.)
d. Click the right arrow between the Potential Members list and Selected Member(s) list to
add the selected members to the alias.
7. Remove members from the alias by completing the following steps.
a. Select one or more members that you want to remove from the alias in the Selected
Member(s) list. (Press SHIFT or CTRL and click each member to select more than one
member.)
b. Click the left arrow between the Potential Members list and Selected Member(s) list to
remove the selected members to the alias.
8. Click OK on the Edit Alias dialog box to save your changes.
9. Click OK or Apply on the Zoning dialog box to save your changes.
Removing an object from a zone alias
Use this procedure to remove an object (by WWN or Domain, Port Index) from a zone alias.
1. Select Configure > Zoning > Fabric.
The Zoning dialog box displays.
2. Click the Zone DB tab if that tab is not automatically displayed.
3. Select Alias from the Type list.
4. Show all objects in the Alias list by right-clicking a object and selecting Tree > Expand All.
5. Select one or more objects that you want to remove from the alias in the Alias list. (Press SHIFT
or CTRL and click each member to select more than one member.)
You can select objects from different zone aliases.
6. Right-click one of the selected objects and select Remove.
To selected objects are removed from the associated Zone Alias.
7. Click OK or Apply on the Zoning dialog box to save your changes.