software technical reference
Notice HEWLETT-PACKARD COMPANY MAKES NO WARRANTY OF ANY KIND WITH REGARD TO THIS MATERIAL, INCLUDING, BUT NOT LIMITED TO, THE IMPLIED WARRANTIES OF MERCHANTABILITY AND FITNESS FOR A PARTICULAR PURPOSE. Hewlett-Packard shall not be liable for errors contained herein or for incidental or consequential damages in connection with the furnishing, performance, or use of this material. Version 1 (11/00) © Copyright Hewlett-Packard Company 2000 All rights reserved.
Table of Contents Table of contents Notice ........................................................................................................................................ 2 Trademark notices.................................................................................................................... 2 Table of contents......................................................................................................................
Table of Contents Help system ...................................................................................................................................... 65 PCL 6 driver feature set .................................................................................................................... 67 PCL 5c driver feature set .................................................................................................................. 69 Background information ...............................
Table of Contents PS driver modifications ................................................................................................................... 122 Windows NT 3.51 .................................................................................................................. 124 System requirements ...................................................................................................................... 124 Background information ................................................
Table of Contents INI file entries........................................................................................................................ 165 Windows 95, Windows 98, and Windows Millennium Ini Entries ..................................................... 165 Windows 95, Windows 98, Windows Millennium, Windows NT4.0, and Windows 2000 ini entries .. 165 Enabling/disabling job status and alerts support .............................................................. 173 Disable job tracking ...
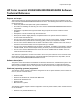
Purpose and scope HP Color LaserJet 4550/4550N/4550DN/4550HDN Software Technical Reference Purpose and scope This technical reference provides information about and troubleshooting tips for the software of the HP Color LaserJet 4550/4550N/4550DN/4550HDN Printer series.
Purpose and scope • Windows NT Workstation 3.51 The following systems support a PS emulation configuration of the printer software: • Macintosh OS System 7.5.
Printing system installer Printing system components Printing system and installer Printing system HP Color LaserJet 4550 Printing System version 1.0 Installer HP Color LaserJet 4550 Installer version 1.0 Unattended install Silent Install allows you to configure Setup to run without user interaction. This installation method is useful when you want to use the default selections provided by Setup or when you want to run the installation without being prompted.
Printing system installer The following Descriptions explain the available options: • /u Signals the installer to use the specified port and printer given on the command line (or in this file), and use all default selections. Installation then proceeds without prompting the user. • /port=xxxx Used to specify the default port when doing an unattended install. The value specified by xxxx should be a valid port and should contain no spaces.
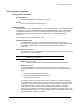
Printing system installer Figure 1: Installer Main Screen HP Color LaserJet 4550 Software Technical Reference 11
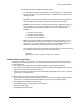
Printing system installer Figure 2: Installation Type dialog box Install Printer – This wizard guides you through the installation of your HP color LaserJet 4550 Printing System. Only the necessary software will be installed. • Register Product: Register your HP Color LaserJet 4550 through the Internet. • View Documentation: View the HP Color LaserJet 4550 Documentation.
Printing system installer Figure 3: Typical Install options Bidirectional (Bidi) Communication for the PCL 6 and PCL 5c Windows Drivers Automatic Driver Configuration and Job Status and Alerts use bidirectional communications software. The Typical Installation installs all of the above components which includes Automatic Driver Configuration, which contain the bi-directional software. These features can be unselected in the Custom Installation.
Printing system installer Figure 4: PCL 6 driver Configuration tab Job Status and Alerts This feature will notify users with a pop-up message when their active print job is interrupted or completed. Interrupt conditions could include paper jam, toner out, paper out, etc. Pop-up messages will appear regardless of the application the user is in. Users can choose which alerts to deliver, or to turn them all off.
Printing system installer Example messages are: • Toner Out: Job Stopped. Replace: (Black, Cyan, Magenta, Yellow). • Media Out: Job Stopped. Load: (transparencies, letter paper, etc.). • No printer response (either not connected or not functioning properly). • Job Complete. Pull Status In addition to the pop-up status alerts, Job Status and Alerts allows the user to remotely view the printer status. Available information includes consumables status and any control panel messages.
Printing system software components End-user software components Drivers The printing system for the HP Color LaserJet 4550 printer family includes the following printer drivers: Windows drivers Operating System Driver Description Windows 2000 • HP Color LaserJet 4550 PCL 6, PCL 5c • HP Color LaserJet 4550 PS PPD for use with Microsoft PSCRIPT driver, version 5.00.
Printing system software components Additional components and features The HP Color LaserJet 4550/4550N/4550DN/4550HDN Printing System (version 1.00) includes the following components for Windows and Macintosh environments. Following the table are descriptions of each component. Component Version HP Installer 1.0 HP Online User Guide 2.0 Macintosh LaserJet Utility (Mac OS 8.0 and later) 3.5.
Printing system software components interpreted in the default CMYK and RGB modes. The sRGB profile matches the default RGB mode (sRGB) which is enabled with the Screen Match or Automatic Color Smart II setting in either the PCL or PostScript driver. The CMYK profile is based on the default mode, which is a SWOP simulation with a CMYK Inkset setting of FAST in the PostScript driver. These profiles can be used for color conversions in a color-managed workflow.
Printing system software components • Fractal Design Painter 2–5.5 • EPSF Charts • TIFF Charts • PANTONE® * Color Drive • Text Format (ASCII) • Raw PostScript File • Adobe Acrobat Vector graphics such as company logos created in one of the above applications (using palettes or applications preserving the PANTONE ® * name) can be imported into Microsoft Word, PowerPoint or other MS Office applications.
Printing system software components NOTE: Hewlett-Packard supports JetAdmin for existing products, but does not provide applets for new products released after Spring, 2000. The HP Color LaserJet 4550 series can use JetAdmin with basic functionality, but Trays and the Paper tab will not be available for configuration. Web JetAdmin A link to download Web JetAdmin over the web is under Optional Software in the Installer.
Printing system software components Figure 7: Embedded Web Server home page JetDirect Web Server Requirement The embedded web server is available only when using a JetDirect network card released Spring 2000 or later. Previous versions and third party cards are not supported. The JetDirect card has its own embedded web server that allows remote configuration of the JetDirect card.
Printing system software components Device Pages • Configure Printer - Lets you change any printer configuration setting • Alerts - Lets you set up the printer to send problem and status alerts to anyone you choose via e-mail (See detailed description below). • Order Supplies - Lets you automatically order supplies over the web. • Security - Lets you set up passwords to control who can remotely cancel jobs or access the Device Pages.
Printing system software components machine. This means that third parties will be able to develop custom printer capabilities much more easily, and that those capabilities will apply to all printers with a ChaiVM virtual machine. HP Resource Manager This network administration software utility allows you to control the hard disk and flash memory features that are not found in the software drivers.
Printing system software components Online user guide The online user guide is supplied as a portable document format (PDF) file. You can install the online user guide while installing the printer software (choose Custom installation), or you can install it later. The online user guide installs in the HP LaserJet folder. Viewing the online user guide, in PDF format, requires either Adobe Acrobat Reader or another PDF reader.
Printing system software components Figure 9: The default appearance of the Finishing tab (PCL 5c version) Document Options The Document Options group box dynamically sizes itself and positions its controls according to the configuration of optional devices that affect its appearance. For the HP Color LaserJet 4550 printer, the only device that affects the appearance of the Finishing tab is the duplex unit. The group box with the duplex unit is shown below in Figure 10.
Printing system software components Flip Pages Up Selecting Print on Both Sides activates the Flip Pages Up and Booklet Printing options when Paper Size is set to: Letter, Legal, or A4. The default for both of these controls is off. The Flip Pages Up checkbox, visible only when the Print on Both Sides is visible, is used to specify the duplex-binding option. The following table demonstrates the results of selecting this box, depending on the orientation of paper.
Printing system software components round to the nearest valid value. Related controls indented beneath the edit box are Print Page Borders and Page Order, which become active when When Pages Per Sheet is greater than 1. Print Page Borders sets a line around each page image to help visually define the borders of each logical page.
Printing system software components Custom The default custom setting for PCL6 and PCL 5c does not have Scale Patterns selected. Details The Details button displays the Print Quality Details dialog box (Figures 12 and 13). The driver leaves the Details button enabled regardless of which PQ setting is selected. The Custom setting will include any combination of settings in this dialog box that differ from the Default settings when you click the OK button.
Printing system software components Current setting The Current Setting sentence dynamically changes the word in quotation marks to reflect the current PQ setting based upon the current choices in this dialog. The default is “Custom” but can change to “Default” whenever the selections match those settings (defined above).
Printing system software components Effects tab features The Effects tab is intended for unique paper effects such as scaling and watermarks. Figures 14 and 15 show this tab. Figure 14: The Effects tab (PCL 6) Figure 15: The Effects tab (PCL 5c) ZoomSmart The ZoomSmart group box is for features that scale the page image, either by a numeric percentage or by specifying a scale change to a different paper size. ZoomSmart handles scale transformations.
Printing system software components Print Document On: This feature allows you to format the document for one paper size but print the document on a different paper size, with or without scaling the page image to fit the new paper size. The Print Document On: control is disabled by any of the following: • % of Normal Size is not 100 percent • Pages per Sheet is not 1 • Booklet Printing is not off When the control is selected, the drop-down list will specify the target paper size on which to print.
Printing system software components Print Document On: is checked, the formatted size is Letter, the target size is set to Executive, and the Scale to Fit option is checked, the edit box will indicate 85 percent of Normal Size. If Scale to Fit is not selected, this value will return to 100. If there is any change to the scale, the page preview will also change; increasing or decreasing from the top left corner of the preview. The slider bar controls the scale directly.
Printing system software components Figure 17: Watermark Details dialog The dialog box shows a preview image and controls the current set of watermarks, including editing, coloring, shading, sizing or styling watermark text. Click OK to accept all changes made in the Watermark details dialog box; however, selecting Cancel does not cancel all changes.
Printing system software components number. The number 2 is used first, but if the resulting name is also in the list, then the number is incremented until the name is unique. Message angle This feature will allows you to print the watermark in a Diagonal, Horizontal, or Angle (custom) orientation to the Page's text. The default is Diagonal. While all three settings automatically center the watermark string within the page, these settings affect only the angle of the string placement.
Printing system software components Very Dark 255, 32, 32 255, 255, 32 32, 255, 32 32, 255, 255 32, 32, 255 255, 32, 255 32, 32, 32 Darkest 255, 0, 0 255, 255, 0 0, 255, 0 0, 255, 255 0, 0, 255 255, 0, 255 0, 0, 0 The Shading attribute provides the following choices: lightest, very light, light, medium light, medium, medium dark, dark, very dark, and darkest. These values represent the intensity of the color chosen in the Color attribute.
Printing system software components Figure 19: The Paper tab (PCL 5c) All Pages or First Page/Other Pages/Back Cover The controls on this tab are contained in a mini-tab named All Pages. As the name implies, this means that the settings specified on that tab apply to all pages of the document.
Printing system software components When the Back Cover tab is active, selecting “No back cover” de-activates the drop-down box, but does not change the value of the drop-down box. No bubble help is available for the inactive drop-down box. The settings will revert to their defaults when Use Different Paper for First Page is selected again.
Printing system software components Paper Name PCL 5 margin x,y portrait PCL 5 margin x,y landscape PCL6 margins Width Height Letter 216 mm (8.5 inches) 279 mm (11.0 inches) 150,100 120,100 100,100 Legal 216 mm (8.5 inches) 356 mm (14.0 inches) 150,100 120,100 100,100 Executive 184 mm (7.25 inches) 267 mm (10.5 inches) 150,100 120,100 100,100 A5 148.0 mm (5.83 inches) 210.0 mm (8.27 inches) 150,100 120,100 100,100 A4 210.0 mm (8.27 inches) 297.0 mm (11.
Printing system software components The table below lists the paper sizes added to the bottom of the paper size list while the Allow Scaling from Large Paper checkbox is selected on the Configure (More) tab: Scales to (Default) Paper Name Width Height A3 297.0 mm (11.69 inches) 420.0 mm (16.53 inches) A4 11 x 17 279 mm (11.0 inches) 432 mm (17.0 inches) Letter B4 (JIS) 257.0 mm (10.12 inches) 364.0 mm (14.33 inches) A4 8K 273 mm (10.75 inches) 394 mm (15.
Printing system software components Figure 21: The Custom Paper Size dialog box (all drivers) Initial settings When the dialog appears, the combo box in the Name group contains one of two things depending on the current paper size selection in the Paper tab: • If the paper size selection is a custom size defined previously, then the combo box contains the name of that custom size.
Printing system software components If a new name is typed into the combo box but the Save button is not selected, then you should be able to change the Width and Height values without losing the name. However, if a saved paper size name is selected from the drop-down list, any unsaved name or size values is lost without warning, and replaced by the values of the selected custom paper size.
Printing system software components State 2 3 4 Combo Box Contents Button Label Save Delete Rename Action Next State Select a saved item from the dropdown list. 3 Click Save. 3 Type something into combo box. 2 Change the Width or Height values. 2 Select a saved item from the dropdown list. 3 Click Delete. 1 Type something into combo box. 4 Change the Width or Height values. 1 Select a saved item from the dropdown list.
Printing system software components NOTE: If units are in millimeters, the custom paper size range minimum is the limit rounded up to the nearest whole millimeter. Custom paper size range maximum is the limit rounded down to the nearest whole millimeter. Any non-numerical entry will revert to the last valid entry. Width and Height entries are validated when the focus has changed. The resolution of each control is one tenth of an inch or one millimeter, depending on the current measurement units.
Printing system software components Measurement units button Like the Dynamic Command button described above, the measurement units button is also multi-titled, although its function is always to change from English to metric and vice versa. Close button The Close button closes the Custom Paper Size dialog box according to the logic in the table below.
Printing system software components If there is a conflict among paper source, size, or type, and you choose to keep the conflicting size or type setting, then the paper source must be Tray 1, the multipurpose tray, which can handle any supported paper size or type. Paper source commands The PCL 5c escape sequence for paper source is Esc&l#H. The table below shows values of #.
Printing system software components • Rough • Transparency Paper Type commands The PCL 5c escape sequence for paper type is Esc&n#W [operation][string], where operation byte 100 and string ('d') as follows. The table below shows values of #.
Printing system software components Destination tab features The Destination tab supports Job Retention. Figures 22 and 23 show the Destination tab. Figure 22: The Destination tab (PCL 6) Figure 23: The Destination tab (PCL 5c) Destination features Destination tab features are controlled through the Destination Features group box. The group box includes a drop-down list and an Options button. For the HP Color LaserJet 4550 printer, this drop-down list will either be blank, or contain Job Retention.
Printing system software components Assuming the controls are visible (that is, the hardware conditions are met and the Job Retention Enabled box is selected), selecting Options displays the Job Retention Options dialog box shown in Figure 24. NOTE: This screen shot appears this way because the Printer Hard Disk option is selected. If it were not selected, the Quick Copy and Stored Job (and Require PIN to Print) options would not be available.
Printing system software components Figure 25: "Proof and Hold" Job Retention Option Figure 26: "Private Job" Job Retention Option Figure 27: "Quick Copy" Job Retention Option HP Color LaserJet 4550 Software Technical Reference 49
Printing system software components Figure 28: "Stored Job" Job Retention Option User Name The User Name edit box allows you to identify the job at the printer's control panel. The restrictions for the User Name field are identical to those of the Job Name field as described below.
Printing system software components Output bin options Bin The HP Color LaserJet 4550 printer has one output bin that can be selected in the driver, so there is one item in the Bin list: Top Bin (Face-Down). There is also a rear face-up bin that can be manually set for a straight paper path. • Top Bin (Face-Down) refers to the main output bin at the top of the printer and is the only setting for the HP Color LaserJet 4550 printer. Jobs sent to this bin are printed face-down.
Printing system software components Basics tab features Figures 29 and 30 display the Basics tab. Figure 29: The Basics tab (PCL 6) Figure 30: The Basics tab (PCL 5c) Copies The Copies feature allows you to specify the number of copies to print. The number of copies you request appears in the box. You can change the number by typing in the box or using the up and down arrows to the right of the edit box to increase or decrease the value. Valid entries are numbers from one to 999.
Printing system software components last valid value when focus is removed from the control. The default number of copies is one. Since applications can also be used to set the desired number of copies, conflicts between the application and the driver can arise. In most cases, the application and the driver communicate, so that the number of copies set in the application will appear in the driver and vice-versa.
Printing system software components Figure 32: The About box (PCL 5c) Driver extensions This text box provides you with some visibility of any extended driver functionality. It can contain a brief description of the driver extension and a version number. Color tab features The Color tab allows you to use factory pre-defined ColorSmart II settings or to fine-tune color treatments and halftoning. Color output can also be converted to grayscale in this tab.
Printing system software components Figure 33: Color tab (PCL 5c) HP ColorSmart II The ColorSmart II group box controls printing coloration. It has two main modes, Automatic and Manual, that allows you to choose between factory default coloration settings and various manually set color controls. Other options allow for grayscale printing of colors. Automatic In this mode, factory defaults, shown below, control ColorSmart. The default values make up the Automatic setting.
Printing system software components Options The Options button displays the Manual Color Options dialog box (see below). Any combination of settings in this dialog that does not match the Automatic settings when the OK button is clicked is saved as a Custom setting. If choose settings that are the same as the Automatic settings, the driver changes the ColorSmart setting on the Color tab from Manual to the appropriate predefined setting.
Printing system software components The choices of Color Map under each are Screen Match and Vivid. The Halftone setting controls the selection of a halftone algorithm embedded in the firmware. The choices for Halftone under each are Detail (the default for Text) and Smooth (the default for Graphics and Photographs).
Printing system software components exceptions, such as Excel 5.0 and Corel Chart 4.0. When opened from the Printers folder, the Configure tab looks like Figure 36. Figure 36: The Configure tab (PCL 6) Figure 37: The Configure tab (PCL 5c) Printer Model In the Printer Model group box, the driver title remains 4550 for all models. Selection of a Printer Model makes the appropriate changes to other configuration options on the tab.
Printing system software components • No optional paper destinations, paper sources, duplexer, or hard disk are selected. HP LaserJet 4550N resets all configuration settings to match the capabilities of 4550N model. Settings affected are: • The DWS value shown in the Other Options dialog box will change to 6.0. If you subsequently select a hard disk or Auto Config also detects a hard disk, the DWS value changes to 7.0. If you manually select the N Bundle, DWS resets to the nonhard disk value.
Printing system software components Envelope feeder There is no envelope feeder option for the HP Color LaserJet 4550 printer. Mopier enabled Multiple Original Printing (Mopying) increases printer performance and reduces network traffic by sending the job to the printer once, then storing it on the hard disk. The rest of the copies are printed at the printer's fastest speed.
Printing system software components Storage In Storage, you can specify whether a hard disk is installed and whether Job Retention is enabled. Job Retention is disabled by default. The printer hard disk control can be set manually and are updated by a successful bidi query. Job Retention Enabled determines whether Job Retention appears as a Destination Feature on the Destination tab.
Printing system software components • Enable or disable one or more of the selected font(s). Printer memory Printer Memory allows you to set the amount of installed printer memory and driver work space. The Total Printer Memory box indicates the total amount of installed RAM in megabytes. It can be directly edited or adjusted with the up and down arrows of the spin control. The only allowable values for this box are 64 and 128 (MB).
Printing system software components Yes/No Off [disabled] Off On Copies=1 1, 2, 1, 2, 1, 2 1, 2, 1, 2, 1, 2 Yes/No Off [disabled] Off Off Copies=3 1, 2 1, 1, 1, 2, 2, 2 Yes/No Off [disabled] Off None (Collate*) Copies=1 1, 2, 1, 2, 1, 2 1, 2, 1, 2, 1, 2 Yes/No Off [disabled] Off None (Do not Collate**) Copies=3 1, 2 1, 1, 1, 2, 2, 2 No On On On Off None QTY=3 1, 2 1, 2 plus page error No On Off On Off None QTY=3 1, 2 1, 2 plus page error *Behavior when there is no
Printing system software components never guaranteed, this query attempt might or might not be successful. If not, then none of the configuration settings should change. A successful bidi query updates all of the settings in the Printer Model, Paper Handling Options, and Other Options group boxes on the Configure tab, as well as any custom media type names. Automatic Configuration does not update configuration information Font DIMMs.
Printing system software components Click the Clear All button to un-configure all the trays and remove the size and type constraints imposed on the Paper tab. Help system What’s this help Windows 95 and NT 4.0 What’s this? help is supported. To use What's this? Help: • Click the right mouse button on a control to display a context-sensitive menu, then select What’s this? to display a popup help window.
Printing system software components Bubble help Bubble Help features a graphical icon resembling a cartoon speech bubble with a small “i” in it, representing the international symbol for information. (See below for a list of the Bubble Help messages.) Figure 41 shows Bubble Help icons on a driver tab.
Printing system software components 3 Allows documents to be formatted for larger paper, but can be scaled and printed on smaller paper, such as 11x17 scaled to letter. Allow Scaling from Large Paper checkbox on Configure tab us disabled by default. PCL 6 driver feature set The following table presents supported PCL features for each operating system. Not all features are available with each operating system. Finishing tab Win Me Win 2000 Win 98 Win 95 NT 4.
Printing system software components Win Me Win 2000 Win 98 Win 95 NT 4.0 Measurement Units button Yes Yes Yes Yes Yes Close button Yes Yes Yes Yes Yes Source Is: Yes Yes Yes Yes Yes Type Is: Yes Yes Yes Yes Yes Printer Image Yes Yes Yes Yes Yes Destination tab Win Me Win 2000 Win 98 Win 95 NT 4.
Printing system software components Quick Sets Yes Yes Yes Yes Yes Configure tab Win Me Win 2000 Win 98 Win 95 NT 4.
Printing system software components Finishing tab Win Me Win 2000 Win 98 Win 95 NT 4.0 Document Options Yes Yes Yes Yes Yes Print on both sides Yes Yes Yes Yes Yes Pags per sheet Yes Yes Yes Yes Yes Print Quality Settings Yes Yes Yes Yes Yes Output Settings Yes Yes Yes Yes Yes Effects tab Win Me Win 2000 Win 98 Win 95 NT 4.
Printing system software components Destination tab Win Me Win 2000 Win 98 Win 95 NT 4.0 Destination Features Yes Yes Yes Yes Yes Output Bin Options and Accessible Architecture Yes Yes Yes Yes Yes Printer Image Yes Yes Yes Yes Yes Basics tab Win Me Win 2000 Win 98 Win 95 NT 4.
Printing system software components *Duplexer, envelope feeder, mopier enabled, optional paper destination, operation mode **Storage, fonts, printer memory, Ignore Applicatin Collation, allow scaling from larger paper ***Bidirectional communication must be functional, and printer friendly name must match printer device name. NT forms tab Win Me Win 2000 Win 98 Win 95 NT 4.0 Form/Tray Assignments Yes Yes Yes Yes Yes Help system Win Me Win 2000 Win 98 Win 95 NT 4.
Printing system software components Year 2000 compliance All printers in the HP Color LaserJet 4550 printer series are Year 2000 compliant. Enhancements The following enhancement was added to the LaserJet 4550 printing software to maximize printer performance. HP ColorSmart II ColorSmart II ensures the best printing results by automatically selecting the best half-toning and color treatment.
CD-ROM directory structure DISK1\ _SETUP.DLL _SETUP.LIB DISK1.ID R13DRV.Z R13SUP.Z Directory Structure Files in this Directory :\ EN\AUTOCAD\WIN32\ DISK2\ APDS.Z COMSUP.Z DISK2.ID README.TXT SETUP.EXE SETUP.INS SETUP.ISS SETUP.
CD-ROM directory structure Directory Structure Directories in this Directory :\EN\DRIVERS\WIN9X PCL5C PCL6 PS Directory Structure Files in this Directory :\EN\DRIVERS\WIN9X \PCL5C HPBAFD16.DL_ HPBF4120.DR_ HPBF4120.HL_ HPBF4120.INF HPBF4120.PM_ HPBF4121.DL_ Directory Structure Files in this Directory :\EN\DRIVERS\WIN9X\PCL6 HPBAFD16.DL_ HPBF4110.DR_ HPBF4110HL_ HPBF4110.INF HPBF4110.PM_ HPBF4111.
CD-ROM directory structure :\EN\DRIVERS\WINNT\PCL6 HPBAFD32.DL_ HPBF4110.DL_ HPBF4111.DL_ HPBF4112.DL_ HPBF4113.DL_ HPBF4114.DL_ HPBF4114.HL_ Directory Structure Files in this Directory :\EN\DRIVERS\WINNT\PS HP4550_6.PP_ HP4550PS.INF HPDCMON.DL_ PS4UI.DL_ HPBF4114.INF HPBF4114.PM_ HPBF4115.DL_ HPBF4116.DL_ HPBFTM32.DL_ HPDCMON.DL_ PSCRIPT.NT_ PSCRIPT4.DL_ PSCRIPT4.
CD-ROM directory structure PANTONE® directory Directory Structure Directories and Files in this Directory :\EN\PANTONE\ ACROBAT APPLICAT COLORSUP EPSCHART LUTTXT RAWPS TIFCHART HOWTOPAN.PDF Directory Structure Files in this Directory :\EN\PANTONE\ACROBAT HPCL4500.
CD-ROM directory structure Directory Structure Directories and Files in this Directory :\EN\PANTONE\APPLICAT\ CORELDRW HPCL4500.CPL HPCL4500.PAL Directory Structure Directories and Files in this Directory :\EN\PANTONE\APPLICAT\ DESIGNER HPCL4500PL4 Directory Structure Files in this Directory :\EN\PANTONE\APPLICAT\ FREEHAND HPCL4500.ACF HPCL4500.BCF HPCL4500.CLB Directory Structure Files in this Directory :\EN\PANTONE\APPLICAT\ QUARK 113-128.EPS 1-16.EPS 129-136.
CD-ROM directory structure Directory Structure Directories and Files in this Directory :\EN\PANTONE\TIFCHART 1-11.TIF 12-23.TIF 24-30.TIF 31-40.TIF 41-52.TIF 52-62.TIF 63-71.TIF 71-84.TIF 85-92.TIF Resource manager directory Directory Structure Directories in this Directory :\EM\RESMGR WIN9X WINNT Directory Structure Directories in this Directory :\EM\RESMGR\WIN9X DISK1 Directory Structure Files in this Directory :\EM\RESMGR\WIN9X SETUP32.DL_ BJRES.DL_ CABINET.
CD-ROM directory structure Directory Structure Files in this Directory HPHCO.HP_ HPHCOUI.HP_ HPHUGOUI.HL_ HPJDUND.HP_ HPJIPX1U.DL_ HPJMON.DL_ HPJMON.HL_ HPIPRO1.DL_ HPIPTS1.DL_ HPJSI.DL_ HPJSI.HL_ HPJSIADP.DL_ HPJSIEXD.IN_ HPJSIME.IN_ HPJSIPM.IN_ HPJSIRA.EX_ HPJSIRES.DL_ HPJSIRES.HP_ HPJSNM1.DL_ HPKOAUI.HP_ HPLOCMON.DL_ HPLOCMON.HL_ HPLOCP.HP_ HPLOTUI.HP_ HPMNSNMP.DL_ HPMOBYUI.HP_ HPMS.HP_ HPMSTOR.HL_ HPHUGOUI.HP_ HPPRECL.HP_ HPPRELK.HL_ HPPRKOA.HP_ HPPRMOBY.HL_ HPPRMOBY.HP_ HPPRNTR.HL_ HPPRNTR.
CD-ROM directory structure Directory Structure Files in this Directory HPBMLC.HP_ HPBNRACO.DL_ HPBPML.DL_ HPBPST.HL_ HPBSTT.DL_ HPBVCMNT.DL_ HPCOLA..DL_ HPDCMON.DL_ HPDMIP.HP_ HPDMIPX.HP_ HPECLUI.HP_ HPELKUI.HP_ HPEXPAND.DL_ HPFL.HP_ HPFLASH.HL_ HPFLSH.HP_ HPGENAPP.DL_ HPHCO.HL_ HPHCO.HP_ HPHCOUI.HP_ HPHUGOUI.HL_ HPHUGOUI.HP_ HPIPXMIB.DL_ HPIPXMON.DL_ HPIPXMON.IN_ HPIPXMUI.DL_ HPIPXMUI.HL_ HPJAHLP.CN_ HPJCMN1.DL_ HPJCMN1U.DL_ HPJDCOM.HP_ HPJDUI.HP_ HPJDUND.HL_ HPJDUND.HP_ HPJIPX1U.DL_ HPJMON.DL_ HPJMON.
CD-ROM directory structure Directory Structure Files in this Directory HPJSIRES.DL_ HPJSIRES.HP_ HPJSNM1.DL_ HPKOAUI.HP_ HPLOCMON.DL_ HPLOCMON.HL_ HPLOTCP.HP_ HPLOTUI.HP_ TLS704D.DL_ UNINSTAL.ST_ UNINSTAL.UN_ WSNMP32.DL_ Z_BIDI.PE_ Z_COLA.PE_ Z_READ.PE_ Z_RESMGR.PE_ Availability HP Color LaserJet 4550/4550N/4550DN/4550HDN printing software is available from the sources listed below.
Windows 2000 End-User Software This section describes the software available to end-users of the HP Color LaserJet 4550/4550N/4550DN/4550HDN printing systems. Software is listed by operating system. Windows 2000 NOTE: In the Descriptions that follow, the $ symbol before a path name indicates that the path to that directory can change from system to system. The term $Path indicates that the path and the subdirectory can change from system to system.
Windows 2000 Components Features/Descriptions HP PCL 6, HP PCL 5c • PCL 6 and PCL 5c drivers feature a Graphical User Interface with a common "look and feel." • Provides access to the printer’s paper handling and print quality features. • Job Status and Alerts provides job status messages at the host PC when printing problems occur (toner out, paper out, etc.) or when a print job is complete. It also allows you to proactively check the status of the printer.
Windows 2000 Background information Online user guide installation The online user guide for this printer is supplied in online format for viewing on your computer screen. You can install the online user guide while you are installing the printer software, or you can install it later. When you install the online user guide, both the guide and Adobe Acrobat Reader are installed in the HP LaserJet folder.
Windows 2000 Arial Italic Helvetica Narrow Symbol CG Times Helvetica Narrow Bold Symbol CG Times Bold Helvetica Narrow Bold Oblique Times Bold CG Times Bold Italic Helvetica Narrow Oblique Times Bold Italic CG Times Italic ITC Avant Garde Book Times Italic CG Omega ITC Avant Garde Demi Times New Bold CG Omega Bold ITC Avant Garde Book Oblique Times New Bold Italic CG Omega Bold Italic ITC Avant Garde Demi Oblique Times New Italic CG Times Italic ITC Bookman Demi Times New Roman C
Windows 2000 PS Device Fonts Antique Olive Garamond Antiqua (*) New Century Schoolbook Bold Italic Antique Olive Bold Garamond Halbfett (*) New Century Schoolbook Italic Antique Olive Italic Garamond Kursiv (*) New Century Schoolbook Roman Albertus Medium Garamond Kursiv Halbfett (*) Palatino Albertus Extra Bold (*) Helvetica (*) Palatino Bold Arial (*) Helvetica Bold (*) Palatino Bold Italic Arial Bold (*) Helvetica Bold Oblique (*) Palatino Italic Arial Bold Italic (*) Helvetica Obl
Windows 2000 (*) Courier (*) ITC Bookman Light Italic Univers Bold (*) Courier Bold (*) ITC Zapf Chancery Medium Italic Univers Bold Condensed Courier Bold Italic (*) ITC Zapf Dingbats Univers Bold Condensed Italic Courier Italic Letter Gothic Univers Bold Italic Courier Letter Gothic Bold Univers Medium Courier Bold Letter Gothic Bold Italic Univers Medium Condensed (*) Courier Bold Oblique Marigold Univers Medium Condensed Italic (*) Courier Oblique (*) New Century Schoolbook Bold
Windows 2000 7. 8. 9. 10. a. Inbox CD-ROM option: Browse to the appropriate \\Drivers\\ directory for your operating system and language. b. Internet download option: Browse to the folder where the Web files were downloaded and decompressed. Select the appropriate .INF file. Click Open, and then click OK. Select the appropriate printer. Follow the remaining instructions to complete the printer installation.
Windows 2000 4. 5. 6. 7. 8. Type D:\SETUP.EXE and press ENTER (or click OK). Click Install Printer. To install printer software for the language and version of Windows being used to install from, click Next. Click Continue until asked to select an installation option. To install software for Windows on a peer-to-peer network, choose Custom.
Windows 2000 6. When you are prompted to choose the method of installation, click Customization Utilities. Select the language and operating system versions for which the disk images are to be created, and choose the drivers to be included in the disk images. Click the Browse button to assign a path to the drive and directory where the disk images are to be copied. Click Next and follow the on-screen instructions to complete the disk copy. 7. 8. 9.
Windows 2000 NOTE: To connect to the network printer on a Windows NT workstation, the installer must have ADMINISTRATOR PRIVILEGES on that workstation. Users of a shared network version of Windows can install only those software components that the Network Administrator installed during the Network Administrator installation.
Windows 2000 Installation options and user prompts for Windows 2000 The following table assumes you are using the HP Color LaserJet installer CD. Installation Option Typical Installation Custom Installation Description User Prompts Installs the printing system already configured for the average user. This includes the PCL 6 driver, PS driver, Readme files, bidirectional communication, Resource Manager and the uninstaller. Select Port.
Windows 2000 Disk Image Copy Network Administrator Copies the Installation disks to a network drive or hard drive. Anyone with access to that drive can run the installation. The installer will provide this option only if it detects that a user is running a shared copy of Windows and has read/write capabilities. It copies installation files to the shared Windows directory on the network. • Language. Allows you to select the language the printer software is to be installed in.
Windows 2000 The following files are added to the $WINNT\SYSTEM directory upon installation of the PCL 5c driver: Filename Description Shared With Component(s) HPC4C.DLL PCL 5c driver 4550 Printing Systems HPC4K.DLL PCL 5c driver 4550 Printing Systems HPC4L.DLL PCL 5c driver 4550 Printing Systems HPC4P.DLL PCL 5c driver 4550 Printing Systems HPC4PCL5.DLL PCL 5c driver 4550 Printing Systems HPC4U.DLL PCL 5c driver 4550 Printing Systems READ_HP.
Windows 95, Windows 98 and Windows Millennium Windows 95, Windows 98 and Windows Millennium NOTE: In the Descriptions that follow, the $ symbol before a path name indicates that the path to that directory can change from system to system. The term $Path indicates that the path and the subdirectory can change from system to system.
Windows 95, Windows 98 and Windows Millennium Components Features/Descriptions HP PCL 6, HP PCL 5c • PCL 6 and PCL 5c drivers feature a Graphical User Interface with a common "look and feel." • Provides access to the printer’s paper handling and print quality features. • Job Status and Alerts provides job status messages at the host PC when printing problems occur (toner out, paper out, etc.) or when a print job is complete. It also allows you to proactively check the status of the printer.
Windows 95, Windows 98 and Windows Millennium Background information Online user guide The online user guide for this printer is supplied in online format for viewing on your computer screen. You can install the online user guide while you are installing the printer software or you can install it later. When you install the online user guide, both the guide and Adobe Acrobat Reader are installed in the HP LaserJet folder.
Windows 95, Windows 98 and Windows Millennium Arial Helvetica Bold Palatino Bold Italic Arial Bold Helvetica Bold Oblique Palatino Italic Arial Bold Italic Helvetica Oblique Palatino Roman Arial Italic Helvetica Narrow Symbol CG Times Helvetica Narrow Bold Symbol CG Times Bold Helvetica Narrow Bold Oblique Times Bold CG Times Bold Italic Helvetica Narrow Oblique Times Bold Italic CG Times Italic ITC Avant Garde Book Times Italic CG Omega ITC Avant Garde Demi Times New Bold CG Ome
Windows 95, Windows 98 and Windows Millennium The following PS device fonts reside in the HP Color LaserJet 4550 printers.
Windows 95, Windows 98 and Windows Millennium Coronet (*) ITC Bookman Light Wingdings (*) Courier (*) ITC Bookman Light Italic Univers Bold (*) Courier Bold (*) ITC Zapf Chancery Medium Italic Univers Bold Condensed Courier Bold Italic (*) ITC Zapf Dingbats Univers Bold Condensed Italic Courier Italic Letter Gothic Univers Bold Italic Courier Letter Gothic Bold Univers Medium Courier Bold Letter Gothic Bold Italic Univers Medium Condensed (*) Courier Bold Oblique Marigold Univers Med
Windows 95, Windows 98 and Windows Millennium Windows 95, Windows 98, and Windows Millennium installation instructions General installation 1. Connect the printer to the computer and turn the printer on. 2. Close the MS Office toolbar and all applications. Turn off virus checkers and terminate stay resident (TSR) programs. After installation, these programs can be turned back on. 3. Insert the installation CD-ROM for the appropriate language into the CD-ROM drive. 4.
Windows 95, Windows 98 and Windows Millennium 2. 3. 4. 5. 6. 7. 8. Insert the installation CD-ROM for the appropriate language into the CD-ROM drive. If AutoPlay is bypassed, select Run from the Start menu. Type D:\SETUP.EXE and press ENTER (or click OK). Click Install Printer. To install printer software for the language and version of Windows being used to install from, click Next. Click Continue until asked to select an installation option.
Windows 95, Windows 98 and Windows Millennium 4. 5. 6. Type D:\SETUP.EXE and press ENTER (or click OK). Click Install Printer. When you are prompted to choose the method of installation, select Customization Utilities. Select the language and operating system versions for which disk images to create and then choose the drivers to be included in the disk images. Click the Browse button to assign a path to the drive and directory where the Network Administrator wants to copy the disk images.
Windows 95, Windows 98 and Windows Millennium Users of a shared network version of Windows can install only those software components that the Network Administrator installed during the Network Administrator installation. Connecting to the printer After installing the end-user software on a client workstation, you or the network administrator must connect the printer drivers to the printer on the proper port before the client can print to the printer.
Windows 95, Windows 98 and Windows Millennium Custom Installation Installs the printing system, allowing you to customize the printing configuration. Disk Image Copy Copies the Installation disks to a network drive or hard drive. Anyone with access to that drive can run the installation. Select Components. Choice is: • Printer Drivers (default selection). Shows space required and available for each. Default has all drivers selected.
Windows 95, Windows 98 and Windows Millennium Network Administrator The installer will provide this option only if it detects that a user is running a shared copy of Windows and has read/write capabilities. It copies installation files to the shared Windows directory on the network. • User Guide. You can choose to install the online User Guide. • Prompts for appropriate installation disks. Uninstalling printing system components CAUTION: 1. 2. 3. 4.
Windows 95, Windows 98 and Windows Millennium Filename Description Shared With Component(s) HPPCL5F1.DLL PCL 5c driver 4550 Printing Systems HPPCL5F2.DLL PCL 5c driver 4550 Printing Systems HPPCL5F2.HLP Driver Help file 4550 Printing Systems HPPCL5F3.DLL PCL 5c driver 4550 Printing Systems HPPCL5F4.DLL PCL 5c driver 4550 Printing Systems HPCLJ5.ICM HPCAFE32.EXE HPCAFD16.DLL HPC4550 HPCFRP32.DLL HPCCPANL.EXE HPCFRP32.DLL HPCFRPAP.EXE MSVCRT.
Windows 95, Windows 98 and Windows Millennium Filename Description FONTS.MFM Microsoft’s Font Metric file. ICONLIB.DLL Microsoft’s Shared Library required by the PSCRIPT.drv. HP4550-4.PPD HP Color LaserJet 4550 printer description file. Shared With Component(s) HPC4550P.ICM Japanese $SYSTEM directory The following driver files are added to the Japanese $SYSTEM directory upon installation of the PS driver: Filename Description PSCRIPT.DRV Microsoft PSCRIPT driver. PSCRIPT.
Windows NT 4.0 Windows NT 4.0 NOTE: In the Descriptions that follow, the $ symbol before a path name indicates that the path to that directory can change from system to system. The term $Path indicates that the path and the subdirectory can change from system to system. System requirements The minimum system requirements for clients running Windows NT4.0/5.
Windows NT 4.0 Components Features/Descriptions HP PCL 6, HP PCL 5c • PCL 6 and PCL 5c drivers feature a Graphical User Interface with a common "look and feel." • Provides access to the printer’s paper handling and print quality features. • Job Status and Alerts provides job status messages at the host PC when printing problems occur (toner out, paper out, etc.) or when a print job is complete. It also allows you to proactively check the status of the printer.
Windows NT 4.0 Background information Online user guide installation The online user guide for this printer is supplied in online format for viewing on your computer screen. You can install the online user guide while you are installing the printer software, or you can install it later. When you install the online user guide, both the guide and Adobe Acrobat Reader are installed in the HP LaserJet folder.
Windows NT 4.
Windows NT 4.
Windows NT 4.0 (*) Courier Bold (*) ITC Zapf Chancery Medium Italic Univers Bold Condensed Courier Bold Italic (*) ITC Zapf Dingbats Univers Bold Condensed Italic Courier Italic Letter Gothic Univers Bold Italic Courier Letter Gothic Bold Univers Medium Courier Bold Letter Gothic Bold Italic Univers Medium Condensed (*) Courier Bold Oblique Marigold Univers Medium Condensed Italic (*) Courier Oblique (*) New Century Schoolbook Bold Univers Medium Italic Windows NT 4.
Windows NT 4.0 3. 4. Double-click Add Printer. Answer the questions in the Add Printer Wizard until you reach the screen with the printer manufacturer list. Click Have Disk. Browse to the driver location using one of the options in this step: a. Inbox CD-ROM option: Browse to the appropriate \\Drivers\\ directory for your operating system and language. b. Internet download option: Browse to the folder where the Web files were downloaded and decompressed. Select the appropriate .INF file.
Windows NT 4.0 1. 2. 3. 4. 5. 6. 7. 8. Close all applications and turn off virus checkers and terminate stay resident (TSR) programs. After installation these programs can be turned back on. Insert the installation CD-ROM for the appropriate language into the CD-ROM drive. If AutoPlay is bypassed, select Run from the Start menu. Type D:\SETUP.EXE and press ENTER (or click OK). Click Install Printer. To install printer software for the language and version of Windows being used to install from, click Next.
Windows NT 4.0 1. 2. 3. 4. 5. 6. Insert the CD-ROM for the appropriate language into the CD-ROM drive. Click the Start button, and then select Run. If AutoPlay is bypassed, select Run from the Start menu. Type D:\SETUP.EXE and press ENTER (or click OK). Click Install Printer. When you are prompted to choose the method of installation, click Customization Utilities.
Windows NT 4.0 Installs: Installs: • Printer drivers • Uninstaller • Uninstaller • Printer drivers • Readme files • Readme files • Resource Manager • Bidirectional Communicatio • Bidirectional Communication • Resource Manager Optional: • Online User Guide Do not install the PCL 5c Driver, PCL 6 Driver or PS Driver(s) onto Windows NT workstations when installing other end-user software. Clear the PCL and PS Driver checkboxes in the Components list during the Custom Installation.
Windows NT 4.0 • Open Network Neighborhood and double-click on the printer icon. Follow the instructions on the screen for connecting to a printer. • Use the Add Printer Wizard in the Printers folder to connect to a network printer. Online user guide installation The online User Guide for this printer is supplied in online format for viewing on individual screens. The online User Guide can be installed while installing the printer software or it can be installed later.
Windows NT 4.0 Custom Installation Installs the printing system, allowing you to customize the printing configuration. Customization Utility Network Administrator Copies the Installation disks to a network drive or hard drive. Anyone with access to that drive can run the installation. The installer will provide this option only if it detects that a user is running a shared copy of Windows and has read/write capabilities. It copies installation files to the shared Windows directory on the network.
Windows NT 4.0 Uninstalling printing system components CAUTION: 1. 2. 3. 4. Hewlett-Packard strongly recommends using the Uninstaller to remove printing system components. Removing printing system components and files manually can impact the operation of other installed components of this printing system, as well as components of other printing systems installed on this computer. System integrity can also be affected by removing files from the printing system.
Windows NT 4.0 The following driver files are added to the $SYSTEM directory upon installation of the PS Driver: Filename Description PSCRIPT4.DLL Microsoft Pscript driver PSUUI.DLL PS UI driver PSCRIPT.HLP PS help file HP4550-6.PPD Printer description file Shared With Component(s) PSCRIPT.NTF HP4550.
Window s NT 3.51 Windows NT 3.51 NOTE: In the Descriptions that follow, the $ symbol before a path name indicates that the path to that directory can change from system to system. The term $Path indicates that the path and the subdirectory can change from system to system. System requirements The minimum system requirements for clients running Windows NT 3.
Window s NT 3.51 Components Features/Descriptions HP PCL 5c • PCL 6 and PCL 5c drivers feature a Graphical User Interface with a common "look and feel." • Provides access to the printer’s paper handling and print quality features. • Job Status and Alerts provides job status messages at the host PC when printing problems occur (toner out, paper out, etc.) or when a print job is complete. It also allows users to proactively check the status of the printer.
Window s NT 3.51 Background information Online user guide The online user guide for this printer is supplied in online format for viewing on your computer screen. You can install the online user guide while you are installing the printer software, or you can install it later. When you install the online user guide, both the guide and Adobe Acrobat Reader are installed in the HP LaserJet folder.
Window s NT 3.
Window s NT 3.
Window s NT 3.
Window s NT 3.51 6. To install fonts, locate the appropriate font installer on the CD for your system and run it. 7. For latest or additional drivers, go to http://www.hp.com/support/lj4100 on the World Wide Web. 8. Network administrators must now configure the printer on the network. NOTE: When installing the software on a network that uses a shared version of Windows, install the software twice. During the first installation, install files on the shared Windows directory.
Window s NT 3.51 Filename Description HPPCL5F PCL 5c driver RASDDUI.DLL PCL 5c driver UNPCL.DLL PCL 5c driver UNPCL.DLL PCL 5c driver HPPCLJ_CP.HPA PCL 5c driver help HPPCLJ_UI.HLP UI support file HPPCLJ_UI.HPA UI support file HPPCLJ16U.
Window s NT 3.51 Filename Description PSCRIPT.DLL PS driver for Windows NT 3.51. PSCRIPTUI.DLL PS driver user interface code associated with PSCRIPT.dll. PSCRIPT.HLP PS driver Help file Shared With Component(s) PSCRIPT.CNT HP_4550.PPD Printer description file. READ_.WRI Readme file for PS UNPS.DLL PS Uninstaller HPCLJ_CP.HPA HPCLJ_UI.HLP HPCLJ_UI.HPA HPCLJ16U.
Windows 3.1x Windows 3.1x/Windows for Workgroups NOTE: Windows 3.1x refers to Windows 3.1 and Windows for Workgroups 3.11. In the Descriptions that follow, the $ symbol before a path name indicates that the path to that directory can change from system to system. The term $Path indicates that the path and the directory can change from system to system. System requirements The minimum system requirements for users running Windows 3.1x or Windows for Workgroup 3.1x are: • Windows 3.
Windows 3.1x Background information Online user guide installation The online user guide for this printer is supplied in online format for viewing on your computer screen. You can install the online user guide while you are installing the printer software, or you can install it later. To install the online user guide, copy it onto your system. Adobe Acrobat Reader Adobe Acrobat Reader allows you to read the PDF format of the online user guide.
Windows 3.
Windows 3.
Windows 3.
Windows 3.1x Filename Description Shared With Component(s) HPPCL5F2.DLL PCL 5c driver 4500 Printing Systems HPPCL5F2.HLP PCL 5c driver 4500 Printing Systems HPPCL5F3.DLL PCL 5c driver 4500 Printing Systems HPPCL5F4.DLL PCL 5c driver 4500 Printing Systems HPCLJUI.DLL PCL 5c driver 4500 Printing Systems HPPCL5F.DRV PCL 5c driver 4500 Printing Systems HPPCL5F.HLP PCL 5c driver help 4500 Printing Systems HPCLJDM.DLL Changes made to WIN.
Windows 3.1x Filename Description HP_4500-6.WPD Printer description file HP_4500-4.PPD Printer description file READ_.WRI PS Readme OEMSETUP.INI Installation script Shared With Component(s) Changes made to INI FILes for the PS driver The following modifications are made to the specified .INI files upon installation of the PS driver: WIN.INI [Windows] device=HP Color LaserJet4500 PS,PSCRIPT.DLL,LPT1 [PS,LPT1] ATM=placeholder [PrinterPorts] HP Color LaserJet4500 PS =PSCRIPT.
Macintosh operating system Macintosh printing system System requirements The minimum requirements for the Macintosh Printing System are: • Macintosh Operating System 7.5.3 or later Components The Macintosh Printing System for the HP Color LaserJet 4550/4550N/4550DN/4550HDN printer includes the following components: Component Version Filename Installed In Font and Configuration Utility v. 3.5.6 HP LaserJet Utility 3.5.
Macintosh operating system and it is installed in the HP LaserJet folder. To access DocMaker, open the HP LaserJet folder and double-click on DocMaker. To install the DocMaker while you are installing the printer software, follow the instructions that appear on your screen. Adobe Acrobat Reader Adobe Acrobat Reader enables you to read the PDF format of the DocMaker file in Asian languages. It is available for installation on the CD.
Macintosh operating system Courier Bold New Century Schoolbook Bold Italic ITC Zapf Chancery Medium Italic Courier Bold Oblique New Century Schoolbook Italic ITC Zapf Dingbats Courier Oblique New Century Schoolbook Roman The following fonts are resident on all HP Color LaserJet 4550 printers but can be used by Macintosh platforms only by installing additional screen fonts. The screen fonts can be accessed on either the CD or the World Wide Web at: www.hp.
Macintosh operating system Printer support The Macintosh Printing System will operate on the HP Color LaserJet 4550/4550N/4550DN. All the Macintosh components will work if the printer has both emulated PS and an AppleTalk I/O installed. Installing the Macintosh Printing System On a Macintosh-compatible computer, the installation procedures are the same for a Network Administrator, a Network Client, and a single user. Install the software on any computer that is printing to the printer.
IBM O/S 2, 2.0 and greater IBM OS/2, 2.0, and greater System requirements The minimum system requirements for users running OS/2 are: • OS/2 2.0 with FixPack, OS/2 2.11, OS/2 Warp 3.0 or OS/2 Warp 4.0 • MB RAM for preWarp 4.0; 16 MB RAM for Warp 4.0 • 2 MB available disk space for installing driver • 10 MB available disk space for Spooler/Swap space for printing. Large print jobs can require more free disk space.
IBM O/S 2, 2.0 and greater CG Times Bold Line Printer CG Times Bold Italic Marigold OS/2 installation instructions NOTE: Installation procedures differ depending on whether or not a printer object does or does not exist on the OS/2 Desktop being used. Use the instructions that match the Desktop. Installing a printer in OS/2 when a printer object does not appear on the computer’s desktop NOTE: Use this procedure if the OS/2 Desktop does not have a printer object.
IBM O/S 2, 2.0 and greater 3. 4. 5. 6. 7. 8. 9. 10. Click the Printer Driver tab. Select one of the Printer Driver Objects using the right mouse button. Click Install. Select Other OS/2 printer driver. Point to the downloaded printer drivers. Click the Refresh button. Wait until the window fills with printer drivers. Select one or more drivers by clicking the left mouse button over the desired driver. Click the Install button.
IBM O/S 2, 2.0 and greater selecting on setup or options buttons. There are times, such as when performing dragn-drop printing, when it is appropriate to change Job Properties outside of an application. To change the default Job Properties associated with a printer object outside of an application: 1. 2. 3. 4. 5. Right-click the Printer Object. Click Settings. Click the Job Properties tab. Change the properties. Click Save. The default job properties associated with a printer object are now set up.
Network operating systems Network Operating Systems Novell Installing a printer driver to the Nd Broker These steps use components of Netware and ND. If any of these steps do not work, you will need to contact Novell for assistance. 1. 2. 3. 4. 5. 6. 7. NOTE: Run NWADMN32.EXE. Double-click the ND Broker Object. Click the Resource Management (RMS) tab. Click Add Resources. Select the printer drivers for the operating system. Click Add. Browse to the .INF file of a printer.
Network operating systems 3. Select the Location Profiles tab. 4. Select Default in the Location Profile area, then select Properties at the bottom of the window. 5. You will now see a new window with a tab labeled Services. Below that is another selection window labeled as Services, where you should see the words Login Service highlighted. 6. Below the Services selection drop-down list, another drop-down should have Default highlighted. Select Properties from that list. 7.
Network operating systems k. l. When you have completed loading the drivers, verify their installation by locating them in the Current Resources field. Select OK and Cancel to complete the installation. 2. Make print queue objects. a. Create a standard NDS Printer Queue using NWAdmin32. b. Label the queue for the person or group that will be using a specific bin location. Create one Queue for each bin/driver that will be used. (Example: user1-printer2bin3) 3. Make NDPS print agents a.
Network operating systems Remove printer objects from the Novell Server. To remove printer objects, it is first necessary to delete from the Novell serverall old queues that were associated with the printer. NOTE: A Bindery Queue as seen on a Novell server is made up of two Objects: the Printer Queue and the Printer Server Object. Verify that no previous Queue has been made and associated to the printer. NOTE: The print queue or the print server object can detach from the printer device.
Network operating systems To build a new print queue, all present objects must be deleted. After deleting print queue object, double click the topmost icon to collapse its directory, then double click it again to refresh its directory. Verify that all printer-associated items have been deleted. The Nwadmin program window can now be closed or minimized. Bindery-NDS-NDPS Queue Quickset Build a Bindery queue on a Novell server 1. Remove any previously built print queues. 2.
Network operating systems 8. In the left pane, if the old queue is listed, highlight the Queue name and select Delete. To confirm the deletion, select OK. If the old queue is not listed, proceed to the next step. 9. In the left pane, select the server where the new queue will be created. 10. Select the Create button. 11. Enter the queue name (Example: CLJ4550-1-B) and select OK NOTE: The naming convention being used is as follows: Printer name, dash, Unit number, dash, type of Queue (B for Bindery). 12.
Network operating systems NOTE: The naming convention being used is as follows: Printer name, dash, unit number, dash, NDS (For the type of Queue you are creating. 15. 16. 17. 18. 19. 20. Verify the server and context are correct, then select OK. To add this to the list of serviced queues, select Yes. Select OK. If the new queue appears, connected to the tree in the right pane, select Next. Verify the IP, Gateway, and Sub mask numbers are correct.
Network operating systems Creating a Printer agent 1. Right click the container object. 2. Select Create 3. Select NDPS Printer. 4. Type in the printer name and select OK. NOTE: HP suggests the printer be named with the following convention: printer name - number (if applicable) – NDPS. All example printer names use this convention 5. Highlight the HP Gateway. 6. Select the NDPS Manager previously created, click OK, and OK. 7.
Appendix A: Job Status and Alerts Appendix A: Job status and alerts in Windows operating systems Operating systems supported This component can be installed on: • Windows 2000 • Windows 95, Windows 98 and Windows Millennium • Windows NT 4.0 Overview The Job Status and Alerts feature is an extension to the printing system to help users stay informed about the status of jobs they have submitted. Job Status and Alerts installs as part of the default driver installation.
Appendix A: Job Status and Alerts Job status and alerts window The Job Status and Alerts window is a standard Windows resizable application window with a title bar, but no menu bar across the top. The status window is divided into several distinct regions. At the bottom of the window is the nameless region that contains the HP logo on the left end and the Cancel Job and Close buttons on the right end.
Appendix A: Job Status and Alerts The Warning icon is used in conjunction with one of the other job status icons, and does not represent a job state by itself. The Receiving icon will be rarely seen, because a typical print job takes very little time to write to the spooler, especially if the spooler is on the local host. After Receiving, the job enters the Waiting state or the Printing state.
Appendix A: Job Status and Alerts that was selected when the window was last closed. If the previously selected panel is no longer present (because it has been deleted), then the first job panel in the list will be selected. If no job panels exist, then the Options panel will be selected as a last-case default. When the window is open, there are three types of events that can cause the program to display a different panel: 1. The user manually selects a different panel by clicking on a different icon. 2.
Appendix A: Job Status and Alerts • Job History: displays a page containing information about the history of jobs printed to this printer from this PC (described further below). Of the five buttons at the top of the printer status panel, the first four should be readily apparent to anyone who has used a web browser. The Refresh button is necessary for updating the printer status page when the printer has no embedded web server.
Appendix A: Job Status and Alerts The second alert option, labeled "your document has finished printing," will notify the user if any job completes successfully. Failed jobs are covered under the "your document cannot complete due to an error" option, and there is no alert option that covers canceled jobs. The Refresh Rate options specify the intervals at which the printer and spooler are queried over the network for updated job status information.
Appendix A: Job Status and Alerts If Job Status and Alerts has been configured not to run automatically on restart, the same dialog will appear again the next time the program is executed manually (either from the Run command or by double-clicking the application icon). If it is already configured for auto-run, this dialog will not appear when the program is executed.
Appendix A: Job Status and Alerts Filename Directory Description hpbwspds.dll $SYSTEM (Print Job Specific) Windows spooler delivery step that communicates with the windows spooler to determine the state of the print job while it exists within the windows print subsystem. hpbsubmn.
Appendix A: Job Status and Alerts Filename blackbar.gif brokenconnection.g if greenbar.gif greenblink.gif Level-00N.gif Level-012.gif Level-025.gif Level-050.gif Level-075.gif Level-100.gif Level-Empty.gif Level-OK.gif Level-Unknown.gif OK.gif redbar.gif redblink.gif Unknown.gif working.gif HPJob Status and AlertsDRV.MTX Directory Description Typically installed in something like: Graphics image files that are used by Job Status and Alerts when displaying the printer/device status.
Appendix A: Job Status and Alerts Hpbdrvrp.dll $SYSTEM Windows NT/2K status proxy driver installation module. Hpsyncnt.exe $SYSTEM Windows NT/2k driver synchronization utility. Filename Directory Update Hpbprx2k.dll $SYSTEM Windows 2K User Mode status proxy driver. hpb2ksrv.exe $SYSTEM Windows 2K Status Service. Hpbjdsnt.exe $SYSTEM Windows NT/2K Job detector application. Hpbprxkm.dll $SYSTEM Windows NT 4.0 Kernel Mode status proxy driver. Hpbdrvrp.
Appendix A: Job Status and Alerts INI File Section Key Value Hpstatus.ini allprinters finishedjobalert 1 Hpstatus.ini allprinters warningalert 1 Hpstatus.ini allprinters erroralert 1 Hpstatus.ini refreshrate allprinters 5 Hpstatus.ini LegacyPrinterDSRates MoreOften 10000 Hpstatus.ini LegacyPrinterDSRates MoreOftenLessOne 30000 Hpstatus.ini LegacyPrinterDSRates Middle 40000 Hpstatus.ini LegacyPrinterDSRates LessOftenPlusOne 90000 Hpstatus.
Appendix A: Job Status and Alerts INI File Section Key Value Hpstatus.ini images brokenconnection $IMAGEPATH\bro kenconnection.gif Hpstatus.ini images LevelUnknown $IMAGEPATH\l evel-unknown.gif Hpstatus.ini images LevelOk $IMAGEPATH\ level-ok.gif Hpstatus.ini images LevelEmpty $IMAGEPATH\ level-Empty.gif Hpstatus.ini images Level00N $IMAGEPATH\ level-00N.gif Hpstatus.ini images Level12 $IMAGEPATH\ level-012.gif Hpstatus.ini images Level25 $IMAGEPATH\ level-025.gif Hpstatus.
Appendix A: Job Status and Alerts Key Name Values Meaning onejobprocessingalert 0* Job Status and Alerts will not activate/display itself when a new job is detected. 1 Job Status and Alerts will activate/display itself when a new job is detected. 0* Job Status and Alerts will not activate/display itself when a print job has completed (includes finished or unknown). 1 Job Status and Alerts will activate/display itself when a job has completed (includes finished or unknown).
Appendix A: Job Status and Alerts allprinters SpecificPrin terName 0 Maps to the Refresh Rate setting of Never (Job Status and Alerts will not track the status of print jobs). 1 Maps to the Refresh Rate setting of LessOften (see LegacyPrinterDSRates for more information). 2 Maps to the Refresh Rate setting of LessOftenPlusOne (see LegacyPrinterDSRates for more information). The refresh rate setting one tick to the right of LessOften.
Appendix A: Job Status and Alerts Middle 40000 When the refresh rate slider control is set to the Middle, print jobs will use the value for this key to check the status of a print job. (Update job state every 40 seconds.) MoreOftenLessOne 30000 When the refresh rate slider control is set to the MoreOftenLessOne, print jobs will use the value for this key to check the status of a print job. (Update job state every 30 seconds.
Appendix A: Job Status and Alerts MoreOftenLe ssOne 275 When the refresh rate slider control is set to the MoreOftenLessOne, print jobs will use the value for this key to check the status of a print job. (Update job state every 275 milliseconds = ~3/10 of second.) MoreOften 275 When the refresh rate slider control is set to the MoreOften, print jobs will use the value for this key to check the status of a print job. (Update job state every 275 milliseconds = ~3/10 of second.
Appendix A: Job Status and Alerts [biditimeout] This section controls the bidi connection timeout values when attempting to open a connection printer, and it also controls the timeout values for getting information from the device as well as how long to wait before retrying again. Key Name Values Meaning Timeout1 3000 Timeout value to wait before retrying the failed bidi call, before trying the call again. On a failed call, it will retry retry1 number of times before it completely fails.
Appendix A: Job Status and Alerts Enabling/disabling job status and alerts support When Job Status and Alerts is closed, by right clicking on the Job Status and Alerts tray icon and selecting Exit, it will prompt the user to restart Job Status and Alerts on startup. If the user chooses “No, don’t start automatically”, this entry will be removed. To start status manually, select the Start|Run menu, and type HPSTATUS.
Appendix A: Job Status and Alerts Steps to remove support for a specific driver 1. Open a command prompt window. 2. Change directories so that the current directory is the windows\system directory (for win9x systems it will typically be windows\system, for NT/2K machines it will be winnt\system32). 3. Make sure Job Status and Alerts is shutdown, if it is not right click on the Job Status and Alerts tray icon and choose exit. 4. Type the command: hpbdrvhk –r “printername.” 5.
Appendix A: Job Status and Alerts Troubleshooting If Job Status and Alerts is conflicting with some other application or a specific driver model is causing problems follow the steps below to resolve the appropriate issue. General problem solving To determine the state of Job Status and Alerts and which printers it is currently monitoring, and how to remove a specific printer, consult the table below.
Appendix A: Job Status and Alerts Problem Solution(s) Description of Solution(s) When I print a job and Job Status and Alerts tracks the status of my print job, after a few minutes of time, it eventually shows the Unknown Job state. (It always behaves this way.) Verify the connection is valid by selecting the printer icon within Job Status and Alerts. If the printer device status shows up correctly, then this is most likely a compatibility issue with the printer driver, see #2 for this problem.
Appendix A: Job Status and Alerts Problem Solution(s) Description of Solution(s) If the device status works correctly from #1 above then the problem is most likely due to an unsupported printer driver model. The printer driver may be incompatible with the Job Status and Alerts proxy drivers, so it should be disabled/removed. Follow the steps below. 1. Open a command prompt window. 2.
Appendix A: Job Status and Alerts Problem Solution(s) Description of Solution(s) I don’t want Job Status and Alerts to track job status on any of my printers, but I do want to use the Device Status feature. Select the Options Icon, and then select the Next button so that the Refresh Rate option is displayed in the right panel. Move the slider to the far left, pointing at Never.
Appendix A: Job Status and Alerts Problem Solution(s) Description of Solution(s) I don’t want Job Status and Alerts to track job status or show device status for a specific printer, but I want to see the device status for that printer. Select the Options Icon, and then select the Next button so that the Refresh Rate option is displayed in the right panel. Select the specific printer in the For list, and then move the slider to the far left, pointing at Never.
Appendix A: Job Status and Alerts Problem Solution(s) Description of Solution(s) How do I get my newly installed printers to show up within Job Status and Alerts. Shutdown and restart the system. When Job Status and Alerts first loads up, it performs a check of the system to see if any new printers have been installed. If it detects a new printer that it supports it will automatically add it to the printer list.
Appendix A: Job Status and Alerts Command Line Option -I Sample Meaning hpbdrvhk –u –a Uninstall Job Status and Alerts support for all printers hpbdrvhk –i “My 8150” Install Job Status and Alerts support for the specified printer, or for all printers depending on the following command line parameter.
Appendix A: Job Status and Alerts Command Line Option Sample Meaning -x hpbdrvhk –x “HP DeskJet” Excludes the driver model name using the specified printer driver file from the driver support matrix. This option is generally not needed, but could be useful in a shared environment.
Appendix A: Job Status and Alerts 9. Any printer that references the same driver model name will no longer be supported by Job Status and Alerts. If the user is still experiencing problems with this driver/printer and Job Status and Alerts, complete the following steps: 1. Repeat steps 1-4 above. 2. Type the command: hpbdrvhk –c “Name of the Printer Goes Here.” 3. Repeat step 11 for each printer name that was used in the steps 1-4 originally. 4. Restart the system.
Appendix A: Job Status and Alerts a. If there is a value named RealDriver, right click on the Driver value and choose delete, then right click on the RealDriver value and choose rename, rename the RealDriver value to be Driver. b. If there is not a value named RealDriver, proceed to the next step c. Select the next driver model name key in the registry and repeat step d-f until each one has been inspected. d. At the command prompt type: net start spooler e.
Readme files Readme Files Hewlett-Packard Color LaserJet 4550, 4550N, 4550DN, 4550HDN Printer Late-breaking Readme File Hewlett-Packard Color LaserJet 4550 Series Printer Printing System Late Breaking Readme The Late-Breaking Readme file contains information that may impact the installation and use of your HP Color LaserJet 4550 printer. * * * * * * * * * * * * * * * * * * * * * * * * * * * * * * * * * Readme File Contents: I. II. III IV.
Readme files Issue: The Job Status and Alerts utility will not be included on the in-box software CD or the Web at product introduction. This utility will be provided on the in-box CD and the Web at a later date. _____________________________________________________________ Printer __________ Issue: The paper jam error codes have changed to be compatible across multiple LaserJet printers. Description: 13.
Readme files __________ Issue: When using the Customization Utility to create a custom printing system, the floppy drive destination is not available. Description: When using the Customization Utility to create a custom printing system, only the "Copy Printer Drivers Only" selection will allow the use of a floppy drive as a destination. When selecting "Create Customized Installer" or "Copy Entire Printing System Installer" from the Customization Utility, only local or network hard drives can be selected.
Readme files that was selected during the creation of the custom printing system. Therefore, the same language must be selected when using the custom installer. Workaround: Verify the same language is selected during both the creation and use of the custom installer.
Readme files Workaround: Verify there is at least 20 MB of free disk space available for the installation of the software. _________________________________________________________________ Printing System Uninstaller ___________________________ Issue: The printing system uninstaller does not completely uninstall the printing system software.
Readme files Issue: Job Retention, Proof and Hold, prints all of the copies of a print job. Description: Some applications may send each copy of a print job as a separate job. Workaround: Clear the Collation option in the application. _________________________________________________________________ Issue: Windows PCL6/5c drivers User cannot print on the backside of the first sheet when duplexing using the "Use Different Paper" option for the first page.
Readme files Description: Netscape Navigator does not support PNG images by default. A PNG plug-in must be downloaded from Netscape (TM) and installed into the browser. Workaround: Download and install the PNG plug-in from Netscape. _________________________________________________________________ Bidirectional Functionality ____________________________ Description: When running the HP Port Resolver, bidirectional functionality, from an NT 4.0 client machine to a remote printer connected via an NT 4.
Readme files Device Status requires Internet Explorer version 4 or greater. _________________________________________________________________ Issue: Device Status stops responding and print job icons freeze. Description: When Job Status and Alerts is tracking a large number of print jobs, Device Status may stop responding and icons may not be removed from the Job Status and Alerts window. Workaround: Download updated Job Status and Alerts software when available from www.hp.
Readme files When port name is more than 63 characters, port creation fails. Description: If a user chooses to change the port name and uses a new name of more than 63 characters, the port creation will fail. A dialog box appears with the following message "There was an error creating the port. Please refer to the Read Me file about how to create network Printer Ports. The printer will be set up to the local printer port." The driver installation finishes, and the printer is setup to print to LPTx.
Readme files The user can then type in the name of the queue. Additional Information: The user should be using Add Printer or the appropriate installer to attach to an existing queue rather than using the Install Network Printer Wizard to create a new queue for each workstation. If the user wants a new queue for each workstation, he or she will have to type in a new queue name.
Readme files In Europe http://www2.hp.com Printer drivers may be obtained from the following sites: In In In or Japan ftp://www.jpn.hp.com/drivers/ Korea http://www.hp.co.kr Taiwan http://www.hp.com/tw the local driver website at http://www.dds.com.tw URL for Access HP: http://www.hp.com FTP library service Anonymous FTP library service is available for around-the-clock access to drivers and technical support information for Hewlett-Packard peripheral and computer products. FTP address: ftp.hp.
Readme files components of the HP Color LaserJet 4550 Series printing system must be distributed together. The HP Color LaserJet 4550 Series printing system may not be distributed for profit. Copyright (c) 1990-2000 Hewlett-Packard Company. Copyright (c) 1985-1990 Microsoft Corp. All Rights Reserved.
Readme files Hewlett-Packard Color LaserJet 4550, 4550N, 4550DN, 4550HDN Printer Printing System CD-ROM Readme File Hewlett-Packard Color LaserJet 4550, 4550N, 4550DN, and 4550HDN Printers Printing System Readme File for Windows® ***************************************************************** NOTICE! PLEASE READ THE README.TXT FILE FOR "LATE-BREAKING INFORMATION." The Late-Breaking Information README.TXT file contains information that can impact the installation and use of your HP Color LaserJet printer.
Readme files This ReadMe file provides specific installation instructions and other information for the HP Color LaserJet 4550, 4550N, 4550DN, and 4550HDN printers. Installation instructions are provided for the following operating systems: • • • • Windows 2000 Windows NT 4.0 Windows 95, Windows 98, and Windows Millennium Windows 3.1x For instructions on installing OS/2 printer drivers or Macintosh OS components, see the associated ReadMe files or installation notes for that particular system.
Readme files Available printing features vary between printer drivers. See the printer driver Help files for instructions on using specific printing features. Additional Drivers The following drivers are not included on the CD-ROM but are available from the internet or customer care. See Section IV, "Technical Assistance," in this ReadMe or "HP Customer Care" in the printer online user guide for more information on obtaining drivers and other HP software.
Readme files The HP Resource Manager is a Windows 95, Windows 98, and Windows Millennium, NT 4.0 and Windows 2000 application that allows you to download, delete, and manage the contents of your optional printer hard disk driver, including printer-based fonts and forms. The Resource Manager supports the most common network protocols (TCP/IP & IPX/SPX) as well as direct parallel port connection. HP Resource Manager can be used with any 4550 series printer equipped with a hard drive.
Readme files The PS emulation drivers are usually the best choice when printing from PS-based applications such as QuarkXPress, CorelDRAW™, or any Adobe application. You should also use the PS emulation driver if you want to control CYMK values. Screen Fonts. Printer-matching TrueType fonts to help ensure WYSIWYG printing. Job Status and Alerts. Alerts you if a job you sent to the printer cannot finish printing, or when the job is complete.
Readme files 5. Select on Have Disk. 6. Browse to the driver location using one of the options in this step: • Inbox CD-ROM option: Browse to the appropriate \\Drivers\\ directory for your operating system and language. • Internet download option: Browse to the folder where the Web files were downloaded and decompressed. 7. Select the appropriate .INF file. 8. Select Open and OK. 9. Select the appropriate printer. 10. Follow the remaining instructions to complete the printer installation.
Readme files Font Installation 1. Close all applications. Turn off virus checkers and terminate stay resident (TSR) programs. After installation, these programs can be turned back on. 2. Browse to the FontInst\Win3x directory under the directory for your language. 3. Double-select the file fontin31.exe to install fonts onto your system. 2.5 CUSTOMIZATION UTILITY The HP Color LaserJet 4550 Printing System Installer includes customization utility that will create custom installations.
Readme files ***NOTE: Values that follow equal signs (=) in a command line must not contain intervening spaces. Method 1: Command line: /setup/setup.exe /u /port=xxxx /printer=n /pd=n Method 2: Setup.lst Use the setup.lst file to specify command line arguments to the installer for an unattended installation. You can send command line arguments in one of the following ways: • • • send the command directly to the installer send the command using the setup.lst file use a combination of the two.
Readme files ***NOTE: No uninstaller is available for driver-only installation using Windows "Add Printer" or Print Manager. For driveronly installations, delete the printer icon from the Printers folder (Windows 95, Windows 98, and Windows Millennium, NT 4.0, and 2000) or Print Manager (Windows 3.x). 2.8 DOCUMENTATION The CD ROM contains the following documentation, in addition to this ReadMe, for the HP Color LaserJet 4550 printer. • • Documentation can be viewed from the CD-ROM by running setup.
Readme files Follow these steps to download HP Web JetAdmin from the HP WebSite: 1. Run setup.exe at the root of the CD-ROM.(If auto-play is enabled, setup will automatically launch). 2. Select Optional Software option. 3. Select Web JetAdmin option. 4. Select on download link on Web page that appears. Resource Manager Follow the steps to install HP Resource Manager Software: 1. Run setup.exe at the root of the CD-ROM.(If auto-play is enabled, setup will automatically launch). 2.
Readme files 3.3 OBTAINING SUPPORT SERVICES OUTSIDE OF THE UNITED STATES See the printer online user guide and visit the HP website at http://www.hp.com for more information on driver distribution and customer support options, or contact your authorized HP Dealer. ****************************************************** 4. LEGAL STATEMENTS ****************************************************** 4.1 TRADEMARK NOTICES Adobe® and PS® are trademarks of Adobe Systems Incorporated.
Readme files Hewlett-Packard Color LaserJet 4550, 4550N, 4550DN, 4550HDN Printer PANTONE®* and ICC ReadMe File Hewlett-Packard Color LaserJet Printer 4550, 4550N, 4550DN, 4550HDN PANTONE®* and ICC Readme File **************************************************************** NOTICE! PLEASE READ "LATE-BREAKING INFORMATION" IN THIS Readme FILE FOR THE LATEST INFORMATION ABOUT YOUR PRODUCT. THIS SECTION IS IN ENGLISH ONLY.
Readme files 3.1 -- Overview of color management systems 3.2 -- Custom ICC profiles 3.3 -- Enabling CMS support in Macintosh OS 3.4 -- Enabling CMS support in Windows OS Enabling ICM by right-selecting on the profile Enabling ICM by from printer properties 3.
Readme files • • • • ColorSmart II optimizes the rendition of text, graphics and images automatically Industry standard sRGB default color space for effortless color matching Automatic PANTONE®* Calibration for easy use of PANTONE®* calibrated colors Color tables crafted to provide smooth, accurate rendition of all printable colors.
Readme files The PANTONE®* MATCHING SYSTEM is widely used by the printing industry to specify the color of objects. By using PANTONE®* certified colors and palettes, you can be assured of getting the closest color match possible when a file is printed on the HP Color LaserJet 4550 printer. The Automatic PANTONE®* Calibration feature lets the printer substitute the best simulation obtainable on this printer when a PANTONE®* color name is found in the PS code sent by an application.
Readme files picture (raster) data such as scanned images and TIFF files. Adobe Photoshop, for example, being a raster image editor, is not on the list of applications that support the Automatic PANTONE®* calibration feature. The printer specific PANTONE®* palettes are available on the HP web site and on the driver CD-ROM 1 in the PANTONE directory. The directory includes application specific palettes as well as a specific name-to-printer CMYK color tables for your printer (LUTTXT directory).
Readme files To use the PANTONE®* color palette in Illustrator 6.0.1 and 5.5 1. Follow the previous steps to open the color palette. Note: You must open the palette for every session before you can use PANTONE®* colors. 2. Choose Open or New from the File menu. 3. From the Object menu, choose Paint Style and select the appropriate PANTONE®* color. Adobe Illustrator 4.x To open a color palette in Illustrator 4.x 1. Start Illustrator. 2. From the File menu, choose Open. 3. Select the HP4550 color palette.
Readme files To print PANTONE®* colors, set the Image Mode to either CMYK Color or RGB Color depending on the color space of the image. Do not select the "Printer Color Management" or "PS Color Management" option. ADOBE PAGEMAKER PageMaker 6.x and 5.x support both .bcf (binary color format) and .acf (ASCII color format) formats. The PANTONE®* color palette for PageMaker is stored in the Applicat\ADOBE\PAGEMAKE directory of the driver CD-ROM. The palette files are named HP4550C.bcf and HP4550C.
Readme files 1. If the Color Palette window is not open, from the Window menu, choose Color Palette. 2. Choose the object that you want to color. 3. In the Color Palette box, choose Fill if you want to apply the color to the object, Line to apply the color to the line (border), or Both to apply the color to the object and its border. 4. In the Colors window, select a color to apply to the selected object. QUARKXPRESS You must add colors to a QuarkXpress color palette by importing an .eps file.
Readme files CorelDRAW 7 and 8 have built-in application-level color correction which must be disabled first. Please refer to the CorelDRAW manual for detailed instructions. To open a color palette in CorelDRAW: 1. 2. 3. 4. Open CorelDRAW. Select the Fill tool. Select the Palette icon. From the right arrow pop-up next to the Custom Palette, choose Open Palette. In version 8, the palette filename is in a pull down menu box. 5. Open the appropriate palette for the HP4550. 6.
Readme files The files HP4550C.clb for PS and HP4550R.clb for PCL are provided for users of FreeHand 3.x and are stored in the Applicat\FREEHAND folder. Place the appropriate file in the folder on your hard drive where other .clb files are stored. HP recommends that you place it in your FreeHand Color folder. To open a color palette in FreeHand 3.x 1. 2. 3. 4. 5. 6. Open FreeHand 3.x. Open a new or existing document.
Readme files Refer to the following list to determine which chart file contains the color you want: Column number from PANTONE®* printout Column 1 through column 11.5 Column 12 through column 23 Column 24 through column 30.5 Column 31 through column 40 Column 41 through column 52.3 Column 52.4 through column 62.5 Column 63 through column 71 Column 71.3 through column 84 Column 85 through column 92 EPS or TIFF chart filename 1-16.eps or 1-16.tif 17-32.eps or 17-32.tif 33-48.eps or 33-48.tif 49-64.
Readme files The Acrobat folder includes a portable document format (.pdf) that contains the PANTONE®* color palette. The file names are HP4550C.pdf and HP4550R.pdf. Use Acrobat Reader to print the color palette. Printing the color palette from Adobe Photoshop The tif files found in the Tifchart directory and the eps files in the Epschart directory can be printed using Photoshop. All color management options must be disabled.
Readme files ******************************************************************************************* 3. USING ICC PROFILES AND COLOR MANAGEMENT SYSTEMS (CMS) ******************************************************************************************* 3.1 OVERVIEW OF COLOR MANAGEMENT SYSTEMS (CMS) Color professionals with more exacting color requirements can use color management systems (software) to control the color data exchange between devices.
Readme files The HP 4550 does not have a device CMYK mode but will work well in the Vivid RGB mode with either the PS or PCL driver provided the application supports RGB ICC profiles. 3.3 ENABLING CMS SUPPORT IN MACINTOSH OS To enable CMS support in Macintosh OS System 7.0, complete the following steps: 1. From the Chooser, select the HP Color LaserJet 4500 printer, and then select Setup. 2. Select Print Options. 3. Select ColorSync Matching. The Printer Profile option becomes available. 4.
Readme files 3.5 ENABLING CMS SUPPORT IN SPECIFIC APPLICATIONS Color profile filename conventions The printer supports both RGB and CMYK color input paths. The RGB path is based on sRGB (Standard RGB) and is the preferred path for the HP Color LaserJet 4550. To enable color management, an ICC-compliant color profile for the data type must be installed. The convention used to distinguish between CMYK and sRGB color profiles is HP4550c.icm for CMYK and HP4550r.icm for sRGB.
Readme files Adobe PageMaker 6.5 1. From the File menu, select Print. 2. Select the Printer drop-down list box and select HP CLJ4550 SWOP CMYK PS. Note that PageMaker will not accept the sRGB profile. The profile is ignored when printing with the PCL driver. 3. If you selected a PS printer driver, select HP CLJ 4550-PS from the PPD drop-down list box. 4. Select Color, and then select CMS Setup. 5. From the Composite Printer drop-down list box, select the HP Color LaserJet 4550 printer. 6.
Readme files 6. From the Manufacturer list, select Hewlett-Packard. 7. From the Model list, select PS Driver -HP Color LaserJet 4550 SWOP CMYK PS PCL Driver - HP Color LaserJet 4550 sRGB 8. Select OK. 9. Select Finish. CorelDRAW 8 or later 1. 2. 3. 4. 5. 6. 7. Setup Color Management by opening the Options dialog from the Tools menu.
Readme files 5. Select OK. *************************************************** 4. HINTS AND TROUBLESHOOTING *************************************************** 4.1 IMPROVING COLOR PRINTING The process of matching printer output color to your monitor is quite complex because printers and computer monitors use different methods of producing color.
Readme files sending to the printer. This is unnecessary as the printer can do resampling after the image has been transferred. 4.
Readme files output. Using sRGB will help you generate good color every time, both within your operating environment and between different operating environments. Why don't the printed colors match the colors on the screen? The process of matching printer output color to your monitor is quite complex because printers and computer monitors use different methods of producing color. Monitors display colors by adding the light from RGB (red, green and blue) colored pixels using an additive color process.
Readme files Many designers create color documents using CMYK color rather than RGB color. This allows them to control colors in the same color space as they will eventually be printed. Because monitors are RGB devices, when an application displays a CMYK color on the monitor, it has to convert the CMYK values to RGB. There are many assumptions that must be made when converting colors.
Readme files *Pantone, Inc.'s check-standard trademark for color. Microsoft®, Windows®, and Windows NT® are U.S. registered trademarks of Microsoft Corp. SOFTWARE LICENSE AND COPYRIGHT This Software is owned and copyrighted by Hewlett-Packard or its third-party suppliers. Additional copies of the Software are available at the HP website: http://www.hp.com "NO WARRANTY". This Software is provided "As Is" with no Warranty. LIMITATION OF LIABILITY.
Index Index collation issues, 73 enabling color management, 224 ICC compliant, 225 number of copies, 61 PANTONE palettes, loading, 217 PANTONE support, 216 PS emulation driver, 207 arguments, command line, 7 arrow cursor, 53 Asian variations Allow Scaling from Large Paper, 74 Macintosh user guide, 150 Auto Mode, Rendering, 33 Auto Select paper source, 51 paper types, 52 Autocad directory structure, 81 Automatic Configuration, 74 automatic driver configuration, 12 Automatic mode, ColorSmart II, 64 automatic
Index C C5 envelope size, 43 Cancel button, 76 Canceled, definition, 174 Canceling, definition, 174 cardstock, trays supporting, 51 case sensitivity, 47 cassettes.
Index Deferred Media Selection (DMS), 52 deinstalling.
Index fields character limits, 58 Job Name, 58 number of copies, 61 User Name, 58 file management tools, 97 file sizes, troubleshooting, 227 files added by drivers Japanese, 117, 143 Windows 2000, 102 Windows 3.1x, 148 Windows 95/98, 116 Windows NT 3.51, 142 Windows NT 4.
Index SAS window, 173 states, 180 system tray, 179 identifying print jobs, 58 Idle state, icon, 180 Ignore Application Collation, 73 Illustrator ICC color profiles, 225 loading PANTONE palettes, 217 image, printer, 53 imageable area, 50 inactive job, definition, 173 in-box software, 86 inches, 50, 51 increments resolution, 50 scroll bar, 37 infrared devices, sending to, 27 InfraRed Receiver guide, 211 INI file modifications, 149, 182 inks, CMYK, 215 Install Printer wizard, 11 installation custom, 94 dialog
Index hardware, 50 standard paper sizes, 43 matching, color, 227, 228 maximum valid entries, 48 Measurement Units button, 51 media. See paper memory Configure Font DIMMs, 71 embedded Web Server requirements, 25 IBM O/S2 requirements, 154 Job Retention requirements, 54 Mopier requirements, 70 settings, 72 slots, 6 Total Printer Memory, 72 Windows 2000 requirements, 87 Windows 3.1x requirements, 144 Windows 95/98 requirements, 104 Windows NT 3.51 requirements, 135 Windows NT 4.
Index order, page, 31 ordering supplies, 25, 89 orientation. See also landscape orientation; portrait orientation Flip Pages Up, 31 options, 61 watermarks, 39 OS/2.
Index PJL commands Mopier Enabled, 70 PIN required, 56 resolution settings, 34 platforms supported, 6 Plug and Play, 107 point sizes, fonts, 39 pointers, 53 pop-up alerts, 15 port=xxxx command line option, 8 portable document format.
Index raster images PANTONE not supported, 216 sending graphics as, 33 Reader, Adobe Acrobat printing PANTONE charts, 222 readme files CD-ROM, 205 late-breaking, 197 PANTONE and ICC, 214 Receiving, definition, 174 Refresh button, printer status panel, 177 refreshrate keys, 184 Register Product, 11 Registration, 207 release notes, 211 remote troubleshooting, 23 remote viewing, printer status, 16 Rename button, 47, 51 Rendering Mode default settings, 32 graphic settings, 33 Require PIN to Print, 56 requiremen
Index sRGB color matching, 227 definition, 215 palettes, 217 profiles, 223, 224 Standalone Status. See SAS Status Alerts, 15, 89 Status software.
Index HP Resource Manager, 211 MAC LaserJet, 19 V valid entries edit boxes, 48 number of copies, 61 vector images hatch patterns, 34 PANTONE, 21 sending graphics as, 33 versions driver extensions, 63 HP LaserJet PS Printer Driver, 18 in-box, 86 installer, 19 MAC LaserJet Utility, 19 Microsoft PSCRIPT driver, 17 Printing System, 7 View Documentation, 11 virus checkers, closing, 92 Vivid option, 65, 224 W Waiting, definition, 174 Warning icon, 174 Warning state, icon, 180 Watermark Message, 38 Watermarks, 3
Index help system, 75 Ignore Application Collation, 73 installation, 122 network installation, 125, 128 NT Forms tab, 74 paper sizes, 43 PCL driver modifications, 133 PS driver modifications, 134 SAS files, 180, 181 SAS INI files, 182 system requirements, 118 typical installation, 130 uninstalling printing system, 132 WindowsSpoolerDSRates, 185 Wizard, Add Printer, 99 wizards, installation, 11 Word PANTONE charts, printing, 222 Workgroups, Windows for. See Windows 3.