Data Protector Express User’s Guide tc330–96002 Part number: *TC330–96002* First edition: October 2010
Legal and notice information © Copyright 1999, 2010 Hewlett-Packard Development Company, L.P. Under copyright laws, the contents of this document may not be copied, photocopied, reproduced, translated or reduced to any electronic medium or machine-readable form, in whole or in part, without prior written consent of Hewlett-Packard Limited. All rights reserved. Windows™ and Windows NT™ are registered trademarks of Microsoft Corporation. Linux™ is a registered trademark of Linus Torvalds.
Contents Before you begin . . . . . . . . . . . . . . . . . . . . . . . . . Intended audience . . . . . . . Editions . . . . . . . . . . . Related documentation . . . . . Document conventions and symbols Release notes . . . . . . . . . HP technical support . . . . . . 1 Overview . . . . . . . . . . . . . . . . . . . . . . . . . . . . . . . . . . . . . . . . . . . . . . . . . . . . . . . . . . . . . . . . . . . . . . . . . . . . . . . . . . . . . . . . . . . . . . . . . . . . . . . . . . . .
Interval Settings . . . . . . . . . . . . . . . . Media to be used . . . . . . . . . . . . . . . Auto format . . . . . . . . . . . . . . . . . . Auto format mode . . . . . . . . . . . . . New media location . . . . . . . . . . . . Move media to new media location on overwrite Rename media to new media name on overwrite New Media Name . . . . . . . . . . . . Advanced Settings . . . . . . . . . . . . . . . . . Advanced Options . . . . . . . . . . . . . . . Settings for all platforms . . . . . . . . . .
Daily Append . . . . . . . . Simple and GFS Rotation Types Custom . . . . . . . . . . . Comparing rotation types . . . Running Jobs with Rotations . . . . . . . . . . . . . . . . . . . . . . . . . . . . . . . . . . . . . . . . . . . . . . . . . . . . . . . . . . . . . . . . . . . . . . . . . . . . . . . . . . . . . . . . . . . . . . . . . . . . . . . . . . . . . . . . . . . . . . . . . . . . . . . . . . . . . . . . . . . . . . . . 8 Encryption and Compression . . . . . . . . . .
Log file formats . . . . Save log to a file . . . E-mail log . . . . . . Auditing . . . . . . . Execution . . . . . . . . . Pre Execution Commands Post Execution Commands Logs . . . . . . . . . Domain Level Barcode Filters Filter rules . . . . . . . . . . . . . . . . . . . . . . . . . . . . . . . . . . . . . . . . . . . . . . . . . . . . . . . . . . . . . . . . . . . . . . . . . . . . . . . . . . . . . . . . . . . . . . . . . . . . . . . . . . . . . . . . . . . . . . . . . . . . . . . . . . . .
Figures 1 Basic Architecture . . . . . . . . . . . . . . . . . . . . . . . . . . . . . . . .
Tables 8 1 Icon viewing status . . . . . . . . . . . . . . . . . . . . . . . . . . . . . . . 21 2 Creating jobs . . . . . . . . . . . . . . . . . . . . . . . . . . . . . . . . . 22 3 Element status . . . . . . . . . . . . . . . . . . . . . . . . . . . . . . . . . 40 4 Log file formats . . . . . . . . . . . . . . . . . . . . . . . . . . . . . . . . .
Before you begin Intended audience This guide is intended for new and experienced users of Data Protector Express and Data Protector Express Basic. For new users, chapter 1 introduces the concepts and architecture of Data Protector Express and Chapter 2 demonstrates the process of completing the first backup job and first restore job. Subsequent chapters explain the more advanced features of Data Protector Express. Editions This guide describes the features of Data Protector Express.
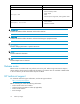
Convention Element Italic text Text emphasis Monospace text • • • • Monospace, italic text • Code variables • Command variables File and directory names System output Code Commands, their arguments, and argument values WARNING! Indicates that failure to follow directions could result in data loss. CAUTION: Indicates that failure to follow directions could result in damage to equipment or data. IMPORTANT: Provides clarifying information or specific instructions.
• Operating system type and revision level • Detailed questions User’s Guide 11
Before you begin
1 Overview In this chapter • Concepts • A Simple, Immediate Backup • Restore to a Different Location WARNING! Data Protector Express security is disabled at installation to simplify the evaluation process. When installing the product in a production environment we recommend, at a minimum, that you set a user password for the Admin user. Doing so will result in the Administrator prompting the user for a password before starting. See Setting a User Password for details.
Figure 1 Basic Architecture Terminology The following terminology is used throughout this document ... • Clients— A client is any computer (or Machine) in the Backup Domain other than the Backup Server. This includes file servers, application servers, and user PCs (desktops and laptops). All client computers must have Data Protector Express installed. For licensing purposes, clients are classified as being server or workstation class machines.
of finding installation disks, installing operating systems and applications, patching them and restoring data with a simple restore process directly from backups. • Full System Recovery — Full system recovery is the process of recovering all of the data on a machine. It differs from DR in that a full system recovery does not reformat the disks prior to restoring the data. A Simple, Immediate Backup We will do a simple backup of selected files to a local backup device.
10. Select the new job object and click the Run button on the Command bar to start the job. Hold the cursor over the Data Protector Express icon (the Quick Access program) in the Windows System tray, normally in the bottom right corner of your screen. You can see that the job is running. NOTE: During execution of the job you may notice a flashing red button in the lower right portion of the screen. This indicates an that requires your intervention.
5. For this first restore job, we want to restore the files to a different location. This will allow you to compare the original files with the restored files. To do this task, we need the move functionality. Click on the Move icon in the Tool bar. We recommend that you create a new folder to hold the restored files. In the Select destination for move operation dialog, select the C: drive, click on the New command, enter a name for your newly restored folder and click OK.
Overview
2 Administering Backup In this chapter • Using the Administrator • Using Quick Access from Taskbar • About the Data Protector Express Service The entire Backup Domain can be managed and monitored centrally. The Administrator is the primary interface for administering the Backup Domain. The program displays an icon in the system taskbar and gives you a quicker way to perform the most common administrative operations. Using the Administrator Data Protector Express is designed to be easy to use.
a. Object Layout — with this layout, the view pane contains a set of objects displayed as large icons. This view typically contains command objects as in the case of the Tasks View or objects as in the case of the Advanced Security View. b. Object Detail Layout — with this layout, the panel is divided into a top and bottom portion. The top portion contains a list of objects. The bottom contains detailed information relevant to the object selected in the top portion.
• The evaluation license for the option has expired. Optional features are installed automatically when you install Data Protector Express. Once the evaluation license expires, you can no longer use an optional feature without purchasing and installing a license. • The option is not available in the edition of Data Protector Express you have installed. • An error occurred when starting Data Protector Express. Review the alerts to see if an option failed to start properly when you started the application.
Accessing Data Protector Express functions When you right-click the Quick Access icon, a menu is displayed. Jobs Click the Jobs menu item to create a new job or to view a list of the jobs that you have currently defined. If there are more jobs that aren’t displayed, More is displayed below the list. Click More to open the Administrator to the Jobs and Media View, which contains the jobs and folders that you have defined.
Settings and Other Commands Settings Click the Settings menu item to change the settings for the Quick Access taskbar icon or for the Data Protector Express service. Login information Use the Hostname field to change the Backup Server to use. Enter the hostname or IP address of the server. Use the User name and Password fields to log in under a different user name.
About the Data Protector Express Service The Data Protector Express Service lets you run backup jobs automatically and unattended. The Administrator can be closed, enhancing security. The service makes sure your scheduled backup jobs run even when the machine reboots after a power loss. NOTE: The Data Protector Express Service runs as a service on Windows and as a daemon on Linux platforms.
3 Backup Jobs In this chapter • • • • • Selecting Files for Backup Jobs Selecting Devices Encryption Configuration Advanced Settings Backup jobs can be created from the Tasks view or the Jobs and Media view using the New command. When a new job is created the Administrator will open the job’s Property page to allow configuration of the job. The Property page can be reopened at any time, even when the job is running. If the job is running the settings pages will not be editable.
By default, Data Protector Express backs up all volumes, folders and files that have been marked for the job. Selection filters let you identify specific criteria for excluding one or more of these marked objects. The filter criteria is applied when the job runs, in effect unmarking any objects that do not meet the criteria. Selection filters are optional. If no selection filter is specified, all of the files and folder that have been marked will be backed up per the job configuration settings.
Rotation type and Sets This setting is only available when the job is scheduled to run repeatedly. The Rotation type and Sets controls allow you to specify a set of preconfigured rotations. The Custom Rotation type is a special case. It unlocks the user interface to allow the user to configure his own rotation. For more information about setting up rotations, see Chapter 7. Type of fixed rotation This setting is only available when creating a custom rotation.
Auto Verify mode After Data Protector Express backs up a set of data, it can verify that the data was backed up correctly. Data Protector Express reads the files from the media and performs the selected verification type. If any discrepancies between the two files are found, the file is reported in the job log. Full Verify This setting instructs Data Protector Express to compare every selected file stored on the media with the original file from the PC desktop or file or application server.
WARNING! Files protected with split file mode cannot be restored during Disaster Recovery. They must be restored after the DR process has completed. Scheduled Dates This setting is only visible when the schedule type is set to run on selected days. It consists of a list of selected days to run the job. To add days to or remove days from the schedule, click the Calendar... button to open the schedule calendar. To schedule the job to run on a day, right-click on the day in the calendar and select Daily.
New media location Specifies the folder in which Data Protector Express will store any new media created while the job is run. By default, Data Protector Express stores media under the backup job to ensure the media isn’t used by another backup job. To change the default, click the Browse button and select the folder from the Browse dialog box. When Data Protector Express runs any scheduled automatic rotation job, it automatically creates media folders for the job.
CAUTION: Unless you have specific needs that require changes to the advanced options, leave the default values unchanged. Settings for all platforms Eject media after use When this option is checked, Data Protector Express automatically ejects the media at the end of the backup job. This feature only works on devices that support software eject. Auto Retension When this option is checked, Data Protector Express automatically re-tensions the media at the beginning of the backup job.
it upon completion. to ensure the files are quiescent during the backup. See Job Pre-Post Execution Commands for details. Barcode Filter These settings control which media can be used by the job by specifying the acceptable barcodes. This feature is designed for use with tape libraries that support barcodes. See Barcode Filters for Jobs for details. Copy Policies Copy policies are used to schedule a job to make a copy of the media created by the current job.
4 Restore and Verify Jobs In this chapter • • • • Selecting Files Selecting Devices Configuration Advanced Settings Restore jobs and verify jobs are similar in that they involve reading files that have been backed up. Whereas a restore job actually copies backed up files, verify job reads the backed up files and compares them to the current files at the original backup location on disk. Because of their similarities, they will be discussed together in this chapter.
When you select a folder, Data Protector Express automatically selects the latest version for that folder and for every file within that folder. If you wish to restore as of another date, select the desired version from the version list. The version list shows all of the versions of the folder and the media on which those versions are stored. The selected folder version is used to the select files contained within that folder.
Restoring files and folders to a different folder You can also restore files and folders to different folders. When Data Protector Express restores the object, it creates it in the new location. This is useful in order to prevent overwriting files and folders that currently exist on disk. To restore to a different folder (also known as a move restore), right-click the file name on the Selection page of the restore job and select Move command from the command bar.
tension to the entire media for maximum media life and data integrity. Your device must support auto re-tension to use this feature. Restore files that are in use The Restore files which are in use option tells Data Protector Express what to do when files to be restored are in use. Select this option to restore the backup copy of the open file. (On Windows platforms, you can access the restored file after you restart the computer.) If you select this option, the restored file will replace your open file.
Advanced Windows Verify Options Enable snapshots By default, the verify job creates a temporary snapshot before verifying the selected file. Deselect this checkbox to disable snapshots. Reparse points Check this option to verify the reparse point data. When this option is deselected, Data Protector Express will verify the object as a file or folder rather than as a reparse point. Mount Points When checked, Data Protector Express includes the mount point information in the restore.
Restore and Verify Jobs
5 Working With Devices In this chapter • • • • Selecting Devices for Jobs Device Properties Device Commands Sharing storage devices on a SAN Data Protector Express recognizes any installed device that is part of the Data Protector Express management domain and displays them on the Devices view. You can use the Devices view to perform operations on any physical or virtual device. Selecting Devices in Jobs The Device page of a job’s properties lets you select the devices that will be used.
Status The Status page displays the current status information for the selected device. For example, it shows the current operation, if any, being performed on the device. It also shows the last time a write and read was done on the device. TIP: Data Protector Express tracks the contents of devices and libraries while it is running. However, there may be times when someone changes media in a device or a library when Data Protector Express is not running.
NOTE: Not all operations are available on all devices. For example, an optical device does not support the Rewind command. Check your hardware documentation to determine which of the following commands are supported by your device. Only supported commands will appear on the context menu and the command bar. Identify Use this command to get the name of the media currently loaded in the device. Data Protector Express tries to identify the tape or other media that is currently loaded in the device.
the tape and then rewinds it to the beginning. This command can be useful in some circumstances. By retensioning on the tape, you can sometimes make an otherwise unusable tape operational again. NOTE: If you need to retension tapes regularly to use them, consider servicing your tape drive or replacing your tapes. Eject You can use this command to eject media from the selected device or eject the media magazines from the selected library. Some device magazines will not be ejectable.
Sometimes you will need to restart a device that has, for some reason, failed to initialize properly. A device may have stopped for any number of reasons, such as a power failure or a connecting cable malfunction. Virtual devices on a network appear disabled if the network connection has failed. When a device is not initialized, it appears with a yellow warning icon. Some devices may take some time to initialize, during which the warning icon will continue to appear.
Working With Devices
6 Working with Tape Libraries In this chapter • • • • • Installation and Configuration Barcodes and MIC (memory in cartridge) Barcode Filters Initialization Process Media Management Tape libraries automate tape media handling which, in conjunction with the Data Protector Express backup schedules, allows hands-off backup operations. A tape library contains one or more tape drives, some number of storage slots for tape media, and, in some cases, import/export slots to add or remove media from the library.
NOTE: It can take a long time to inventory the tape media in a tape library, which is why Data Protector Express usually performs a "light inventory" rather than running an identify job on all the slots in a loader. See the "Inventory Process" section below for more information. Additional media slot configuration is accessed via the Element Status dialog for that slot, which is accessed by a right click on the desired slot.
• Binding the loader to its physical devices. This ensures that the devices are associated with the library in the Data Protector Express catalog. • Updating the status for each element in the loader. Barcodes are read at this time, and are associated with each element regardless of status (i.e. both Invalid and Valid elements get a barcode shown in the loader status pane).
Working with Tape Libraries
7 Scheduling, Rotations, and Media Management In this chapter • • • • Backup Schedule Considerations Scheduling Concepts Media Rotation Types Running Jobs with Rotations Ensuring that you have all the files needed to restore your system is a complex task. Typically, it is not practical — from either a time or a media perspective — to create a full backup every day.
Backup Schedule Considerations Data Protector Express lets you set up jobs that run automatically on regular schedules.
a textual description of its current setting. To customize the settings for an interval , click on one of the interval buttons. Most schedules are defined in terms of the following intervals: Daily — run on sequential weekdays. Weekly — run once per week on the day specified by the user, for example, Friday. Monthly — run once per month on a day specified by the user such as the first day, the last day, the first Monday, and others. You can also specify how many months should elapse between monthlies.
will be a monthly or yearly job and not a weekly job. As long as none of these media sets has been overwritten, full data recovery is possible. NOTE: When a full backup media set is reused, any incremental or differential backups relative to that full backup will no longer be usable for full system restores. However, files on those media are still recoverable. NOTE: Yearly backups only provide you with access to files present on your computer or network on that one day each year.
Simple and GFS Rotation Types These rotation types specify combinations of full and incremental backups that efficiently use a specific number of media sets. The main difference between the Simple and the GFS rotations are that only the GFS rotations specify Yearly backups. Custom Select this option to create your own rotation.
Failed jobs If a job fails, it will not automatically be run again. However, you can manually rerun by clicking the Run command in the command bar. Pausing and continuing a schedule You can stop a scheduled job from running for a period of time by clicking the Pause Schedule command in the command bar. To turn the scheduled job back on, click the Continue Schedule command in the command bar.
8 Encryption and Compression In this chapter • Encryption for Backup Jobs • Compression • Key Management Encryption Encryption is the process of changing data into a form that cannot be read until it is deciphered, protecting the data from unauthorized access and use. Company policy normally determines when encryption is required. For example, it may be mandatory for company confidential and financial data, but not for personal data.
device does not support encryption, the user will be prompted with an alert telling them that the device cannot be used since it does not support hardware encryption. Passphrase The passphrase is a series of characters that must be provided by the user for input to the cryptographic key generation process. • Passphrases must be no less than 8 logical characters. They may be created by the user or randomly generated by a separate application.
Hint The text entered here will be added to the log file of an import job if the media later needs to be imported and the incorrect passphrase is supplied. Use this field to create a reminder of the passphrase as Data Protector Express cannot recover a lost passphrase. Compression Software encryption disables hardware compression, although you will still be able to select Software compression.
Encryption and Compression
9 Working with Third-Party Applications Data Protector Express provides agents for protecting a number of popular third-party applications. These agents protect the applications using the application specific backup interfaces provided by the application vendors to ensure complete protection of your data.
NOTE: The settings here are only applicable to Microsoft Exchange Server databases; all other file types are backed up in the job’s default mode. For example, if the Backup mode of a job is set to Incremental and the Force modes setting for incremental jobs is set to Full, Data Protector Express will back up the Exchange Server databases in Full mode, but all other file types in Incremental mode.
CAUTION: These .log files are then purged. When the Backup mode is set to Differential, for databases, only the .log files are included in the backup job, but these files are not purged. When the Backup mode is set to Copy, Data Protector Express runs the job similar to full backup. However, the transaction logs are not purged at then of a job run in Copy mode. Backup modes and circular logging Microsoft Exchange Server supports database circular logging.
5. Sequentially move through the versions in the Available versions list by date until you find the most recent full backup of the storage group. This version will be selected for restoring when it is selected in the Available versions list. 6. Click OK to restore that version. 7. If the most recent backup was a full backup, skip the rest of these steps and restart the Microsoft Exchange Server storage group.
4. For each storage group to be restored, dismount and change the properties for each store with a storage group: a. Right-click the store within the storage group. A pop-up menu appears. b. Select Properties. The Properties screen appears. c. Select the Database tab. d. Select This database can be overwritten by a restore. e. Click OK. f. Right-click the store again. A pop-up menu appears. g. Select Dismount Store, if the option is available. 5. h. Click Yes to confirm.
b. Create a restore job. c. Click the Microsoft Exchange Server in the Folders panel to display the storage groups in the list in the Name column to the right of the Folders panel. d. Select the storage groups you want to include in the restore job from the list in the Name column to the right of the Folders panel. e. Run the restore job. f. Exit Data Protector Express. 2. Mount the Exchange databases for each storage group that you restored: a.
Configuring the Microsoft SQL Server You can configure any Data Protector Express feature by selecting the object from the Catalog view and updating information on its property pages. 1. Select the Administration desk bar and open the Catalog view. 2. Select Network, then select the Microsoft SQL Server on your system. 3. Expand the object until you see a list of database instances. TIP: Switch to the Folders view to display a hierarchical tree of the Data Protector Express management domain. 4.
NOTE: There is no distinct Differential job mode for SQL Sever database instances. If you want jobs with a Differential backup mode to back up both the database and the transaction logs, change this setting to Full. In this case, Data Protector Express will treat the SQL Server database instances as if it were running a job in Full backup mode. Incremental When the Backup mode of a job is set to Incremental , Data Protector Express checks this setting to see how the job should be run with SQL databases.
For example, you can use the DUMP command to dump transaction logs to the dump device (preferably, a separate disk drive). You can set this up to occur at regular intervals, such as every 15 minutes or every hour. Next, you can create a backup job that backs up these transaction logs onto archival media every day. In general, when you implement Data Protector Express to back up your SQL Server databases, continue to use SQL Server’s internal commands to duplicate and back up transaction logs.
During the restore processes, Data Protector Express will recreate the database and all segments exactly as they existed when the backup was performed. To do this, Data Protector Express first determines if the database exists. If the database does exist, Data Protector Express will use the database as is without any further processing or changes. 3. If the database does not exist, Data Protector Express next identifies the database devices on which the database was originally located.
In the last incremental restore job, click the Advanced Options button and select the Finalize recovery of MS SQL databases check box. If you do not select this check box, the database will be offline. Restoring Microsoft SQL Server master databases A damaged master database is evident by the failure of the SQL Server to start, by segmentation faults or input/output errors or by a report from DBCC.
virtual server configuration, style sheets (CSS), themes, and customization information for site definitions are stored in the SharePoint installation directory on the file system. Regular backups of the “SHAREPOINT” databases in conjunction with File System backup will ensure protection and integrity of SharePoint Services virtual servers, the document repository, users, security settings, and permissions.
2. Microsoft Internet Information Server (IIS) Virtual Servers WSS uses one or more virtual servers to host Web sites. Unlike ASP.NET, it does not configure each Web site using an IIS virtual directory. Alternately, WSS tracks all configuration information for WSS Web sites inside the configuration database and content databases. This implies that a backup of the configuration database will be required to ensure the protection of all SharePoint extended virtual servers. 3.
Working with Third-Party Applications
10 Disaster Recovery In this chapter • • • • • • • • Bootable devices Important guidelines Create the Disaster Recovery Backup Testing Disaster Recovery Media Recovering From a Disaster Disaster Recovery with Libraries Recover Windows Active Directory (Windows only) Limitations Bare Metal Disaster Recovery (DR) is a Data Protector Express agent that performs disaster recovery operations as automatically as possible during initial preparation and recovery.
cycling with the Eject button held down), your tape drive goes into a special Disaster Recovery mode that enables it to restore your operating system and reboot from the most recent backup cartridge. With bootable devices, you only need the device and the last full backup media for Disaster Recovery. The whole backup can often be run from a single piece of media, making the restore much simpler to run.
3. Test the bootable media to make sure you have created it properly. See Testing Disaster Recovery Media later in this section. NOTE: We recommend that you create at least one extra set of bootable media in case the first set fails during disaster recovery. Create full backup Data Protector Express automatically creates disaster recovery media whenever you run a full backup with the Overwrite all media job option unless you have specifically deselected the option in the advanced job settings.
3. Select the machine for which to prepare the bootable CD/DVD. The bootable CD/DVD is customized for that machines specific operating system and device drivers. 4. Select the a CD drive or writable DVD drive available to create the bootable CD/DVD. 5. Click the Start Recording to create the bootable CD/DVD. During the creation, which can take some time, the status information and a progress bar is displayed in the Status Information area the screen.
d. The system boots from the CD or DVD. 4. If you are using a bootable tape: a. Remove all media from all tape drives and/or library magazine slots. b. Insert the first bootable media: c. i. If you are using a single tape drive, insert the first bootable media into the drive. ii. If you are using a library, insert the first (or only) bootable media into slot 1 of the magazine.
To perform Disaster Recovery for one of the operating system listed above, do the following: 1. Remove all media from all cartridge disk drives, tape drives and/or library magazine slots. 2. Insert the first bootable media: a. If you are using a single tape or removable disk drive, insert the first bootable media into the drive. b. If you are using a library, insert the first (or only) bootable media into slot 1 of the magazine.
12. Press Esc. A message screen appears. 13. Press F10. Data Protector Express restarts your computer. After your computer has rebooted, log in. 14. For Linux users, Disaster Recovery is now complete and they can use Data Protector Express to restore the data from incremental and differential backup media, if needed. 15. For Windows users, additional Restore jobs are required to finish the recovery of their system. a. The system state must be restored to the last backup.
If you had incremental and differential backup media since the last full backup, now use Data Protector Express to restore the data from your incremental and differential backup media. Recover Windows Active Directory (Windows only) When performing disaster recovery on a system with Windows Active Directory, use the following general steps: 1. Perform the general system-level disaster recovery to restore the basic system data. 2. When the Starting Windows screen appears during system startup, press F8.
5. Once the recovery manager has been started, the Disaster Recovery Wizard displays a list of source and target devices available on the system. a. In the top list, select one or more source devices that you want to restore data from by placing a checkmark next to them. b. In the bottom list, select one or more of the target hard drives that you want to restore. This is useful if you have multiple hard drives and you do not want to restore to all of them.
c. c. Go to the system properties of this machine (right click on “Computer” and go to properties or open the System Control panel) d. d. Click on “Computer Name” and click on “Change…”. e. e. Change “Member of” from “Domain” to “Workgroup”. f. f. Restart your computer. 2. 2. Re-join the Domain a. a. Logon locally to the machine as a domain administrator. b. b. Go to the system properties of this machine (right click on “Computer” and go to properties or open the System Control panel) c. c.
11 Advanced Job Options The options in this chapter are common to backup, restore, verify and copy jobs. In most cases these settings can be left at their default values. Job Log options Data Protector Express keeps a log of which files it processes while running a job. In addition to viewing the job log from the Status and Logs view, you can configure the job to e-mail it automatically to a designated e-mail address or save the log to a file for later viewing.
E-mail log Log Format Choose a format from the drop down list. Log will be sent to... Data Protector Express lets you e-mail logs to one or more recipients. Enter a list of recipients separated by semicolons. Auditing In some cases, you may want positive confirmation that an object — like a database — was backed up but you don’t want to wade through the log file generated by selecting Log All. You can accomplish this by setting the Audit property on the object when you select if for backup.
Command to execute if job completes with no error This command will execute if the job completes with no final error. A job can complete with no error, even if all hosts are offline. This does not mean that anything was backed up, it just means that the job was not cancelled, or there wasn’t some other major problem executing the job. Command to execute if job completes with error This command will execute if the job completes with an error, such as no specified devices, or operator cancelled.
Add a range of barcodes This filter allows you to specify a range of volume identifiers and media identifiers to include. (Any media without a barcode or outside of the specified range will be excluded.) The following example would include LTO-3 (L3) media that fall within the volume range 791000 to 791044. Add barcodes from media present in the library This filter displays a list of all libraries and their elements.
12 Backup Domain Configuration In this chapter • • • • • • • E-mail Settings Execution Options Barcode Filter Performance Settings Alert Settings Client Upgrade Settings Domain Security To configure the Backup Server, select Domain Configuration command in the menu bar. This displays the Properties window for the domain. Select the particular property page you want to configure from the tasks list. E-mail Settings You can configure e-mail information for the Data Protector Express management domain.
Max number of active selection lists This number controls how many hosts can build their selection list for all active backup jobs in the Backup Domain. This is used to limit use of the database and keep it responsive for active jobs. Alert Settings You can control the types of alerts that are logged in the operating system’s event log by checking the boxes next to Error, Warning, Information, or License. We strongly recommend you always select the logging of Error and Warning alerts.
Backup Domain Configuration
Backup Domain Configuration
Index A Active Directory disaster recovery and, 80 Advanced options backup jobs, 30 restore jobs, 35, 35 Alerts, viewing with the Quick Access application, 22 audience, 9 Auto eject, 31, 35, 36 Auto format mode, 29 Auto retention, 31, 35, 36 Auto verify mode backup jobs, 28 B Backup job options span mode, 27 split file, 28 Backup jobs advanced options, 30 media rotation, 49 selecting a schedule, 50 working with mapped drives, 26 Backup mode and Microsoft Exchange Server, 60 and Microsoft SQL server, 66 b
J Job restore, 33 Job status viewing, 21 Jobs creating with Quick Access application, 22 with the Quick Access application, 22 Jobs and Media view, 49 L Libraries clean device command, 42 disaster recovery, 79 element status, 40 Log option backup jobs, 83 Logs viewing with the Quick Access application, 22 M Mapped drives selecting files for backup, 26 Media backup job settings, 29 deleting, 50 formatting, 41 identifying, 41 importing, 41 number required, rotation jobs, 49 Media commands eject media, 42
Restore jobs advanced options, 35, 35 assinging new names, 34 concepts, 33 files to new folders, 35 Microsoft Exchange database, 61 Microsoft SQL databases, 67 redirected store, 34 selecting files, 33 to a new or different folder, 34 Retension, 41 Rotation types built-in schedules compared, 53 Running the software as a daemon, 24 symbols in text, 10 S Verify jobs options, 36 Versions latest version, 33 Versions window, 33 Viewing Alerts with the Quick Access application, 22 Viewing Data Protector Express