
Integrating Citrix XenServer and HP Data Protector

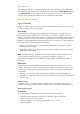
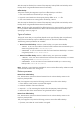

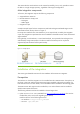
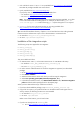

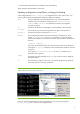
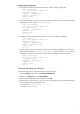
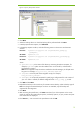

Figure 4 Temporary backup folder selection
5. Click Next.
6. Select the backup device on which the backup will be performed and click Next.
7. In Backup Specification Options, click Advanced.
8. In the Backup Options window, make the following entries in the Pre-exec and Post-exec
sections:
Pre-exec:
PythonDirectory\python.exe ScriptPath\DPxen_backup.py
[ConfigFile]
On client:
myDPClient.com
Post-exec:
PythonDirectory\python.exe ScriptPath\DPxen_postbackup.py
On client:
myDPClient.com
where:
•
PythonDirectory is the name of the directory containing the Python interpreter, for
example,
Python25. Python must be installed in the correct location, as described in
Prerequisites on page 5.
Note: If the integration scripts have been installed on the Cell Manager, the full path must
be given. For example,
Data_Protector_home\bin\Python25.
•
ScriptPath is the full path of the integration scripts, for example,
Data_Protector_home\bin
• ConfigFile is an optional parameter for specifying a configuration file with a name of
your own. If this is omitted, the default configuration file
DPxen_config.py is used.
9. Click OK and then Next.
10. Schedule the backup in the normal way for a Data Protector backup. Select a backup type of
Full. Even though incremental backups are shown as available, only full backups are
supported for this integration.
11. Click Next.
12. After reviewing the specification, click Next. Note that if you click Properties on the review
panel, the options tab contains object options, not backup options, so your pre-exec and post-
exec entries are not displayed.
13. Click Save as…, enter a name for the specification and click OK.
10