
Integrating Citrix XenServer and HP Data Protector
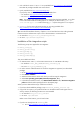

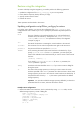


Mode = "online"
url =
username = "user"
password = "myPassword"
vmName = ["Debian"]
debug = False
sr = "Removable storage"
http://tpc227.company.com
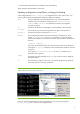
Specifying a restore
1. In the Context List, click Restore.
2. In the Scoping Pane, expand Restore Sessions to display clients and then the object backed up
on those clients (the mount point containing the temporary backup directory you created
during the installation process).
3. Click the object to open the property pages.
4. In the Source tab, select the temporary backup directory to view the files available for restore.
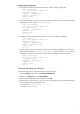
Note that the filename formats indicate the mode of the backups in the folder, as follows:
•
offline or allOffline: servername_vmName.xva
•
online or allOnline: servername_vmName_Snapshot.xva
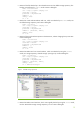
Check the file format, to decide the mode of restore required, (it must be equivalent to the type
of backup). See
Figure 6.
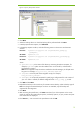
Figure 6 Selection of files to restore
Important: The Source tab shows the contents of the temporary backup folder when the
backup session was performed. It does not show the current contents of the folder. It is
important to ensure that the temporary backup folder is empty before performing a restore.
During a restore, the files selected in this tab are first restored to the temporary backup folder.
Only files selected here are subsequently available for the restore of virtual machines using the
DPxen_restore.py script (provided the temporary backup folder was empty beforehand).
13