HP LF Printing Knowledge Center Create and Install ICC profile for an existing paper Printer: HP Designjet Z2100 series Software: HP Advanced Profiling Solution
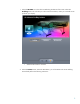
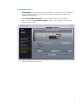
1. Select the HP APS icon in the dock located along the bottom of the screen. Select the Profiling button. This will take you to the screen shown below, where you can build an ICC profile for your display. • Select the Next button to continue. 2. Select the Printer button.
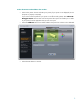
Select the Printer and Calibrate the media > • Select on the printer chooser and select your printer (If your printer is not displayed, be sure the printer is properly connected). If you want to create a profile for your printer in an offline mode, please, select Other HP Designjet Printer. The test chart will not be printed. This option will enable you to send it to your printer from the application that you will use to print.
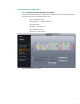
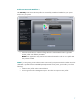
Test chart Selection and Preview > • Check I want to print and measure a new chart. HP APS will automatically check the media format loaded in the printer and offer appropriate test chart formats. Select the appropriate test chart: ⎪ Photo and design printing HP Easy RGB 1.2 / HP Easy CMYK 1.2 ⎪ Great all-rounder HP RGB 1.5 / HP CMYK 1.1 ⎪ High-end photo printing HP TC9.18 / HP ECI 2002 • Select the Next button to continue.
Print, dry and Measure Test Chart > The printer creates and installs automatically the new ICC profile to be used with your media. The process takes about 15 minutes and consists of the following steps: • • • A profiling test chart is printed. The test chart is allowed to dry for a period of time depending on the paper type. The test chart is scanned and measured using the HP Embedded Spectrophotometer. • Select the Next button to continue.
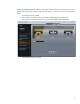
Profiling Parameters > • Profile Name: Enter the name of your new profile (ex. “PhotoGloss”). Use a descriptive name in order to identify it later when you are selecting a specific ICC profile in your application while printing. • Check Save Profile to System to work with the ICC profile on your computer. • And/or check also Save Profile to Printer to allow other computers connected to the same printer can copy it. • Select the Next button to continue.
Profile Creation and Workflow > The Summary area shows that the profile was successfully created and installed on your system and/or into your printer. • Select the Finish button to end the Profiling Wizard or select the Back button to generate another profile with different parameters. NOTE Some applications may need to be closed and restarted in order to use a profile that has just been created.
For more information on HP Designjet products www.hp.com/go/designjet © 2007 Hewlett-Packard Development Company, L.P. The information contained herein is subject to change without notice. The only warranties for HP products and services are set forth in the express warranty statements accompanying such products and services. Nothing herein should be construed as constituting an additional warranty. HP shall not be liable for technical or editorial errors or omissions contained herein.