
HP-UX Virtual Partitions 6.0 Release Notes


BB068AA VirtualBase
3. Allow HP-UX to boot.
4. Configure the VSP. For information about what must be done, see “Configuring the
Virtualization Services Platform (VSP)” (page 14)
5. Create one or more virtual switches using the vparnet command.
6. Create virtual partitions on the VSP after HP-UX boots. Use the vparcreate and vparmodify
commands to create and modify vPars on the VSP. For information about configuring VSP,
see the “Configuring the Virtualization Services Platform (VSP)” (page 14).
You must specify the number of CPUs, the memory size, boot and data disks, and network.
NOTE: In vPars v6.0, a boot disk is created when you install HP-UX on the vPar. And the
boot disk is specifically defined during installation when the EFI NVRAM is updated with the
hardware path of the installation disk. This process occurs automatically when the partition is
ignited. Hence, there is no need to specify a boot disk when configuring virtual partitions in
vPars v6.0.
7. Install HP-UX 1109 on the vPar.
After the storage is added to the vPar, HP-UX can be installed from an Ignite server using
lanboot or from an install media such as DVD or ISO image. Any OE can be installed on
a vPar.
Installing HP-UX OE in a vPar from an Ignite Server:
Start the vPar from VSP using the vparboot command. Connect to the virtual console instance
by using the vparconsole command and wait for the boot to reach the EFI shell prompt,
and then use lanboot to install HP-UX from an Ignite Server. For more information on HP-UX
Ignite-UX, see the documentation available at http://www.hp.com/go/ignite-ux-docs.
Installation of HP-UX OE in a vPar from a boot media (DVD or ISO image
file):
Add the media as virtual DVD to the vPar using the vparmodify command. Boot the vPar
to EFI and select the virtual DVD to boot HP-UX.
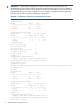
8. Install VirtualBase on the vPar from the DVD:
swinstall –x autoreboot=true –s <DVD dsf> VirtualBase
Configuring the Virtualization Services Platform (VSP)
After installation of the vPars v6.0 product, the VSP is ready for use to create and manage vPars.
The VSP by default is configured to have one CPU core and enough memory to support HP-UX and
the virtualization services infrastructure. You can modify the VSP core count to a value greater than
one if additional processing power is required to support high I/O workloads or a large
configuration such as BL890c i2.
The sum of the VSP and vPar core counts cannot exceed the cores of the system. Hence, any
adjustment that you make to the VSP core count affects the cores available to the vPars. When you
increase the VSP core count, if the system core count exceeds, and if the vPars are already
configured, an error occurs. In such a situation, to satisfy the core count required for the VSP, you
must first reduce the core count of one or more vPars using the vparmodify command, then adjust
the VSP CPU core count using the vparhwmgmt command.
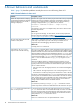
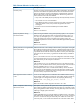
Before starting to configure vPars, to ensure that the hardware and VSP environment are appropriate
for the vPars to be created, consider the following checklist of tasks:
14 Installing HP-UX Virtual Partitions v6.0