
Fabric OS Encryption Administrator's Guide

34 Fabric OS Encryption Administrator’s Guide
53-1002159-03
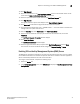
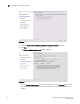
Steps for connecting to an SKM or ESKM appliance
2
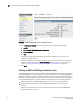
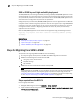
Enter information required in the Install CA Certificate section near the bottom of the page.
- Enter the Certificate Name of the certificate being transferred from the first cluster
member.
- Paste the copied certificate data into the Certificate box.
4. Click Install.
5. In the Certificates & CA menu, click Trusted CA Lists.
6. Click on the Default Profile Name.
7. Cl ic k Edit.
8. Select the name of the CA from the list of Available CAs in the right panel.
9. Click Add.
10. Click Save.
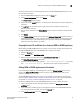
11. Select the Device tab.
12. In the Device Configuration menu, click Cluster.
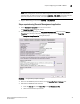
13. Click Join Cluster. In the Join Cluster section of the window, leave Local IP and Local Port set to
their default settings.
14. Enter the original cluster member’s local IP address into Cluster Member IP.
15. Enter the original cluster member’s local Port into Cluster Member Port.
16. Click Browse, then select the Cluster Key File you saved.
17. Enter the cluster password into Cluster Password.
18. Click Join.
19. After adding all members to the cluster, delete the cluster key file from the desktop.
20. Create and install an SKM/ESKM server certificate. Refer to “Creating and installing the SKM
or ESKM server certificate” on page 30 for a description of this procedure.
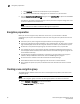
Signing the Brocade encryption node KAC certificates
The KAC certificate signing request generated when the encryption node is initialized must be
exported for each encryption node and signed by the Brocade local CA on SKM/ESKM. The signed
certificate must then be imported back into the encryption node.
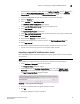
1. Select Configure > Encryption from the menu task bar.
The Encryption Center dialog box displays.
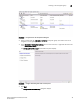
2. Select a switch from the Encryption Center Devices table, then select Switch > Export
Certificate, from the menu task bar, or right-click a switch and select Export Certificate.
The Export Switch Certificate dialog box displays.
3. Select Public Key Certificate Request (CSR), then click OK.
You are prompted to save the CSR, which can be saved to your SAN Management Program
client PC, or an external host of your choosing.