
Fabric OS Encryption Administrator's Guide


Fabric OS Encryption Administrator’s Guide 35
53-1002159-03
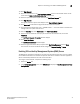
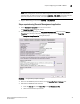
Steps for connecting to an SKM or ESKM appliance
2
Alternatively, you may select a switch, then select Switch > Properties. Click the Export button
beside the Public Key Certificate Request, or copy the CSR for pasting into the Certificate
Request Copy area on the SKM/ESKM Sign Certificate Request page.
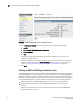
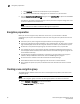
4. Launch the SKM/ESKM administration console in a web browser and log in.
5. Select the Security tab.
6. Select Local CAs under Certificates & CAs.
The Certificate and CA Configuration page displays.
7. Under Local Certificate Authority List, select the Brocade CA name.
8. Select Sign Request.
The Sign Certificate Request page displays.
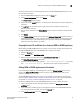
9. Select Sign with Certificate Authority using the Brocade CA name and maximum of 3649 days.
10. Select Client as Certificate Purpose.
11. Allow Certificate Duration to default to 3649.
12. Paste the file contents that you copied in step 2 in the Certificate Request Copy area.
13. Select Sign Request.
14. Download the signed certificate to your local system as signed_kac_skm_cert.pem.
This file is then ready to be imported to the encryption switch or blade.
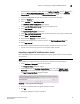
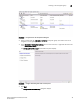
Importing a signed KAC certificate into a switch
After a KAC CSR has been submitted and signed by a CA, the signed certificate must be imported
into the switch.
NOTE
This operation can be performed only after the switch is added to the encryption group.
1. Select Configure > Encryption from the menu task bar.
The Encryption Center dialog box displays.
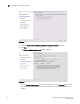
1. Select a switch from the Encryption Center Devices table, then select Switch > Import
Certificate from the menu task bar, or right-click a switch and select Import Certificate.
The Import Signed Certificate dialog box displays.
FIGURE 18 Import Signed Certificate dialog box
2. Browse to the location where the signed certificate is stored.
3. Click OK.
The signed certificate is stored on the switch.