
9.5.01 HP P4000 SAN Solution User Guide (AX696-96168, February 2012)
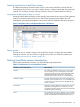


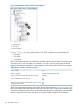


5. Next you select the following characteristics:
• Base name for the SmartClone volumes
• Type of provisioning
• Server you want connected to the volumes, and
• Appropriate permission.
6. In the Quantity field, select the number of SmartClone volumes you want to create.
7. Click Update Table to populate the table with the number of SmartClone volumes you selected.
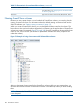
8. If you want to modify any individual characteristic, do it in the list before you click OK to
create the SmartClone volumes.
For example, you might want to change the assigned server of some of the SmartClone volumes.
In the list you can change individual volumes’ server assignments.
9. Click OK to create the volumes.
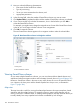
The new SmartClone volumes appear in the navigation window under the volume folder.
Figure 81 New SmartClone volumes in Navigation window
1. Clone point
2. New SmartClone volumes
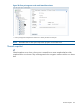
Viewing SmartClone volumes
As you create multiple SmartClone volumes, you can view them and their related volumes and
snapshots in both the navigation window and in the Map View tab, shown in Figure 82 (page 191).
Because a SmartClone volume is the same as any other volume, the icon is the standard volume
icon. However, the clone point and the shared snapshot have unique icons, as illustrated in
Figure 77 (page 186).
Map view
The Map View tab is useful for viewing the relationships between clone point snapshots, shared
snapshots, and their related volumes. For example, when you want to make changes such as
moving a volume to a different cluster, or deleting shared snapshots, the Map View tab allows you
to easily identify how many snapshots and volumes are affected by such changes.
190 SmartClone volumes