
HP StorageWorks LUN Configuration and Security Manager XP user guide for the XP12000/XP10000/SVS200 LUN Manager and Volume Manager (T1714-96015, October 2007)


Deleting CVS vo
lumes
To delete an individual CVS volume within a VDEV, use the Volume to Space operation (see Converting
logical volumes to space ).
Converting CVs back to FVs (Volume Initialize operation)
CAUTION:
TheVolumeInitializefunctionisadestructiveoperation.DataontheCVSvolumebeingconverted
is lost when the operation is complete. You are responsible for backing up data as needed before
performing this operation.
Use the Volume Initialize function to convert a CVS volume back to a fixed volume. This operation
de-installs all variable-sized volumes under a CVS volume, and reformats the CVS volume as a normal
FV (fixed volume).
CAUTION:
An error message might appear if a Volume Initialize and Make Volume operation are performed
concurrently. For this error message, the part code is 0003 and the error number is 1041. If this message
appears, ensure that these operations are performed separately.
1. On the upper right of the XP Remote Web Console main pane, select a CU group from the
drop-down
list.
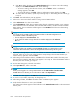
2. From the Customized Volume pane, select the LDEV folder on the Parity Group - LDEV tree to display
alistofVDEVs,andselectaVDEV.TheLDEV Information table displays detailed information about
the LDEVs
.
NOTE:
If the sel
ected VDEV contains one or more CVs that violate any restriction for the Volume
Initialize operations (see Volume Manager guidelines), you cannot perform Volume
Initialize operations. Remove all invalid CVs before performing Volume Initialize operation.
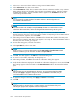
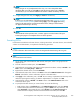
3. Right-click any part of the Parity Group - LDEV tree, and select Volume Initialize.TheVolume
Initialize pane (1) appears.
4. OntheVolumeInitializepane(1):
a. Select one or more CVS volume numbers.
b. In the Select CU No. list, select a CU number.
c. In the Select LDEV Number table, select an LDEV number from the white LDEV numbers. The CU
and LDEV number appear in the CU:LDEV field.
NOTE:
If an LDEV number ends with # (for example, 00:01#), the LDEV is an external LU.
For more information about external LUs, see the
HP StorageWorks External Storage
XP user guide
.
d. To change a CU:LDEV number that is already assigned, select one or more volume numbers
corresponding to the CU:LDEV numbers you want to remove, right-click, and select Clear.
5. After setting all CU and LDEV numbers, click Next.
HP StorageWorks LUN Configuration and Security Manager XP user guide for the
XP12000/XP10000/SVS200
205