
Matrix Co-Existence with VMware vCenter Site Recovery Management (SRM)


Technical white paper | Matrix Co-Existence with VMware vCenter Site Recovery Management (SRM)
11
E. In the Matrix OE Logical Server perspective, click on the green refresh symbol (double arrows) to refresh the
display.
F. Verify that the logical server is now displaying the appropriate icons.
5. Once all the logical server issues are resolved, verify that all VMs are associated with their correct ESXi host in the
Matrix OE Physical and Virtual perspective. In rare cases where there are still problems, it may be necessary to do an
Identify operation of any ESXi host that is not displaying all its VMs appropriately. Refer to the section “Procedures to
Identify an ESXi host.”
Procedures to Identify an ESXi host
Do the following steps to Identify an ESXi host. It is a good idea to always do a Logical Servers Refresh operation after doing
an Identify.
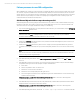
1. In SIM, select Options -> Identify Systems, and then select the host(s) you wish to Identify
2. Do a Logical Servers Refresh.
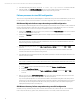
3. In the Matrix Operating Environment, select Tools -> Logical Servers -> Refresh, and then select SIM and VMM
resources.
4. In the Matrix OE Logical Server perspective, click on the green refresh symbol to refresh the display.
5. Verify that all of the logical servers are displayed correctly as indicated below.
A. All are active.
B. None are inoperable or active on unknown host.
C. All have the correct host name or IP address.
D. All have the icons normally displayed for VM logical servers.
E. Click on the logical server details icon to verify that the logical server details reflect the correct host and storage
location as shown in vCenter.
6. In the Matrix OE Physical and Virtual perspective, verify that all VMs are correctly associated with the correct ESXi host
Capturing HP Capacity Advisor data from VMs on secondary site
These steps are only necessary when you are using a two CMS configuration. After a failover, HP Capacity Advisor data is
collected on the secondary CMS for the VMs while they are running on the secondary site. To capture this data and integrate
it with the HP Capacity Advisor data back on the primary CMS, you must execute the following steps for each VM.
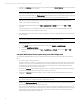
1. On the secondary CMS, execute the C:\capprofile -ld command to get a list of all profiles.
2. Identify the VM Guest profile name to be exported.
3. On the secondary CMS, execute the C:\ capprofile –x VM_profile_name_secondary_cms >
VM_profile_name_secondary_cms.txt command to export the VM Guest profile to a .txt file.
4. Copy this file to the primary CMS.
5. On the primary CMS, execute the C:\capprofile -ld command to get the list of profiles.
6. Identify the profile name that belongs to the corresponding VM on the secondary CMS.
7. On the primary CMS, execute the capprofile -i VM_ profile_name_primary_CMS <
VM_profile_name_secondary_cms.txt command to import the profile.
Note
If there is any overlapping data when importing the profile on the primary CMS, you must use the –o option to overwrite
the data, or use the –b and –e options to set the range you want to export on the secondary CMS. For more
information, check the online capprofile help or refer to the HP Capacity Advisor User Guide which can be found at
www.hp.com/go/matrixoe/docs.