
Building Disaster Recovery Serviceguard Solutions Using Metrocluster with Continuous Access EVA A.05.01
Configuring the identical ASM disk group at the Target Disk Site
This procedure is required only for Oracle 11g R1 with ASM and not required for Oracle 11g R2.
In this procedure, the source disk site is referred as site1 and the target disk site is referred as site2.
To configure the identical ASM disk group for Oracle 11g R1 with ASM:
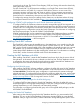
1. Create the Oracle admin directory at the target disk site, if it is not already created.
In this example, run the following command from the first node in site1:
# cd /opt/app/oracle
# rcp -r admin <site2_node1>:$PWD
# rcp -r admin <site2_node2>:$PWD
2. Run the following command at the target disk site:
# chown -R oracle:oinstall /opt/app/oracle/admin
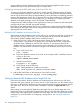
3. Copy the first ASM instance pfile and password file from the source disk site to the first
ASM instance node in the target disk site.
# cd /opt/app/oracle/admin/+ASM/pfile
# rcp -p init.ora <site2_node1>:$PWD
# cd /opt/app/oracle/product/11.1.0/db_1/dbs
# rcp -p orapw+ASM1 <site2_node1>:$PWD
The -p option retains the permissions of the file.
4. Setup the first ASM instance on the target disk site.
In this example, run the following commands from node1 in the site2.
# cd /opt/app/oracle/product/11.1.0/db_1/dbs
# ln –s /opt/app/oracle/admin/+ASM/pfile/init.ora init+ASM1.ora
# chown -h oracle:oinstall init+ASM1.ora
# chown oracle:oinstall orapw+ASM1
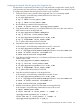
5. Copy the second ASM instance pfile and password file from site1 to the second ASM
instance node in site2.
# cd /opt/app/oracle/admin/+ASM/pfile
# rcp -p init.ora <site2_node2>:$PWD
# cd /opt/app/oracle/product/11.1.0/db_1/dbs
# rcp -p orapw+ASM2 <site2_node2>:$PWD
The -p option retains the permissions of the file.
6. Setup the second ASM instance on the target disk site.
In this example, run the following commands from node2 of site2:
# cd /opt/app/oracle/product/11.1.0/db_1/dbs
# ln –s /opt/app/oracle/admin/+ASM/pfile/init.ora init+ASM2.ora
# chown -h oracle:oinstall init+ASM2.ora
# chown oracle:oinstall orapw+ASM2
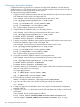
7. Add the ASM instances with the CRS sub-cluster on the target disk site.
In this example, run the following commands from any node on site2:
# export ORACLE_SID=”+ASM”
# srvctl add asm -n <site2_node1> -i “+ASM1” –o
/opt/app/oracle/product/11.1.0/db_1/
srvctl add asm -n <site2_node2> -i “+ASM2” –o
/opt/app/oracle/product/11.1.0/db_1/
Configuring Oracle RAC database with ASM in a SADTA 123