
Building Disaster Recovery Serviceguard Solutions Using Metrocluster with Continuous Access EVA A.05.01


7. Test the Volume Groups activation with exclusive option.
# vgchange -a e /dev/<vgname>
8. Create a back-up config file that will contain the cluster ID on the disks/luns.
# vgcfgbackup /dev/<vgname>
9. Deactivate the volume group.
# vgchange -a n /dev/<vgname>
10. Use the vgexport command with the -p option to export the Volume Group on the primary
system without removing the HP-UX device files.
# vgexport -s -p -m <mapfile> /dev/<vgname>
Make sure to copy the map files to all of the nodes. The sample script /opt/cmcluster/
toolkit/SGCAEVA/Samples/ftpit shows a semi-automated way (using ftp) to copy the
files.
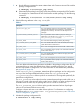
NOTE: While creating a volume group, you can choose either legacy or agile Device Special
File (DSF) naming convention. To determine the mapping between these DSFs, use the ioscan
–m dsf command.
IMPORTANT: From HP-UX 11i v3 onwards, HP recommends that you use agile DSF naming
model for mass storage devices. For more information on the agile view and LVM Online Disk
Replacement, see the following documents that are available at http://www.hp.com/go/
hpux-core-docs -> HP-UX 11i Volume Management (LVM/VxVM) Software.
• LVM Migration from Legacy to Agile Naming Model
• LVM Online Disk Replacement
Importing volume groups on nodes at the same site
Use the following procedure to import volume groups on cluster nodes located at the same site as
the EVA on which you are doing the Logical Volume Manager configuration. The sample script
/opt/cmcluster/toolkit/SGCAEVA/Samples/mk2imports can be modified to automate
these steps.
1. Define the Volume Group on all nodes at the same site that will run the Serviceguard package.
# mkdir /dev/<vgname>
# mknod /dev/<vgname>/group c 64 0xnn0000
NOTE: If you are using the March 2008 version or later of HP-UX 11i v3, skip step 1;
vgimport (1m) will create the device file.
2. Import the Volume Group on all nodes at the same site that will run the Serviceguard packages.
# vgimport -vs -m <mapfile> /dev/<vgname>
NOTE: Use the vgimport -N command to configure the volume group using agile DSF.
In the absence of the -N option, legacy DSF is used.
3. Activate the Volume Group and back up the configuration.
# vgchange -a e /dev/<vgname>
# vgcfgbackup /dev/<vgname>
See the sample script /opt/cmcluster/toolkit/SGCAEVA/Samples/mk2imports.
4. Deactivate the Volume Group.
# vgchange -a n /dev/<vgname>
Configuring volume groups 23