
Neoview Database Administrator's Guide (R2.2)

Granting and Revoking Access (Privileges) to a Table
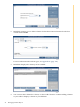
1. Start DB Admin and log on using the user ID that created the table, or log on as a user
authorized to grant privileges to others on that table.
2. Click the Database tab, then navigate to the schema and table whose privileges you want
to change.
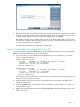
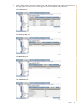
3. Right-click the table name to which you want to grant privileges and select Grant/Revoke
privileges or click the Privileges tab, then the Grant/Revoke button in the right pane. The
Grant/Revoke Privileges Tool appears:
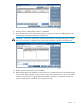
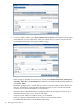
4. Select Grant or Revoke at the top of the screen and check All Privileges if appropriate.
Select the table from the left column, then the user from the list in the center. Indicate row
and column privileges and select the columns, with shift-click, if appropriate. Check With
Grant Option to allow this user to grant these privileges to other users. Click Grant to set
the privileges.
To abort the change, click Reset to return the privileges to their original state, or simply
close the Grant/Revoke Privileges Tool window.
5. Repeat this procedure for other tables or users. When you have finished, click Done.
For additional information, see DB Admin online help.
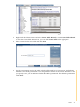
Displaying Tables and Their Properties
1. Start DB Admin and log on using any user ID.
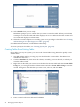
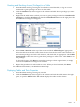
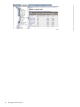
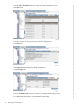
2. Click the Database tab, then navigate to the schema and click the table name in the right
pane, or open the Tables folder. DB Admin displays the tables in this schema:
Tables 47